
If a thing is worth doing, it’s worth overdoing. Now that I have some property and the opportunity to actually build things that I don’t have to take down, I can start doing things like building shelving that I expect to last the rest of my life (so a design lifespan of about 65 years - and that’s a bit optimistic given my genes).
This post covers the overbuilding of several varieties of stud-secured shed shelves. My design philosophy on things like this is, “It shouldn’t come down without bringing the building down around it.” Overkill, yes. But even with the wood weakening with age in the next 60 years, I’d like to be able to put stuff on these shelves without having to worry about what it is or what it weighs. Maybe not Powerstroke 7.3L engine block, but I stand a good chance of, at some point, having some I4 blocks laying around to store. Or Wankel rotary engines.
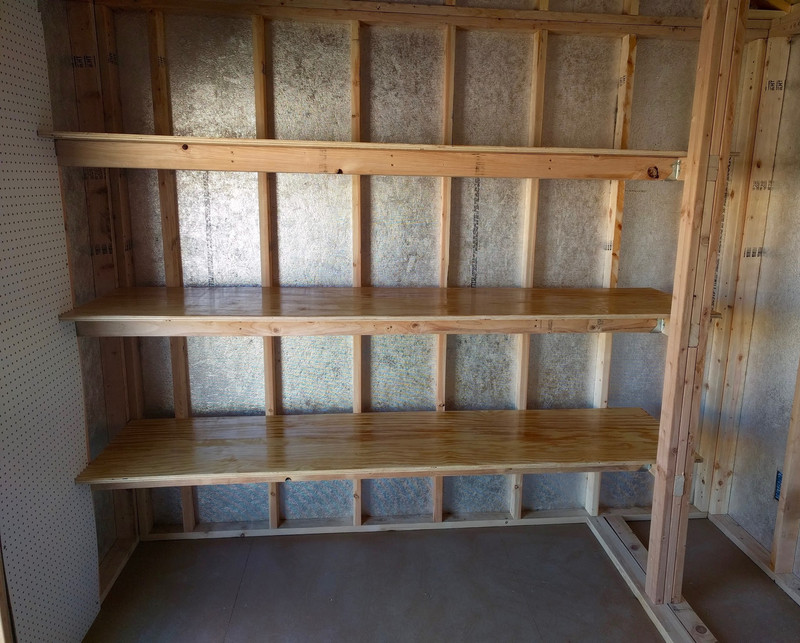
So, these are my Super Shelves. Entirely overbuilt, as is right and proper for one of my projects!

Interested in the design and assembly? Want some tips for doing something like this in your own shed? Read on!
My (Second) Tuff Shed
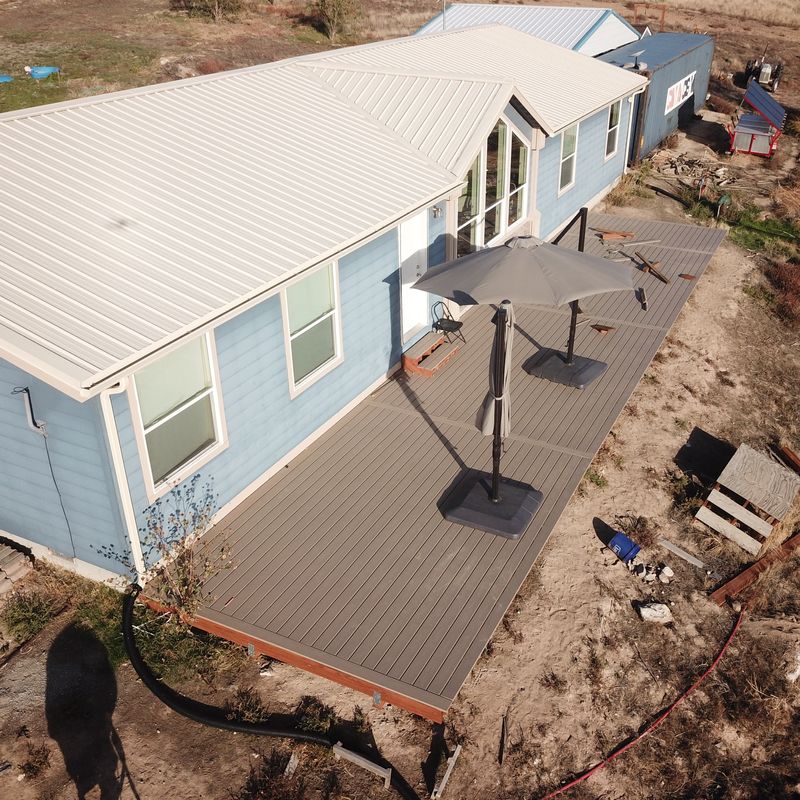
I was so happy with my first Tuff-Shed (I use it as an office) that when I wanted a second shed for the property, I went with the same company when they were having a particularly useful sale. They’re not the cheapest option for a shed, but they’re solidly built, use an excellent metal frame underneath, and should last a long, long while (paint them occasionally). Behind the shed is my (currently illegal) shipping container. Did you know you need a building permit to install a 40’ container on wood blocks in a lot of areas? I discovered this while trying to get a building permit for my carport… sigh. I understand why an awful lot of older people in this area just do what they want and figure they’ll pay the fine when they get caught…
Combined, this represents 520 square feet of new storage area for all sorts of things - a quarter the square footage of our house, but much easier to extend and improve with things like shelves!

After an exciting morning with my daughter watching a crew put the shed up (it shows up flat packed on a truck, and they assemble it onsite - this is fascinating to watch for a toddler and a dad), I’ve got… a shed! The silver on the inside is a radiant barrier - theoretically, it helps prevent hot plywood walls from dumping quite as much heat into the shed as you might otherwise see. It being fall, I have no idea how well it works - ask me next summer. The shed is also shaded by the shipping container (which I expect to be hellishly hot in the summer until I vent it), so this shed should, ideally, stay pretty cool! A pair of low intake vents plus a ridgeline vent should help it stay cool in the summer as well - the hot roof will help heat the air up there, drive it out the ridgeline vent, and replace it with cool air from near the ground.
In the winter? Well, just like everything else out here, it will be quite cold.
This is the inside of the shed - 2x4 construction around, plywood walls, some doors, some windows, and a nice floor - with metal joists underneath. Right now, it’s an empty building - but I’ll soon fix that!

Syonyk’s Secured Side Shelves
Before going into the construction of the fancy wooden shelves, I’ve got a few plastic shelves laying around. These are useful for lighter loads, and after a bit of washing (my old shed was a prodigious dust accumulator), they’re clean enough to make use of - along, say, the side of my shed. However, worrying about loading shelves with heavy stuff on the bottom is a bit annoying, and I really, really don’t want these shelves falling over on me or any small children. So, since I’m not planning to move them any time soon, I can secure them properly.

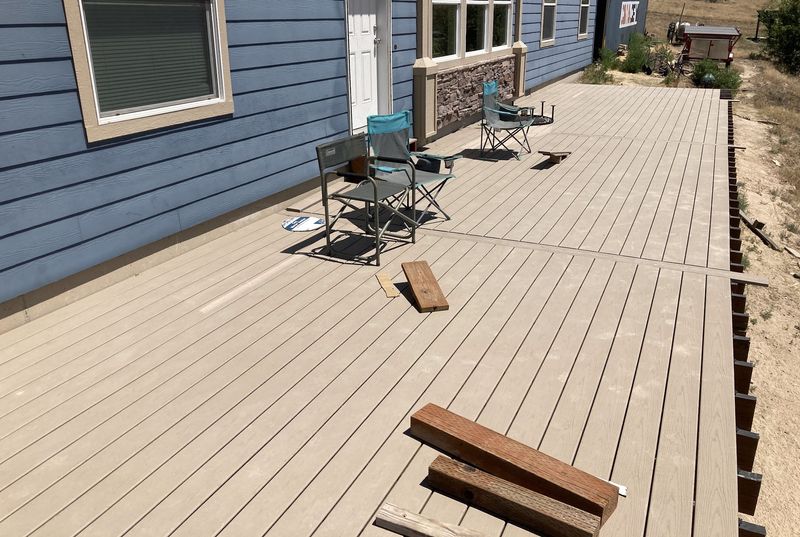
How do you secure plastic shelves to the wall? The easiest way is plumbing strap and some screws! Also, I had the plumbing strap laying around from another project. Those temporary stairs are still holding up fine, and serve very nicely as a drone launch/landing platform. But a pair of panhead screws and a bit of plumbing strap does a perfect job of securing the uprights to the wall!

While securing shelves, I learned an important lesson in shelf width: Some shelves are designed for standard stud widths. Some are not. These shelves, for instance, are not at all designed to be secured to walls.

While this shelf (ignore the different colored uprights - some movers in a previous move lost an awful lot of my shelving and I got creative) is perfectly sized for standard stud spacing! Worth considering when you’re buying shelves… This shelf is easy to secure, and shouldn’t go anywhere.

The black shelves took a bit more to secure, and aren’t as well secured to the wall as the white shelf, because the spacing is just all wrong for it. But, they’re not going to fall over on someone (even a persistent toddler). And, given that I expect to be replacing these shelves in a decade or so (plastic shelves, in my experience, always start sagging after a long enough time), this will do for now.

I’ve started pulling cardboard out of my waste stream (now that I have somewhere to store it), and Amazon boxes, with a tiny bit of cutting, make perfect shelf liners for things like a “liquids” shelf. If something leaks badly, I can just replace the box and go on my way.

Super Stud-Secured Shelves
With those side shelves finished, it’s time to turn my attention to the back of the shed. This is the main event - I’m going to build myself some awesome shelves here that can support anything I can fit on them and will never come down. Yes, this approach costs more than building something flimsier, but my goal is to spend money now so I don’t have to spend money in the future. Early retirement through frontloading expenses, perhaps?
I’ve got a 10’ wide shed, and I like working with 8’ sheets of plywood. This leaves a bit of room in the corner, but that’s fine with me - I have some taller stuff I’d like to hang out of the way (think “weed eater”, and perhaps some long bits of lumber being saved for future projects).
A bit of sketching in my small notebook worked out a basic plan - build a framework of 2x4s, secure it to the studs, put an upright in the front right corner, and cover it with some plywood. Simple, easy to build, and plenty strong. Also, I have a lot of experience building overkill things like that - ask someone about my dorm lofts sometime…
Really, for projects like this, a little notebook is awesome. I talked at the start of 2017 about distraction reduction and the like - little notebooks are great for just getting things down and not worrying about digital. Really, taking pictures is about all I use my phone for on projects like this.

Protecting the Shelves
With the basic design worked out, I set about building my shelf surfaces. These are built from 3/4” plywood (23/32” actual), and protected with a urethane finish. I really like what a urethane finish looks like on plywood, it does a great job of protecting the wood, and the UV issues aren’t a problem - this finish should last a long, long while.
I designed around 8’ x 2’ shelves, mostly because that’s a lot of storage area (16 sq ft per shelf), and because it’s super easy to chop a sheet of plywood in two with a circular saw and have that size shelf. They’re a bit deeper than I’d want for regular storage, but many things in a shed are infrequently accessed, and I can store some large boxes on these shelves if I want (without the boxes hanging off). My lumberyard looks an awful lot like my driveway with a few spare cinder blocks used for support…
This is AC plywood - basically, one side looks good, one side is pretty crappy. I could have gone with lower grade plywood for shelves, but I may as well make the top look nice (actually, I don’t care how it looks, but I like my shelves smooth). The underside is a bit rough, and would make it difficult to slide boxes around.

I really don’t like circular saws, but I certainly use mine enough. I prefer to put earplugs in before working with it - it cuts the volume down enough to just be “really loud,” not “leaves my ears ringing” - a circular saw can be north of 110dB at your head, and that’s not safe. A pair of cuts later, and I’ve got 4 shelves, even though I only really need three. I’ll find something else to do with the remainder…

Before coating wood with urethane, the can suggests sanding it down with a 220 grit sandpaper to remove high spots and generally help roughen up the surface for adhesion. And I was reminded that there’s no such thing as doing something unaided with a toddler around. She insisted on helping, and, well, I’m not going to discourage that! So she sanded the lower parts, and I sanded the rest (rather, she rubbed the sandpaper on it some, and I sanded the whole thing afterwards).

With these, I intend them to sit around for a long, long while. And shelves, at least occasionally, get stuff spilled on them. For these, I’m protecting them with two coats of urethane - I don’t need insanely good protection (you’ll see what that looks like in a different project), but I want something a bit better protected than bare plywood. Urethane is a plastic finish that leads to a nice glossy, well protected finish on plywood - and it’s fairly cheap for the quality of protection it offers.
Since I don’t have a proper paint booth, I’m using my shipping container. A couple tarps for floor protection, some cinder blocks to hold the plywood up, and I’m good to go!

Applying urethane is easy enough - use a brush, paint it on. I’ve got a pretty good sized brush for this, and a handy little container to carry it around so I’m not having to carry the little paint buckets around.
Around the internet, you’ll find all sorts of advice for getting super glossy urethane finishes without any air bubbles or such. You’re not going to find that here, since it’s shed shelves. Brush it on and don’t worry about it that much.

You can tell which ones are painted here… it really makes a difference in how the wood looks.
Dry plywood is quite thirsty, and these ended up being a bit starved - don’t be afraid to load the brush up and soak the plywood with a thick coat if you’re coating for protection purposes.

The first coat took longer than expected, and I ended up working into the night with my work lamps. I’ve had these for almost 15 years, and I love them. They’re just awesome, awesome work lamps. A pair of 500W halogen photon blasters. I could replace them with some fancy new LED ones, but… why? I don’t run them long enough each year that the power costs matter that much, and the heat is very welcome at night (when I’m likely to use them). They have a funky smell from burning the dust off that reminds me of nights spent in a garage, post-college, trying to get at least one vehicle running properly so I could make it to work the next day. We won’t discuss how late into the night some of these projects went, but my coworkers never realized just how much time I spent trying to keep something or other running for cheap. Life tip: Learn to work on cars. Seriously.

Between coats of urethane, sand the boards with some 220 grit paper, and then wipe them down with a damp rag (per the instructions on the can). This helps the next layer adhere. If you want a super glossy finish, there’s more to do, but for basic protection, just sand it, wipe it down, and paint it again.
Having a bright light (say, the sun) at the end of a panel makes it easier to see the dry spots on the board and make sure everything is covered.

Finally, it’s worth mentioning that urethane isn’t something you really want your hands soaked in. Cheap latex gloves (assuming you’re not allergic to latex) are awesome for this type of work. Yes, you’ll sweat in them. It’s fine. I’ve been using the Venom Steel gloves (I picked up a box on eBay for about $11 a while back), and they work great - they’re robust enough to not tear instantly if you catch a sliver of plywood. I use these for painting and vehicle work - they’re thin enough that you don’t have the normal -2 to dex rolls like normal work gloves have.

Installing the Shelves
Once the plywood is protected, it’s shelf-building time! I have a design philosophy about stuff like this: Build it big, build it strong, build it once. I know I tend to over-build my stuff. I’m OK with this, especially for something I hope to last 60 years or so. Beyond that, it’s not my problem, but I don’t want to be rebuilding these shelves in my 70s or 80s. Nope.
The back and left side can screw straight into studs, the front needs to be open so they’re useful, but the right side is left hanging (I have a 10’ wide shed, but plywood is only 8’ long). After considering a few options, I decided that an upright column to support the front right corner would work - secure the sides to the studs in the rear, and I should be plenty strong for my needs.
I lined the column up with a stud in the rear, and there’s 24.5” of space between the studs - I left a bit extra for my 24” deep shelves, in case things didn’t line up perfectly. Why is there a long 2x4 along the floor? To spread the load. Putting the upright 2x4s directly on the OSB floor would be a bad idea - sufficient weight would simply punch through the floor, or at least warp it. I’ve got two floor joists I have the load spread across, and it’s right up near a third. I probably won’t load the shelves up enough that it matters, but if I want to toss an engine on the shelves, well, I’d like to not worry about it.

My frames are pretty simple - a 2x4 screwed into the studs in the rear, a few crossmembers, and a (slightly) longer 2x4 in the front that goes from the stud on the left (overlapping the stud and screwed in) to the right side - which, at least in this image, is still hanging.
I leveled the shelves to the ground - I’m not sure if the shed is 100% level or not (it’s certainly very close), but the shelves are leveled relative to gravity. With one screw in, it’s easy enough to pivot this around to level it. Once it’s level, the rear crossbar is secured to each stud with a pair of 4” screws, and a few screws are used in the front left corner as well.

The right side has a long 2x4 that goes from the stud in the rear to the upright, and uses a joist hanger to help secure the front shelf support. Plus screws. Because redundancy.
Why screws instead of nails? I like working with them better, and don’t have a good air nailer. For some of this, nails might be a better option (they tend to be more ductile than screws), but I’ve got enough driven that I’m not worried about it. I’m using some newer generation screws that are radically better in shear strength than the older style screws. There’s been a lot of interesting development in fasteners lately - I’m a huge fan of Torx drive as well. If it fails, well, I’ll certainly report on that in the future!

With all that done, the shelf slides in place! I screwed the shelf down into the frame at a few places to ensure it doesn’t move. The shelf does extend slightly beyond the right support - it hangs over a few inches. I just won’t put anything heavy over there.

Shelves two and three are identical - just up higher. If you’re doing something like this, be careful close to the ceiling - you may not be able to get a shelf in place from above. I’d thought about a fourth shelf, but it would have been very difficult to install, and wouldn’t have given me nearly as much useful storage space on the top.

I’m not done yet, though. Remember, I want this to last 60 years. That front corner with the 2x4 upright is still dependent on fairly few screws, and a split in the crossmember could drop a shelf down. No good.
My solution: More wood. I cut spacers to fit tightly in the gaps (you can take off about half a blade width at a time with a circular saw to fine tune this type of fit), then added another upright on the outside, and screwed everything together. It’s a solid upright now.

Just in case the top end wanted to go wiggling, I secured that as well. It’s not taking any load, but it will prevent the support from moving around any. Also, I had some short 2x4s with no other use for them, and they were about an inch too long - so perfect to cut down here.

I also inserted additional supports in the front left corner - they help secure the front crossmembers as well. Wood is super strong in compression!

With that done, the main set of shelves is done - and should hold just about anything I care to put on them. Hopefully for the rest of my life!
The Extra Half Sheet of Plywood
If you’re keeping track, there’s an extra half sheet of plywood unaccounted for - until now! I cut that sheet in half for some extra shelving along the wall (two 8’ x 1’ shelves). This is a high pair of shelves, well secured with shelf hangers, but generally intended for things I won’t need regular access to. Spare motorcycle parts, truck parts, things like that. But, even with that, I want to make sure they’re not going to come down.
The base of an install like this is the shelf brackets - you can find these at your local home improvement store, or if you plan ahead a bit, you can get them you can get them a lot cheaper on eBay. I have no idea how people make money on that, but, not my problem.
How many hangers you use is up to you - I use three per shelf, which doesn’t work out to ideally spaced hangers, but it keeps me mostly clear of my lower shelves as well.
These are secured directly to the studs with 2.5” screws. Like all my other shelves, I’m securing them to the studs, as this is the strongest part of my building.

With all the hangers secured, the remaining step is simply installing the shelves! Some short construction screws anchor the plywood into the hangers, and it’s done!
The shelves are different heights for a few reasons. First, I wanted to clear the lower shelves with my higher shelf, and this helps. Second, the “tall stuff corner” is to the left of the higher shelf. Were it lower, I’d stand a good chance of whacking my head on the corner of the shelf as I head back into the tall stuff corner. And third, it’s really hard to line up edges perfectly with plywood shelves like this. I’ve tried before, and it doesn’t look good unless it’s perfect - which is harder to achieve than you’d think. So, staggered shelves it is. My shed, my design!

Final Thoughts
I’ve installed 64 square feet of high strength plywood shelving in here, as well as all the plastic shelves for light use (another 30-60 sq ft, haven’t measured exactly). All my shelving is nicely secured, and should handle an awful lot of weight without problem. All of it is out of the way along the walls as well - which leaves the main floor space open for other things (motorcycle and lawn equipment storage, mostly).
That said, this hasn’t been a cheap build. I’ve got $70 in plywood, $35 in urethane, probably $50 of 2x4s and joist hangers, and easily over $100 worth of screws (though I didn’t use all of them - I buy screws in bulk, because I’ll use them eventually on other projects). Plus assorted odds and ends like the joist hangers - and I’m not counting things like brushes that I can reuse. Considering this a $300 set of plywood shelves (the main shelves and the overhead ones) is probably about right. Or, ideally, $5/year for the design life.
How do you build your shelves? Feel free to toss a link to your builds in the comments!
Comments
Comments are handled on my Discourse forum - you'll need to create an account there to post comments.If you've found this post useful, insightful, or informative, why not support me on Ko-fi? And if you'd like to be notified of new posts (I post every two weeks), you can follow my blog via email! Of course, if you like RSS, I support that too.
