Or, “How I Left Blogger Behind and Kept My Sanity and My Posts!”

For about 5 years, I ran Syonyk’s Project Blog on Blogger. It worked. It was fast. It was Google hosted, auto scaling, integrated Adsense nicely, and I had no problems. However, my Blogger-hosted blog ended back in October when Google decided that making a new, fancy, mobile-first Blogger admin interface was more important than keeping a blogger interface that fundamentally worked for blogging. Based on the results, it seems to be that the people involved in writing the new interface were not bloggers, did not talk to bloggers, and based on their commitment to the utterly broken stuff, are people who simply did not care about blogging in the slightest. They did the thing they were told to do, got their promotions out of it, and don’t give two shits about the fact that they’ve ruined a perfectly good interface on anything short of a Google workstation. If you’re on that team, you could try to prove me wrong, but… really, it’s too late. I’ve gotten the message, loud and clear, and have moved on (and am moving on from other Google products as well, as you’re busy killing off Feedburner too - I guess maintaining an email post delivery service for a blog platform you’re trying to kill off is too boring). Believe me, I’ll consider my use of non-paid Google products very, very carefully in the future.

I considered moving to some other hosted platform, but… really, the whole process of moving a ton of content just sucks. It utterly, completely, and entirely sucks, especially for someone who hasn’t been in the web world for over a decade. I’m not going to move my blog, then find out in 5 years that I have to do it again. I’m going to solve the problem. Entirely. Once and for all.
Static Sites: Once And For All
After looking into a number of possible options, I decided to go with one of the “static site generators.” Most blogging platforms are dynamic - you need a database, a scripting engine (PHP, Python, Ruby, Go, Lisp, etc), a full Linux server, the works. And you have to keep all that stuff updated, and if you run Wordpress, you have to regularly restore from backups because someone found yet another way to use your unauthenticated remote sysadmin tool against you to spread spam and “keyword optimizing blackhat SEO add-ons” without bothering to get your permission first. Static sites eliminate this, because all the dynamic stuff is done locally, and the rendered output is pushed (as HTML, images, Javascript, CSS, etc) to some server somewhere. Or, perhaps, not even a “real” server - you can use some cloud bucket or another (Amazon S3, Google Cloud Storage, etc). Even if you are running a server to host it, there’s just not much attack surface to exploit. You’re hosting static files.

And when your current hosting service gets bored and goes away because they have the attention span of a tired two year old, you upload the static files to another hosting service, repoint your DNS, and go on your way. Once the workflow is established, it’s just hosting files.
The downside to all this is that, for me, this is a totally different workflow that breaks everything I used to use. But I’ve accepted that hosting my own stuff is both the past and the future as the internet convulses around us and tries to centralize everything, so… self hosting it is.
Why Jekyll? It has a Blogger importer (the hacking beyond it is the subject of the rest of this post…) and seems well enough supported that it probably won’t go away any time soon. Maybe. Is it better than Hugo, Pelican, or the others? I have no idea, and, honestly, I just don’t care. I’m not a web dev anymore. I want something that I can set up, leave set up, and use to render my content to something that other people can view. Maybe even comment on. Though comments are another thorny problem…
But the reality is that as long as I have a stable “render VM,” I’m no longer dependent on any external service to do my blog rendering. Once I have something that works, I can just keep a nice archived copy and always use it. Sounds kind of nice compared to the modern “Everything must change every week because change is new and new is good!” approach a lot of companies have, doesn’t it?
Jekyll’s Blogger Importer
Search a tiny bit, and you’ll come across Jekyll’s Blogger Importer. This is a handy little tool that swallows a Blogger export XML file and converts it to Jekyll. Simple, easy, clean! Right? Well, sure, except for all the things it doesn’t do…
This script will convert the Blogger XML into a set of .html files in _posts and _drafts, corresponding to your existing blog posts - and, while rough around the edges, they do work (in that the content is there and it renders properly). The problem is that the importer leaves an awful lot undone. Images are still hosted on the blogspot domain, the posts are Blogger’s hideous HTML, comments are untouched, etc. One could fix a lot manually, but with a couple hundred posts, that just gets old. So, enter some automation.
Some Notes on Automation
I am not attempting to write a robust, generally applicable process that you can point at your blog and have magical results. I am attempting to cludge together the minimum amount of tooling to reduce my pain substantially in the process of performing tasks I’d rather not perform by hand. Are there better ways to do this? Almost certainly. Should you really follow my directions blindly? Definitely not. I’m a legacy IRIX/Linux sysadmin who currently plays in the weird weeds of modern computers, and so if it feels like I’m doing something the “early 2000s” way, well… I am. Such is life.

I’m also not providing a full tutorial on setting up a Jekyll site or how to use the tool to render a site. You can find plenty of those, written by people far better at it than I am. I wasn’t even sure I’d end up with a working RSS feed when I started this translation process…
I mean, I bought a theme. I really, really don’t do web front end stuff. Some of this stuff is probably even specific to my theme (post thumbnails and such)!
However, I do care about bandwidth and size, so I’m trying to optimize things to be at least somewhat lighter on the end users. I’ve spent a while coming up with solutions to do automatic image resizing such that people can download the proper image size for their connection/device (“Responsive” is, I think, the right term). I’m happy enough with how it turned out - only a few meg for an image heavy front page, lazy loaded, and isn’t horrid on mobile. Anyway. On to de-hashing the import.
De-Googling Images: Downloading Locally
If you run the exporter and poke around the downloaded HTML, you’ll find that Blogger, at least on my blog (I have no idea how consistent it is), handles images like this (garbage removed for readability):
<a href="https://blogspot_domain/uuid_here/s1600/IMG_2058.JPG">
   <img border="0" src="https://blogspot_domain/uuid_here/s640/IMG_2058.JPG" />
</a>
Of note, the “s1600” or “s640” or (in newer versions) “w640-h476” refers to the size. If you want the full size image, you can use “s0” to get the native resolution image, though this is still a far smaller version than what was originally uploaded.
Someone banged up a handy script that pulls down images from the blogger HTML, but it only pulls the originally linked resolution, not the native one, and it dumps everything in assets - which I don’t care for. So I modified it somewhat. In particular, I pull the high res version of images from Blogger (the “s0” size), I ignore eBay tracking pixels (yes, I use those for my affiliate links, though I think they’re obsolete now), and if an image is not hosted on Blogger, I ignore the size translation stuff so I just pull the hotlinked image (I’ve linked various other images I host over the years if I’m controlling the hosting).
It also, very nicely, replaces the links to the images in the HTML with links to your locally hosted version - but it doesn’t replace the “a href” bit. You’d get something like this:
<a href="https://blogspot_domain/uuid/s1600/IMG_2058.JPG">
   <img src="../images/2020-07-04/2020-07-04-IMG_2058.JPG" />
</a>
This is better - but the links still go to blogspot, and that’s just no good if you don’t trust them to keep that sort of service running (which, at this point, I don’t).
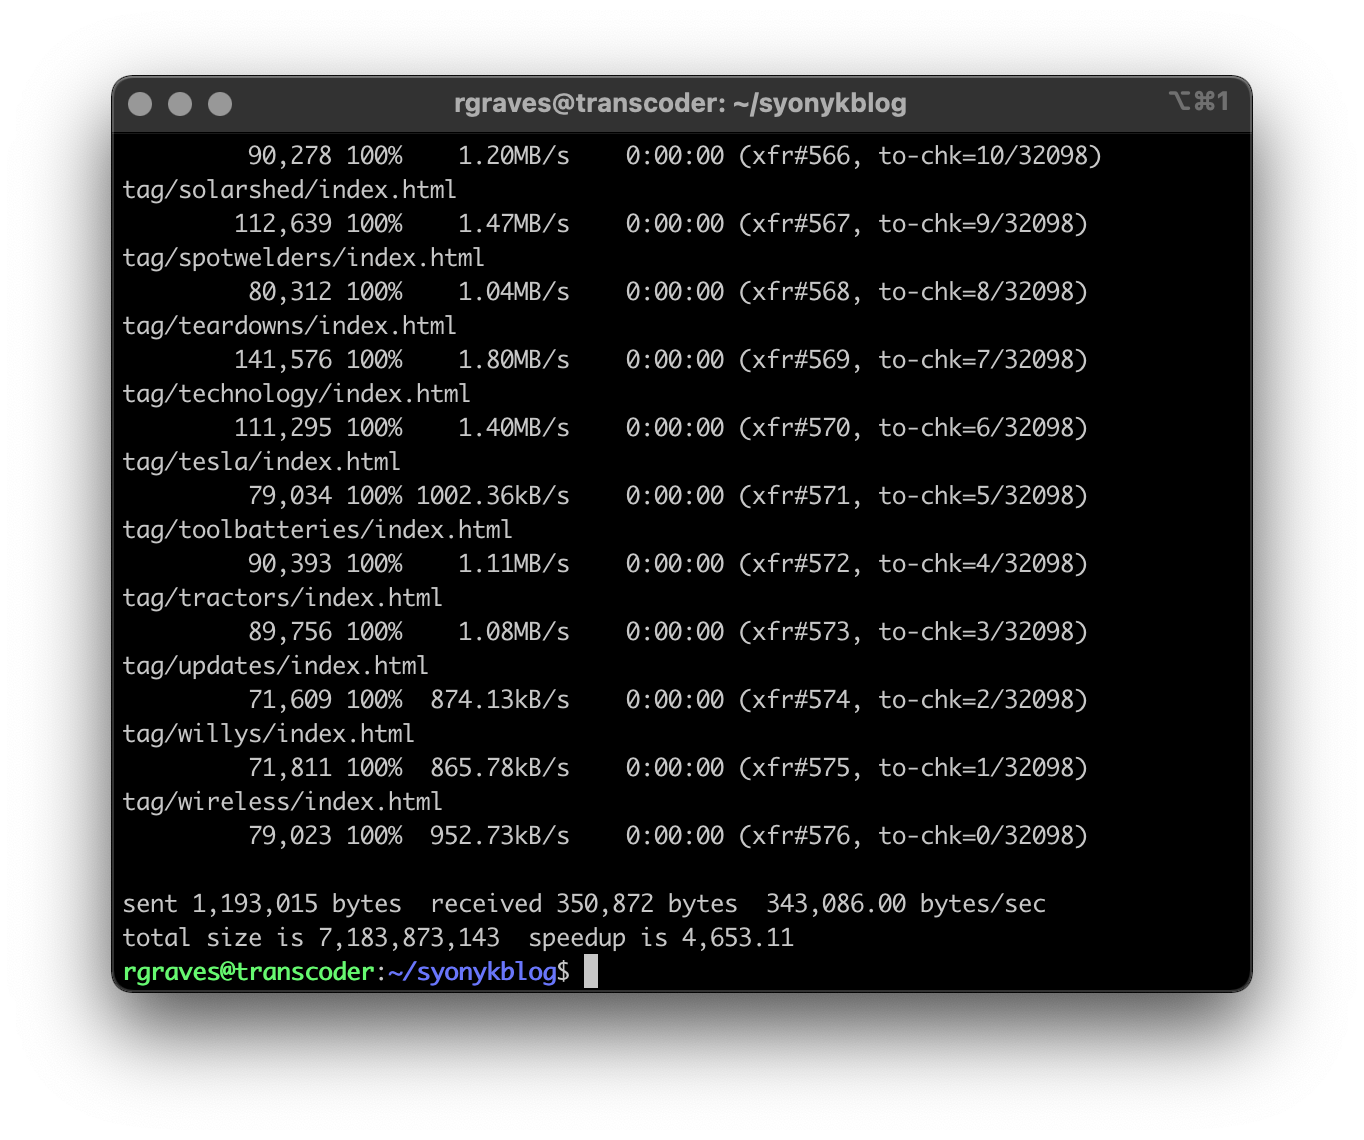
But, importantly, toss this script at your blogger-exported-html-hash, and you get at least some progress made. Some variant of your image is now local - and referenced in your HTML! Move stuff out of the “processed” directory and carry on (I added that feature so I could resume the downloads after fixing various errors - my internet connection is neither fast nor reliable, though Starlink has improved things a good bit).
Going Backwards: HTML to Markdown
The next step, after realizing that Blogger’s HTML is now wall-o-text that is impossible to make sense of (and which more than a few times does terrible things like applying style to each character or line in a code segment), is to convert the html to markdown. There are some tools that do it out there, and for no reason beyond “It has been updated somewhat recently” and “It exists in a command line form,” I’m using to-markdown-cli - it’s Node, it’s not my style at all, but, hey, it works. Mostly.
Except that it really, really struggles on the metadata at the head of each file. The Jekyll markdown files include “top matter” at the (surprise!) top of the file.
---
layout: post
title:  This is a Blog Post!
description: I am Blogger!  See My Blog!
date:   2020-13-32 15:01:35 +0300
image:  '/images/totally_srs_blogging_picture.jpg'
tags:   [Blogging, Writing, WinningTheInterblags]
---

(HTML content starts here)
It’s not HTML, and it gets mangled badly by the html2md tool. So I need to split stuff up.
Also of note, this tool doesn’t handle things like iframes or YouTube embeds properly. You’ll probably want to eyeball each file if you do anything weird and see if stuff is missing. Sucks, but, hey, you chose Blogger, didn’t you?
Anyway, a quick bash script based around csplit solves the problem. Split the file at the right point into two separate files (top matter and html), convert the html, merge back together.
#!/bin/bash

dir=`pwd`
cd /tmp
for var in "$@"
do
  split_num=`grep -n '\-\-\-' $dir/$var | tail -n 1 | cut -d':' -f1`
  let split_num+=1;
  csplit "$dir/$var" $split_num
  html2md -i xx01 -o out.md
  new_filename=${var/.html/.md}
  cat xx00 out.md > "$dir/$new_filename"
  rm "$dir/$var"
done
Throw it at the processed HTML (with the proper image links), and you get something markdown-ish!
With… still split links like this. At least it’s a standard format!
[](https://blogspot_domain/uuid/s1600/IMG_2058.JPG)
Fixing Image Links and Top Material
The next step here is to go through and process these image links into what I want. It’s not that they don’t work as-is, but… they’re not ideal for several reasons. First, the links are wrong - I don’t want to be linking to Blogspot as I’m moving entirely off them. But, second, I’m trying to support the whole “Responsive” web thing - smaller images for smaller screen devices, instead of shoving megabytes of JPEG down to devices that won’t render them as more than a few hundred pixels. Plus, for devices that support it, webp - it’s smaller than jpeg. This requires rendering a lot of image sizes (and paying some storage overhead) to keep bandwidth requirements down for a range of users. I’m fine with this tradeoff, but it requires a bit more work.
To do this, I’m using Jekyll Picture Tag - one of many Jekyll extensions that does it, and my logic is heavily based on this being actively maintained and configurable. Fire it off, and if I need to re-render images to change quality, easy enough to work from the canonical sources! At least, the best ones I have…
However, there are a few other changes that need to be made in the files as well, so I may as well work on those too while I’m here. I need to add some new top material for the header image, and I need to set up redirects. The Jekyll permalink layout is slightly different from the Blogger one, and while I could probably change it to match, it’s just as easy to put in redirects with some other little plugins - tell it, at the top, what else it ought to be available as, and meta refresh redirects get added to the site in the proper places.
redirect_from:
 - /2019/12/building-raspberry-pi-4-desktop.html
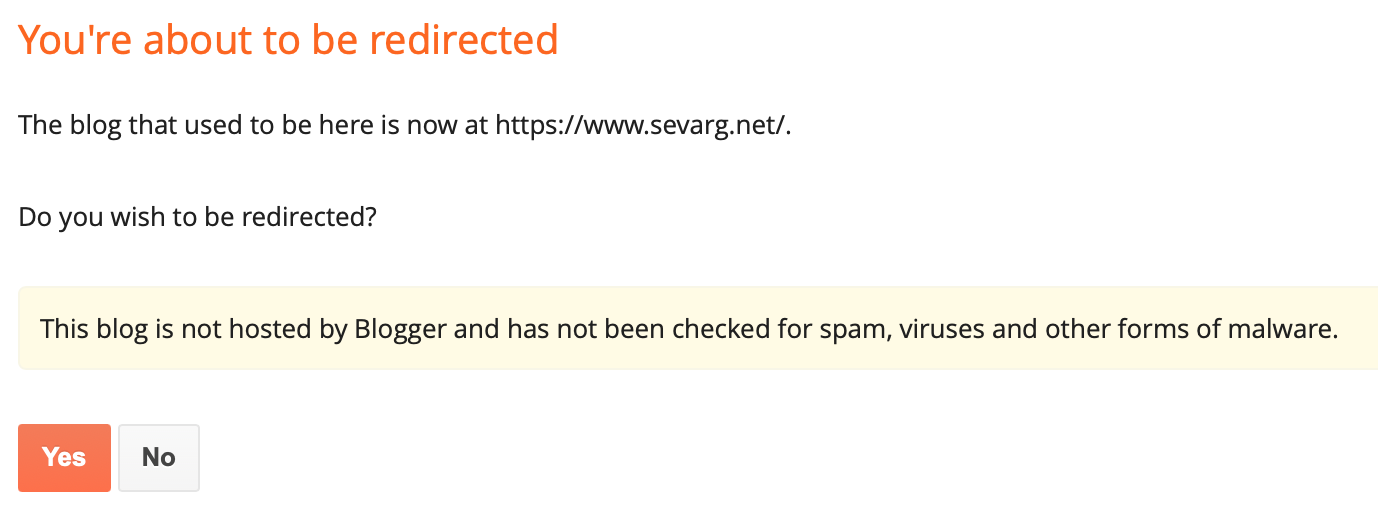
It’s not a 301 redirect, and as near as I can tell most of my content has gone missing from search results (quite annoyingly, but… at this point I really don’t care - I’m no longer trying to monetize my blog). But I’d rather not needlessly break links, even if I am moving to totally different hosting. A link to my old Blogspot domain will be redirected to my new domain after a warning, and then you get redirected to the new location. Clean enough.
This image and link mutation process isn’t perfect - small images (often screenshots) aren’t handled properly, so those may take some manual rework if you care. And, as I noted, YouTube embeds simply don’t get handled (perhaps a feature…?). But, the bulk of the work is now automated.
For smaller images, you might need to center them manually. Try this - or with the `````` tags supported by Jekyll Picture Tag. I know there are hip, modern ways of doing this, but… must we? This works fine and is super obvious if you read the source.
<center>

</center>
In general, you can freely mix HTML into your markdown with Jekyll - and this is useful for random little tweaks like this. I’m sure it breaks if you try to render markdown to something else, but, given that I’m going to HTML? It’s fine…
Replacing Links
You’ll want to replace links to your old blog with links to your current content. I’ve written yet another script to do this, and it creates a list of blogger_orig_url to filename mappings, and replaces them properly.
You can link to posts with something like this: [first ebike](/2015/05/09/my-first-ebike-lessons-learned/) - and this will follow any URL rejiggering one might do down the road.
Tags are a bit harder - and I’m just doing them manually because I’ve renamed some tags. You’ll replace things like this:
[others along this line](https://syonyk.blogspot.com/search/label/Off%20Grid)
With something like this:
[others along this line](/tag/offgrid)
Manual Tweaks
There are still a few manual tweaks to perform. I’ve got some file names to fix (quirk of Blogger when you re-title a post), and as mentioned above, I’m rethinking tags to better match content. So there’s still a bit I need to do by hand, but the bulk of it? Automated!
Comments
The last major thorn in my side is handling the comments. Jekyll is a static site tool - there’s no plumbing for database engines or such, by design. The common approach seems to be using Disquss or some other hosted, spammy, data-collecting commenting tool (embedded in the page), but a lot of those include pretty jarring advertising (“If you’re a Boise driver and drive less than 50 miles a day, you’re overpaying for…” level trash), and if I’m going to host stuff myself, I’ve no interest in that sort of crap spewed all over my site. I’m moving to self hosting for reasons, and I’m not going to let someone else spray their web advertising diarrhea all over my site.
Truth be told, I spent about a month waffling about what to do on comments, and that’s part of why it took me forever to translate things around. I had all the comments exported with the blog backup, but I didn’t want to handle copying them around. I could have just dropped them entirely, but there’s actually quite a bit of good technical content in the comments on some posts (some of the tool battery pack posts have a ton of very useful information), and I didn’t want to just dump that all on the ground like most sites do when they migrate.
However, I’ve been trying to spin up a quiet backwaters discussion forum as well, and Discourse (what I’m using to host) supports embedding in other sites with some simple Javascript (static per page). My static blog can point to my dynamic forum for comments, and this works well enough for me (plus drives a bit of traffic and signups to my forum). You can find plenty of guides, but you set up the embedding in Discourse, and copy the Javascript into the right place in the file, with some Jekyll tagging to set up the correct URLs. It really does work!
<script type="text/javascript">
  DiscourseEmbed = { discourseUrl: 'https://conversation.sevarg.net/',
                     discourseEmbedUrl: 'https://www.sevarg.net/2021/07/04/moving-from-blogger-to-jekyll/' };

  (function() {
    var d = document.createElement('script'); d.type = 'text/javascript'; d.async = true;
    d.src = DiscourseEmbed.discourseUrl + 'javascripts/embed.js';
    (document.getElementsByTagName('head')[0] || document.getElementsByTagName('body')[0]).appendChild(d);
  })();
</script>
I (surprise!) wrote yet another script to go from the html-file-per-comment format to something with authors and comment text in a flat text file, one per blog post. In what took most of an evening, I then manually copied these into the comment threads created on my forum. Part of this was because I wanted to remove some old spam I’d discovered during the export process, and part of it was to trim out some of the non-technical content in the comments. I don’t care if I lose some “Thanks for posting this, it was useful!” grade comments, but I wanted to keep the stuff from people who’d furthered my reverse engineering on battery packs and tool batteries. I’m mostly happy with the results, and have a solution that can continue forward as long as I keep hosting my discussion forum.
Hosting: Cloudflare & Cloud Buckets
One of the reasons I liked Blogger was that I didn’t have to worry about hosting. Google managed it, I typed content, and if I frontpaged Reddit with a post and got a ton of traffic, well, I didn’t have to worry about it! If you can “slashdot” Google, good luck.
However, the site being purely static content, there’s no real reason to host it on a traditional server anyway. I considered hosting it from home for a while, but my upload bandwidth ranges from “poor” to “nil” depending on the time of day, and that’s just not a good option for hosting content - especially image heavy content as I tend to post. I could run a cheap server from DigitalOcean, but… to start, I tried something that I’ve used in the past for static content hosting: Google Cloud Storage. For purely static content, this actually works quite well and I’ve archived some sites to it in the past for myself and other people (yes, I know you can do the same thing on S3, and I dislike Amazon more than I dislike Google, though I’ll probably be changing to my own static file host in the future).
As part of the move, I also switched my DNS and some content caching over to CloudFlare. I’ve been having weird DNS issues with my domain registrar, and finally got tired of it. CloudFlare covers my DNS, as well as covering static content caching - which, on a static site, could be worth an awful lot if I get a spike in traffic.
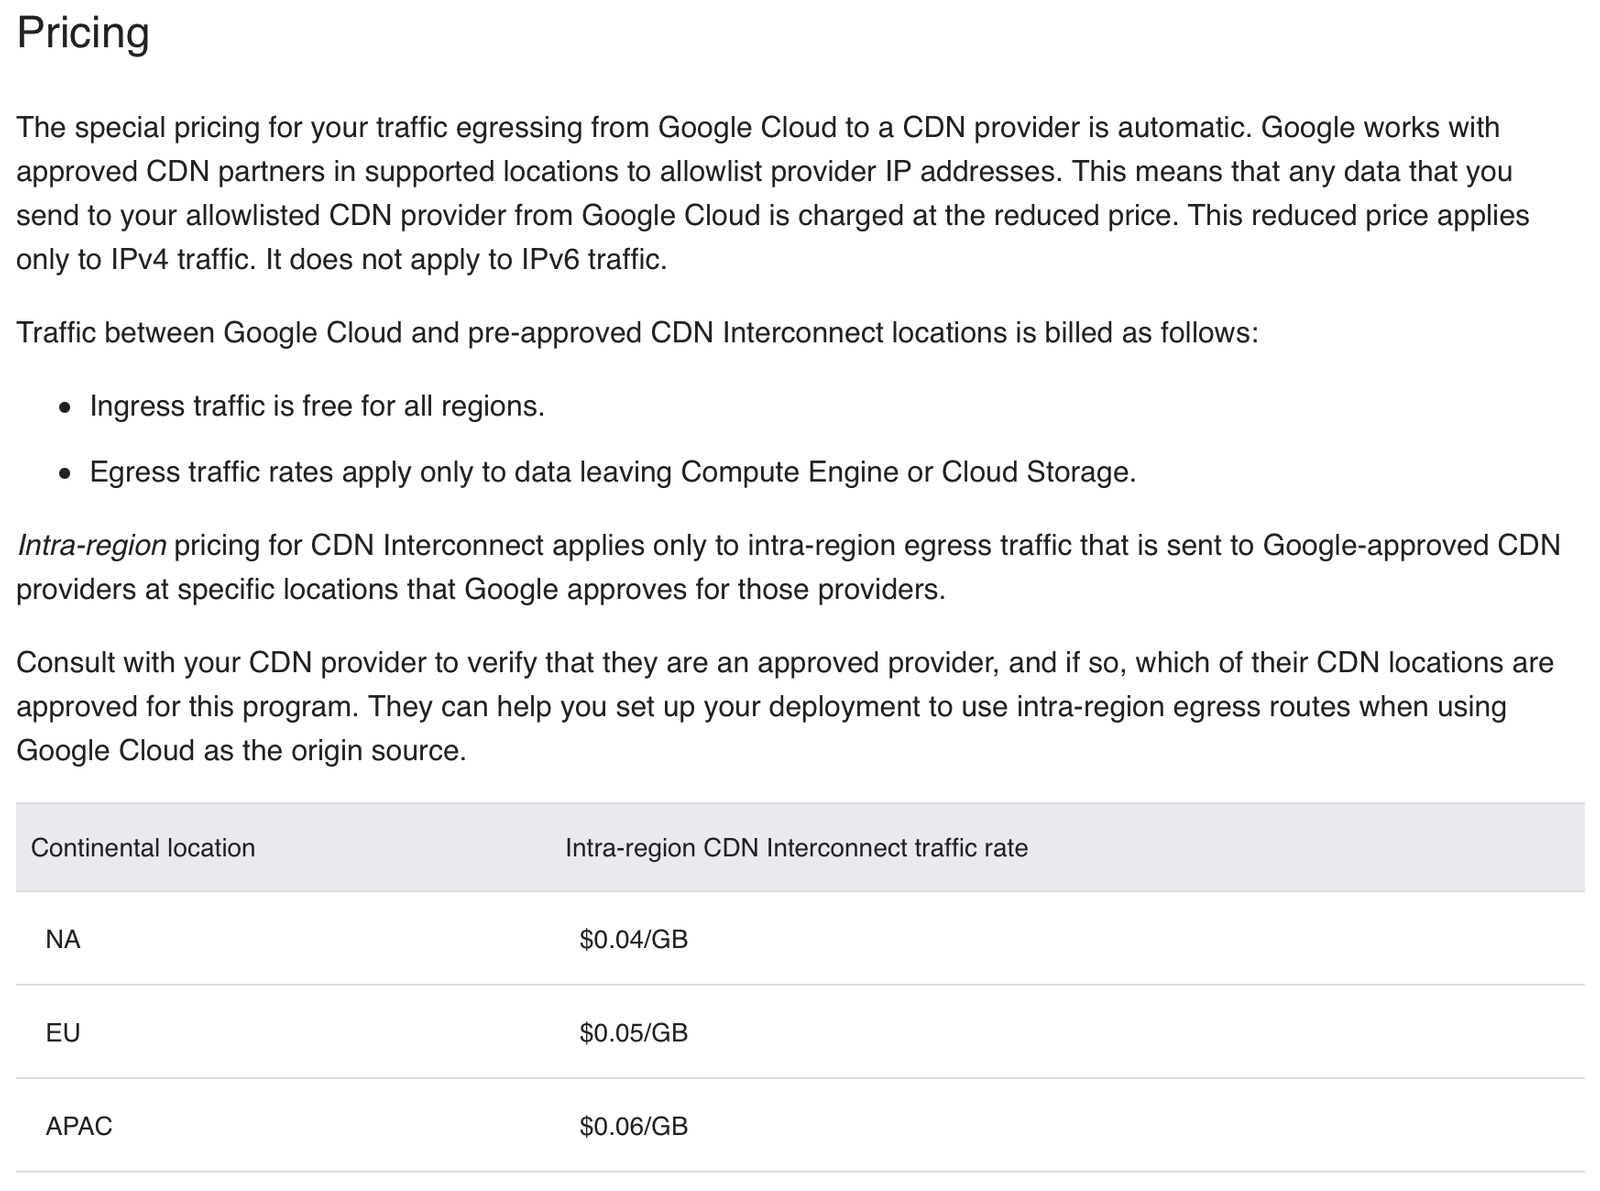
But, in the process of moving stuff around, I discovered an even better perk of using CloudFlare with Google Storage - peering arrangements between companies mean that it’s actually less expensive to use the cloud storage than it would be serving directly to the internet! In the Google Cloud CDN Interconnect Overview, traffic in North America going to CloudFlare is only $0.04/GB. Normally, going out to the internet, it’s $0.12/GB. That’s a third the cost - and I’ve got less traffic because CloudFlare caches some of it! This really helps reduce the costs of operating the site, and if you’re looking at doing any sort of statically hosted site, I’d suggest looking awfully hard at this setup.
I don’t get the benefit of having a full remote server to render content on, so I simply render it locally on a VM then sync it up. The gsutil utility for interacting with Cloud Storage has an rsync function that will transfer deltas, and I’ve got a little script set up that pushes image content first (as that’s likely to be larger and take longer for most of my posts), then syncs the text bits, compressing them for transmission (HTML gzips very well). Build, publish, done. I’m learning that Cloudflare takes a while to catch some of the changes to the index page, so once it’s synced, if I don’t see the changes, I just wait.
Should I care to host it somewhere else (which I eventually decided to do…), I simply upload my files somewhere else, repoint DNS, and I’m on my way.
How Well Does This Scale?
I had a couple hundred posts, a few thousand images, and a few thousand comments I cared to move over. The process took me easily 20-30h total, and that doesn’t count time spent researching and waffling on options. It’s not easy. I guarantee that my scripts will break for you if you try to use them as-is, and they may not do exactly what you want. But, at least, they might be a useful starting point. Or not. If you have thousands of posts, you’ll probably want to optimize the automation a bit more.
In terms of hosting, though? With CloudFlare/Google Storage, I’m just not concerned about bandwidth and serving traffic. Since everything is static, CloudFlare will just cache the static stuff and deliver it on out. If I’ve got light and scattered traffic, it comes off storage easily, and I pay very little. If I get heavy traffic on a post, it comes out of Cloudflare and I pay nothing. Win/win? Something like that!
New Workflows
Another part of the transition, which I’m still working out, is the new workflow. No longer do I just log into Blogger, make a draft, dump images in, and work on it from everywhere. I actually have to keep a local file repo, and because I work from a few different machines, I decided to keep it on my homeserver in Git. Don’t get me wrong - I hate Git with the passion of a thousand suns, mostly because any time I try to do something complex I end up merging nonsensical changes from 5 years ago, somehow, in the rebase. But, for one user, one (or very few) branches, and mostly SVN-like use, it’s fine. And eventually I’ll get better at it, probably.
I had to find a Markdown editor that doesn’t suck, and currently I’m on Mark Text. It performs better than some others when loaded down with pictures on 5 year old hardware, though would someone please write a Markdown editor that isn’t Electron-based? At least with Markdown, I can write text on a low power machine without rendering the images.
Like before, I edit my images, put them in a folder (now in my local directory tree), dump a ton in a document, wait… for a while, then start editing. Something about images is just painful for editors, I guess.
These image use Markdown-style image links, which work in the editor.
I can get the content mostly written and tweaked in Mark Text, but for the final rendering, I have to do some tweaking. I wrote, you guessed it, another hacked up Python script to do this final translation.
It does a few things:
-
Changes Markdown-style image links to the “picture tag” stuff I need for responsive rendering.
-
Creates an 800px version of the title image for use in the thumbnails and captions. I could optimize down further for the thumbnails, but since they’re dynamically resized for start/end rows, it seemed easier to just leave one size and compress it a bit more. I can fiddle with the compression on this to save bandwidth if I want.
-
Writes the file back out.
Is it a bit of a hack? Sure. Does it require a local Linux VM? For now, yes. Does it work? Yeah. Does it beat relying on the Blogger team to fix their crap, which they still haven’t shown any signs of caring about? Certainly.
I can preview the changes locally as well, and alter formatting as needed that way before doing a final render and push.
I’m sure I’ll refine this over time, but the key is that I can - I now have a local workflow that doesn’t rely on third parties nearly as much for publishing content. I mean, I can even work offline!
Now With More Self Hosted!
Since getting things online, I’ve also moved to my own server for file hosting. I colo a physical box now as part of my commitment to getting away from cloud based tech company nonsense, and it only makes sense to use my own hardware for my blog. This is how I’ve hosted sites most of my life, and apparently the only reliable way to make them work and stay stable through the whims of the tech companies.
Should You Do This?
Only you can answer that question. I was unhappy enough with the new Blogger interface that I went out of my way to get off it, and to get so firmly off it that I don’t need to rely on Google anymore. This makes me a bit sad - they’ve been a good company for many things, but they seem to have lost their way recently and I don’t seem them finding it again any time soon.
If you’re on Blogger, and upset with Blogger, hopefully this helps you out. This whole mess is, sadly, nowhere as easy as Blogger, and the transition is quite painful, fairly technical, and entirely annoying. If you’re not able to hack on Python scripts, my route probably won’t work very well for you. But if you are, well… hopefully they’re useful!
And I’ll happily take updates to my scripts on Github, should one feel the desire to improve on them!
Comments
Comments are handled on my Discourse forum - you'll need to create an account there to post comments.If you've found this post useful, insightful, or informative, why not support me on Ko-fi? And if you'd like to be notified of new posts (I post every two weeks), you can follow my blog via email! Of course, if you like RSS, I support that too.


