
I’ve been talking about Urals for the past three weeks, and this week finishes my (current) Ural series with a post on a task that every Ural owner should be familiar with - oil changes.

The recommended oil change interval for the engine and gearbox (at least on the older model I own - 2005 and similar) is 2,500 km (1550 miles), with an oil filter change every 5000 km, and a final drive oil change every 10,000 km.
What an awful lot of people do instead is to just change everything (oils and filters) every 2500 km. The bike doesn’t make much power, but it runs an older and looser air cooled engine design hard - 40hp if you squint at the dyno sheet and a bike with the aerodynamics of a sheet of plywood make for a hard working engine! The engine doesn’t hold much oil either - only a hair over 2 quarts.
In any case, oil is cheap, metal pieces and labor are expensive. It’s cheap(ish) insurance, and regular oil changes are a good way to catch problems before they get bad - both from the oil and from the time spent around and under the bike, paying close attention to things. Fine metallic powder/flakes in the oil? Annoyingly, normal. Metallic chunks? Time to dig in deeper…
Plus, it’s insanely easy to change the oil on this bike! It could be a KTM…
Tools & Parts Needed
You’ll need a 19mm wrench or socket (six point is a good idea), a 22mm wrench or socket (for the oil filter), four quarts of your favorite 20W50 oil (you’ll use about 3.5 quarts, leaving some for topping off as you ride), and some 80W90 gear oil for the final drive. Plus, should you choose to replace it, a new oil filter.
You’ll also need a drain pan (or, at least, you really should have a drain pan), and a funnel to refill the bike because, of course, the fill plugs are in weird places. Get the smallest tipped funnel you can - the gearbox fill hole is really small! My funnel (shown later) works, but only barely.
Hot Engine? Bad Idea!
You really, really don’t want to change the oil on a Ural just after a ride - yes, changing hot oil is good for draining things fully, but it will lead to some serious burns. An oil change will cover you in oil, and it involves working right around the exhaust system - so make sure the pipes are cool, at a minimum, but I prefer to do the oil changes on a cold engine. I’ve already been burned by the exhaust pipes once (literally 10 minutes after buying the bike, while trying to load it onto a trailer for the trip home), so I’m claimed, and I have no real desire for more exhaust burns or oil burns.
Engine Oil & Filter: Draining Everything
If you have a Ural, you should be familiar with the engine oil fill port - it’s the dipstick on the left side of the bike. And, yes, you should actually be using it on a regular basis.
It’s worth noting here that the engine oil level is checked with the dipstick not screwed in - just sitting on the opening. If you screw it in to check the oil level, you could be running the engine a bit lower than you should on oil - which is a bad idea for an air cooled engine.

There should be a sealing washer under the dipstick. If there’s not, you should probably go replace it. Sometimes it’s stuck to the bike, or to the dipstick. And, as always, it’s a good idea to clean up around the dipstick before loosening things. Dirt is a really bad lubricant!

The engine oil drain plug is the front plug under the engine/gearbox combination. It’s towards the rear of the finned section (you can actually see the gearbox drain plug peeking around the fins in this photo from further back) - this drains the engine oil. If you haven’t worked with these vertical drain plugs before, there’s a trick to getting them out without dropping them in the oil catch pan and covering yourself or your tools in used engine oil.
Use the wrench or socket to loosen the plug a few turns, then do the rest by hand - but push up on the plug as you twist. This keeps most of the oil in the oil pan. Once you feel the threads “skip,” you know that the plug is free - pull it quickly to the side. The oil heads into the pan, the drain plug is (ideally) secure in your fingers, and you’re not covered in very much oil!

The drain plug has a really neat idea I’ve not seen anywhere else - the crush washer is held on with a little rubber o-ring! It makes it a lot harder to leave the crush washer on the bike and then, perhaps, drop it in the catch pan and have to go fishing.
In theory, the drain plugs are magnetic. Mine aren’t. I suppose the factory was out that week. If you don’t have the magnetic plugs, you should probably replace them with the magnetic type to help keep the metal out of the oil - I’ll be replacing mine with magnetic plugs at the next oil change. Be careful about the depth of the magnet - there’s not much clearance between the drain plugs and the spinning bits in the gearbox and final drive!

While the oil is draining, you can start on removing the oil filter. With a longer catch pan, you should be able to drain both the oil pan and the oil filter at the same time, but if not, just put the drain plug back in before you start working on the filter - it doesn’t take very long to drain 2L of oil.
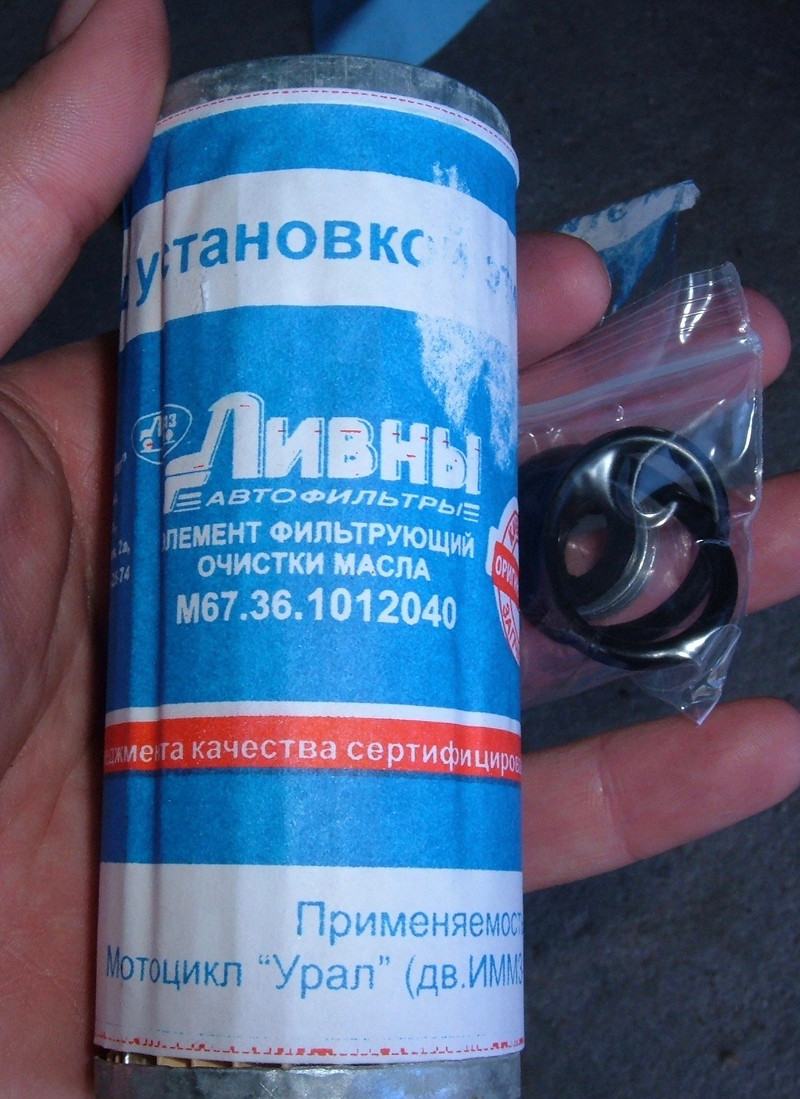
The oil filter lives in this cylinder on the front of the engine - which is probably covered with road grime and dirt. If it’s perfectly clean, either you wash your bike regularly (???), or you ride in really clean places.
Mine is covered in “winter mess,” with some nice clumps of dirt tossed on top of the exhaust crossover pipe. I’ve been having fun!

The oil filter is a cartridge type filter. To remove it, simply put your 22mm wrench or socket on the bottom and unscrew! This involves working really close to the exhaust pipes, so you really don’t want to do this with hot pipes - unless that’s your thing, in which case, have fun!

It unscrews, and unscrews, and unscrews - and then unscrews some more. The threads are pretty far up inside, so you’ll be turning it for what feels like forever before things come free. In the photo below, the plug still has another turn or two to go before coming loose - and it’s kind of messy as the oil drains around the threads.

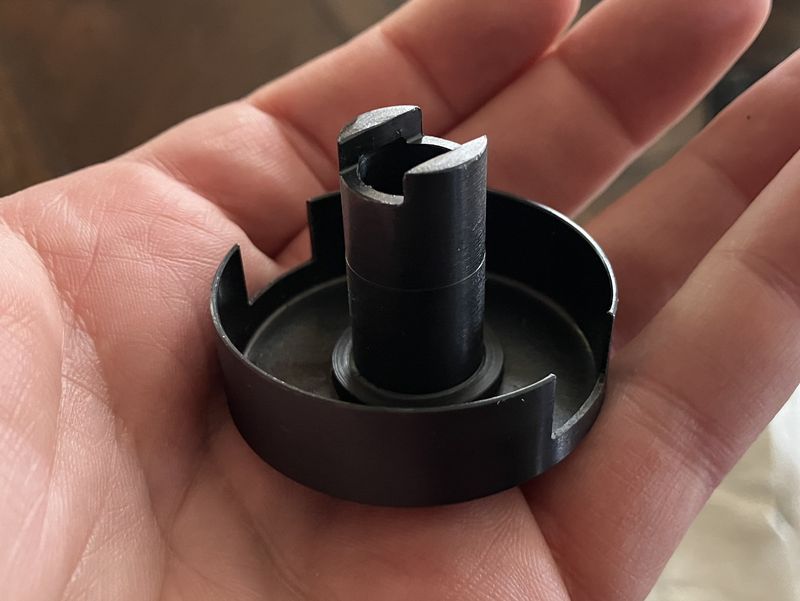
Finally, the cap will come free, a bunch of oil will come gushing out, and the filter will (hopefully) drop out. You can dump the filter in the oil pan if you want, but pull the cap aside for cleaning and replacing some o-rings. If the filter is stuck, get creative. WWID?

Helpfully, the oil draining out of the filter performs the mandatory anti-corrosion treating of the center of the crossover pipe. I really don’t understand why so many companies insist on draining oil over exhaust system components. At least this is a hard pipe you can wipe up - a 2000 Cavalier’s oil filter will drain oil down the back half of the engine, straight onto the mesh flex coupling in the exhaust pipe. So there is literally no way to avoid it burning the oil off after you change the oil. Poor design, all around. Bean counters, I suppose…

The grey goo in the bottom of the oil filter cap is assorted fine metallic bits from the engine wearing in (or, possibly, nano machines - though I assume the first). They accumulate down here, and you really should clean them out of the cap before you put things back in.
Annoyingly, my oil filter bushing is quite crushed, and I’m not entirely sure how well it was sealing. As far as I can tell, it was sealing fine (the engine obviously was still running), but the replacement bushing on my filter is different - and look stronger. You’ll see!

Engine Oil & Filter: Refilling
At this point, you should have all the oil out of the engine - or, at least as will run out easily. At this point, old car guys seem to start their engine and let it pump oil out of the passages until the low oil pressure light comes on. I’m not an old car guy, and am not a fan of this practice, so there’s no engine starting going on for me! I suppose if you really wanted to, you could turn it over with the kick starter a few times (though, really, there’s no reason to do this).
The only thing you need at this point is a new oil filter - I got mine from UralNE, though there are also kits on eBay. It’s supposedly worth avoiding the EMGO brand filters (the ones with a perforated metal exterior) - they seem to get stuck in the canister annoyingly often, and (as happened with mine) tend to mangle the rubber sealing ring. This is an OEM paper filter - or something quite close to it.
The oil kit should come with a new rubber bushing, and ideally a new exterior o-ring (at least, the UralNE kit comes with both). The oil filter bushing in this kit is reinforced with a few washers to prevent it from blowing out like my previous one did. I’ll see how it works!

Like everything else Ural related, the parts kits don’t include instructions. It seems to make the most sense to install the bushing like this, with the large flat bit pressing against the oil filter for sealing. The bushing is tight, which seems a useful thing for such a device intended to seal things.
If you have a new o-ring, replace the o-ring around the base as well - getting the old one off can be a bit tricky if it’s been on for a while.

Put the filter on top of the base and spin the whole thing up and in! It’ll take a while to spin in - just like coming out. You don’t need to crank it down insanely tightly, just “tight enough” - you can feel when it starts to bottom out. If it leaks, add another quarter turn. You do look for oil leaks regularly, right?

Finally, take your funnel, shove it in the fill port, and dump two full quarts and about a quarter of another quart in.
You’ll need a bit more (around 2.4 quarts total), but it’s easiest to put 2 and change in, run the engine for a while to fill the oil filter canister, and then top off based on the dipstick until you learn exactly what yours will take.

I fill with Amsoil, but given the frequent oil changes, it probably doesn’t matter that much…

That pretty much does it for the engine oil - just remember, check the level with the dipstick sitting on top of the fill port, not threaded in!
Gearbox Drain and Fill
There’s no filter in the gearbox, so the process is much easier. Drain the oil, fill the oil!
The fill port is just forward of the shifter, on the left side of the bike.

And the drain port is underneath - behind the finned oil pan. You don’t want to drain the engine oil again by mistake!
If you want, you can drain the oil from here and the engine at the same time. Just like with the engine oil, pushing up on the drain plug as you unscrew it should help avoid covering your hands in oil and dropping the drain plug in the catch pan! I prefer to do one compartment at a time, though.

At least on my bike, the fill plug doesn’t have the rubber o-ring holding the crush washer on. I have no idea if it was there originally or not. Annoyingly, my drain plug isn’t magnetic here either!

Refilling is pretty simple - it takes a few ounces over a quart (you can use the oil left over from the engine fill).
The opening is quite small, though - my funnel tip is a tiny bit too large, so I had to hold the funnel end in place while filling. The smaller the funnel end you have, the more likely this will work easily for you!

And that covers the gearbox!
Final Drive Drain and Fill
Finally, the final drive! This, too, is a simple drain and fill with about 4oz of 80W90 gear oil - not engine oil!
It’s worth noting here that the final drive will go about pissing out excess oil through several paths, including towards your brake pads, so be careful about overfilling - the dipstick (screwed in) is a good measure for oil level, and you might want to try and fill towards the bottom of that.

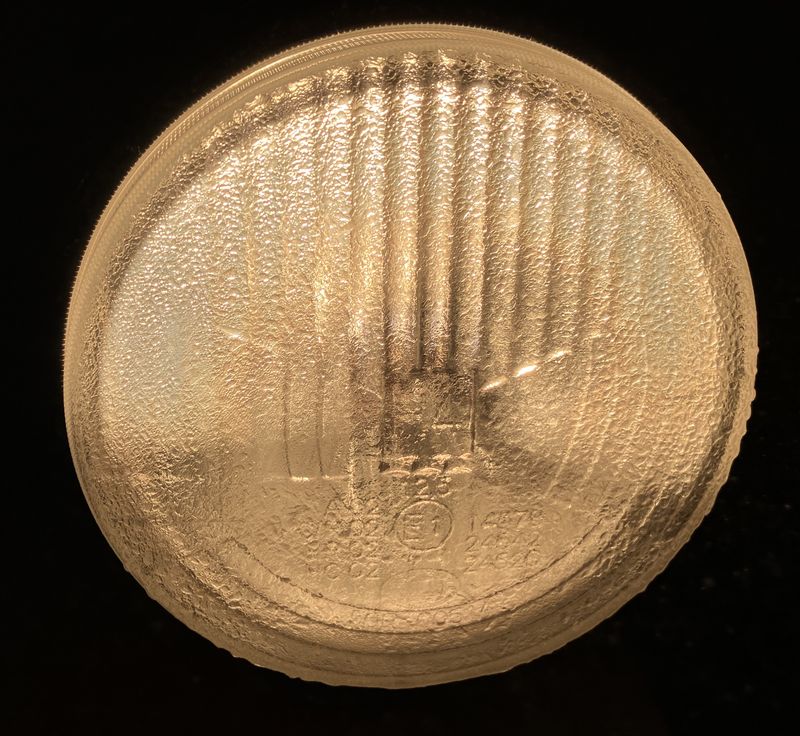
The drain plug is fairly close to the wheel, but it should drain straight down and you can fit a catch pan close to the wheel and get the oil. How do I know about things being a bit overfilled and making a tremendous mess of everything? Well… this photo should make things clear.

And that should finish up the oil change!
Check the engine oil level for the first few rides, top off as needed, and then go about your regular riding with preflight oil checks.
It shouldn’t take more than about half an hour once you do it a few times, and oil is cheaper than new metal parts.
If you have any particular tricks you’ve found, please share them below in the comments!
Comments
Comments are handled on my Discourse forum - you'll need to create an account there to post comments.If you've found this post useful, insightful, or informative, why not support me on Ko-fi? And if you'd like to be notified of new posts (I post every two weeks), you can follow my blog via email! Of course, if you like RSS, I support that too.


