
I left last time with the bulk of the deck surface done - but the edges weren’t finished out, and I didn’t have stairs (at least, not written about). That’s what this post covers!

Building the Stairs
I thought I’d save time by getting pre-formed stair stringers and cutting them down to the exact size I needed. What I didn’t really consider is that I wasn’t able to actually find enough of the two stair stringers locally to meet the Trex requirements (it’s soft, so you need about 12” on center for stairs, too). I was able to find three. Not the four or five I should have gone with. And I probably should just have purchased a big hunk of 2x14 or something to build my own. But, this is what I built with what I had laying around.
The concept for stairs is pretty simple: I have a door, and the deck is a good bit below it. So, add stairs up to it. The deck is low to make building it easier, and also to allow access to the crawlspace vents and some other things I need occasional access to, and the end result is that I need a pair of stairs at the 6” and 12” mark to make a nice even rise up into the house. Of course, the stringers aren’t exactly that size, so I had to cut them down.

When cutting stair stringers down to size, recall the height of the treads you’re about to put on them - the Trex I’m using is an inch thick. Take that into account when trimming things off! I have to say, I’m quite happy with this metal speed square - my orange plastic one shattered some while back, and this one just keeps going. Caution: Hot in the sun!

I like my compound miter saw. It can make some impressively long cuts when asked, and doesn’t complain a bit about it. My saw has been out and hooked up quite a lot this year, and it’s worth every penny I spent on it.

Of course, we have to be careful with praying mantis cocoons! This went right back where we found it so it can hatch and chew on other bugs.

I initially planned something fairly complex - a step on top with a big step around it on all sides below. I even started building it, and you can see the general concept here. What I didn’t work out was the details of how to actually secure everything to the stringers and to generate a structure that would actually work. If I want to build something like this, I think the right answer is actually to start with regular lumber instead of stair stringers, and just build it entirely from scratch. So, why didn’t I? I was building this a few days before a rather large “deck warming” gathering at our place for the 4th of July, so I needed something working, and was running out of both time and tolerance for working in the heat. I may go back to this design at some point in the future, when it’s cooler, and I’m not under time pressure - it’s easy enough to rework the stairs should I want to.

What I ended up with instead is something that I’m going to claim is more than strong enough, and spreads the load out decently - but also looks more than a tiny bit Kerbal in design. It does provide the needed support for the stairs, though. The whole thing sits on the deck - it’s not anchored to the house at all. Find the joists, drill some pilot holes, and some very long structural screws go through the base at the front to hold the entire contraption in place. Should I want to redo things down the road, I can easily remove it.

But, it supports steps, and allows people to go up and down into the house. I just don’t really like it. I’m considering ways to do a fully enclosed set of stair treads in the future, with some overhang of the treads. I’ll just need to pull out a table saw and do a bunch of Trex ripping to do it - which is a project for future me.

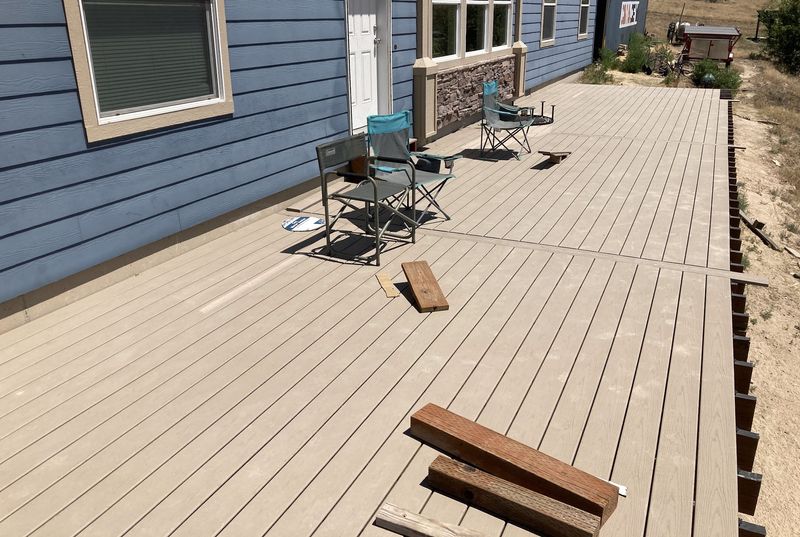
Finishing the Surface: Square Sided Trex
As of the last update, I had the bulk of the Trex in place with hidden fasteners - though I’m suffering some tennis elbow as a result of all the hammering and need to get that resolved. The last step in a “full deck” is to finish it out with the square edged Trex (the stuff I built the stairs out of). There are two ways of doing this - either secure the outside of the previous “hidden fastener” board with screws and fully screw the final board in entirely, or do what I did, get a Trex Hidden Fastener router bit, and make one of the square-edge board edges compatible with the hidden fasteners - and then screw the outside of that in. Benefits include “Cleaner, better looking, and only marginally more work.” Of course, you have to borrow a router, if you don’t have one…
I start by cutting the boards to the proper length - matching the previous hidden fastener boards. Yet more fun with a compound miter saw, and yet more wrangling a few small children to help hold stuff, where I want it, without wiggling it around.

Step one is to set the depth of the router bit properly. You mill (or, if you’re Jeremy Clarkson, you probably call it “routering!”) from the backside, so the depth needs to be set from there. You can guess and check, or you can just use a piece of the hidden fastener board to get things close. I found I had to extend the bit a hair further than “aligned in the groove” to get it to cut the right depth - just a smidge further out than what you find when aligned in the groove.

Route some test pieces to verify the depth. It’s easy enough to get set - just be sure it’s accurate, otherwise you’ll have issues with the hidden fasteners. They’re somewhat tolerant of misalignment, but don’t make them work harder than they have to.

Finally, with your router depth adjusted, it’s time to start making a square edge board less square! What I found worked best, since you’re working from the back of the board, is to set the board in place and make sure it fits, then just flip it up and over the previous deck board, with an inch or so hanging off the end. Apply a few clamps, and mill it out in sections.

Start with the end, then once you’ve finished that part, move a clamp over and route the next section. It doesn’t have to be continuous - the bit, if you’ve secured it properly, won’t go anywhere. Just start the router in the previously cleared groove and start working on over! Repeat until you have a full groove completed.

It leaves a wonderful mess. But, before securing the final board in place, I still had one thing left - trimming the perpendicular “blocker boards” down to length. Instead of trying to estimate exactly how long to cut them, I just left them long, with a plan to cut them down once everything else was worked out. The trick is, you really don’t want to rip up your new end board - so they have to be cut before you secure the new board fully into place.

Get the final row of hidden fasteners installed, slide the end board into place, and then make a nice mark to cut along. Remove the end board, and apply a circular saw (one of the only times in this project I had to use one - I really don’t like them much) to trim to length! Just square the marks first.

Once done with that, secure the boards! I’m using the hidden fasteners, and then one screw per joist. You might, rightly, consider the boards to be “a bit more cantilevered out than reasonable,” and you’d be right. Once the railing is up, I’m going to put a fascia board in under them to finish out the side - but I don’t want to do that until I’ve got the railings and some shade cloth structures finished out.

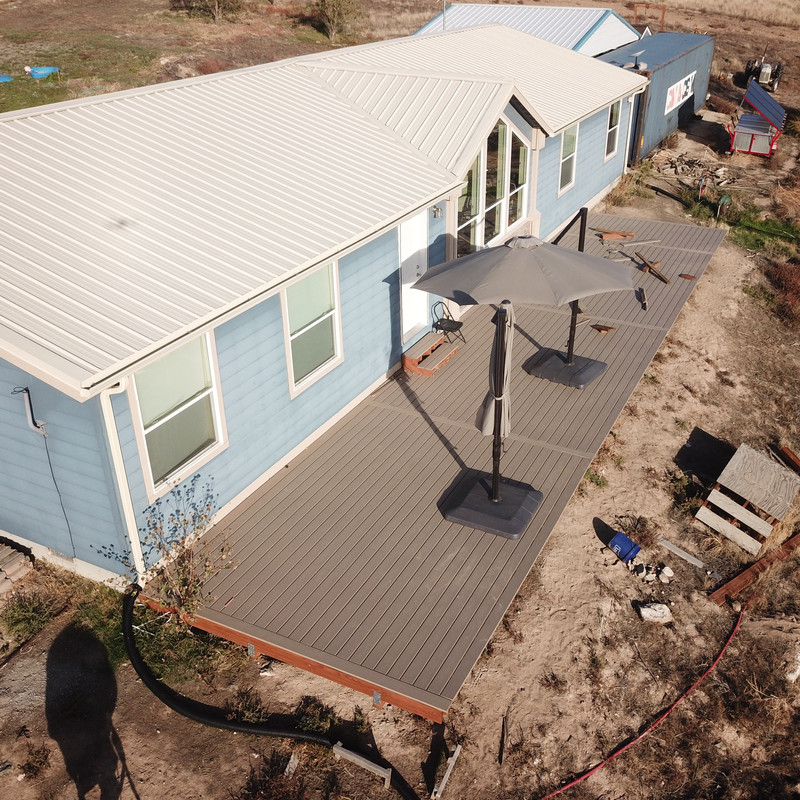
The result? One finished deck surface, complete with stairs!

Shade Umbrellas
You’ll notice in some of the photos above some shade umbrellas, and they’re worth talking about. I’m using them more as a short term solution, because I have plans for something better down the road - but they provide some useful shade from the sun and rain should you care to have something more than a full sun exposure. They’re not cheap at $500 or so each, but they are well built and should work for some useful while. I’ll see - we have a stupidly high UV environment here that just destroys stuff in short order, so I’ll be interested in how the more expensive ones hold up.
They all look generally similar, though a lot of them don’t come with a base (they’re designed for hard mounting to something). Not having had any idea of where I want ours, they’ve got a plastic base that I filled with sand (or, rather, got my kids to fill with sand and paid some other kids to fill with sand, because stuffing wet play sand into them is just tedious). The whole thing folds up nicely for storage and doesn’t take too much space - but they’re still large and heavy when stowed.

You can fill each of the four base pieces with whatever you want - sand, water, antifreeze, etc. If they’re going to be out all winter long, you probably don’t want to fill them entirely full of water, because it will certainly crack them when it freezes. I went with some play sand, though it’s of the wetter variety and a pain to pack in (you can’t just pour stuff out of the bags in). They’re not entirely full, but there’s enough weight to keep the umbrellas mostly planted when deployed. Wind can still push them around a bit, so be careful - Trex provides a slippery enough surface for other plastics that these can be slid around by either a person or the wind.
The crank at the bottom serves to rotate the umbrella around 360 degrees, though it will bind up if there are strong loads on it. Rotate it before you deploy it in the wind.

Squeeze the handle, and the bottom slides up and down to cantilever the umbrella out. I’ve found that to deploy the umbrella, you need to slide it out somewhat - it just won’t deploy properly when stowed.

There’s a crank on the handle that pulls on a rope. Crank it a bit, flip all the umbrella ribs out (at least one or two tend to like to be over-center and the umbrella won’t deploy until you fix it), and the umbrella pops out. Presto! Instant shade! Well, at least, during the middle of the day. Towards the evening, when we like it use our deck, the sun is coming from lower in the sky and this doesn’t offer much useful shade. You can see the shaded section across the door.

At the cost of far greater wind area, you can then tip the umbrella up and add a lot more shade. I’ve found that if the wind is coming at it from the peaked side, it’s fine, but if the wind is coming into the “cup” of the umbrella, it’s likely to slide around more than I’d prefer. Deck umbrella sailing will probably never be an Olympic sport, but it’s certainly a thing.
Overall, I think these are a decent enough short term solution - but they’re not a great long term solution. You have to stow them when not in use, or the wind (at least out here) will come up and do something nasty to them. They’re stout, but I just can’t leave them deployed regularly.

Batty Batty Bat!
Apparently, though, a stowed umbrella is a compelling seeming place to sleep the day away, if you’re a bat. I went out one afternoon to deploy them, and as I started cranking it up, I saw a large black spot. I was initially annoyed, thinking it was mold or mildew, but… nope! This is what I found!

This would be the “What on earth are you doing waking me when that thing is still in the sky?” sort of death glare you get from a bat, mid-day, that has gone from a nicely shaded sleeping spot into full sun. It was not happy with me.

And, having shaken off some of the grogginess, proceeded to crawl down a bit and fly off (erratically - I’ve never seen one fly in the day before, but the Hotel Transylvania movies did get it right). Anyway, I suppose I should find a good spot to put some bat boxes. I’m just concerned about the heat - most of our land is sunny in the summer, and high temperature isn’t good for bats. So I need to find some shaded areas for them. But I’ve never seen a bat out here before! Sorry, little guy! I didn’t know you were in there!

That’s the state of the deck - until I get the next parts for it in!
And Lent…
Lent 2024 starts this Wednesday - Feb 14, and goes through the end of March. As is becoming my tradition, I substantially reduce internet use (and computer use) during Lent, and focus on the world in front of me. I’ve written about it before, but I’m finding other people working out much the same (my end of the bell curve seems to be getting crowded lately) - so if you’re curious, I’d encourage taking a look at a recent post from Ruth and Peco over at School of the Unconformed (and subscribe to their substack, if you’re that sort). They’ve laid out a good plan of action for how to take about six weeks off computers, and find ways to do something else with the time. After Easter, you can add things back in, but it’s amazing how much less I find myself caring about stuff after that time. The forum threads I’ve argued in have gone somewhere else or died out, the draw of the doomscroll is dramatically reduced, etc. Try it out, and report back!
Posting will resume in April, along with the Nampa Farmer’s Market. I’ll be out there this year in a booth with a bunch of other people I know. We’re going for a bit of an “old west trading post” sort of feel, and I’m providing what should be some pretty solid quantities of basalt rock dust and biochar, along with ferro rods and blow pokers that weren’t at the market last year. It’s a very much analog, in person, aggressively local (everything must be made or grown within 100 miles of the market) sort of place, and if you’re in the Treasure Valley and haven’t stopped by, you really should check it out this year!
Comments
Comments are handled on my Discourse forum - you'll need to create an account there to post comments.If you've found this post useful, insightful, or informative, why not support me on Ko-fi? And if you'd like to be notified of new posts (I post every two weeks), you can follow my blog via email! Of course, if you like RSS, I support that too.


