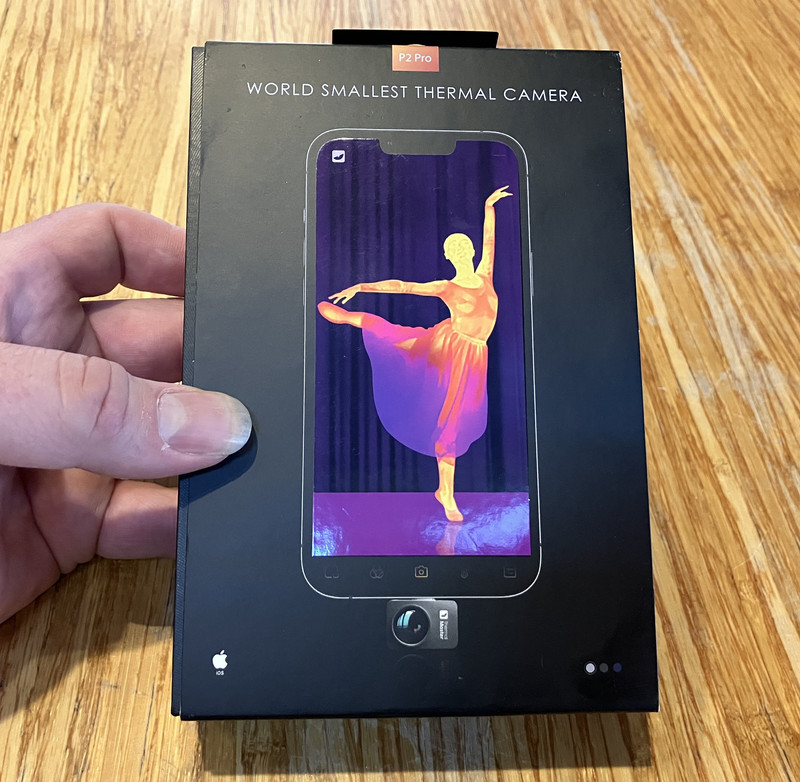

Another post, another thermal imager review. This time, I’m looking at the Thermal Master P2 Pro, iOS version!

This is a very cute little thermal imager for both iOS and Android, with a useful pile of adapters, and the ever-impressive thermal macro lens that’s very handy for close up thermal imaging work.
I received a review unit free of charge, but all the conclusions are mine.
What’s Inside?
The box comes with your usual bits and pieces for a thermal imager of this type: A manual, the imager, the thermal macro lens, and, usefully, a couple adapters and extension cables in the “accessory box.”

The extension cable is useful if you want to stick the imager somewhere small that you can’t fit the whole phone, and the USB-C to Lightning adapter makes this particular imager a bit more future-proof than some others.

I’ve no problem with keeping a phone/laptop/tablet of a particular era around for talking to some particular bit of hardware, and I’ve got an old… I think it’s a Nexus 5X, that exists to talk to cars. But as Apple has largely moved from Lightning to USB-C, and I still have an iPhone SE that has Lightning (as well as an iPad Mini with USB-C), the adapter is pretty darn nice. It should help keep this device useful longer than a Lightning-only device (though, again, there’s nothing wrong with keeping an old phone around to run a bit of dedicated hardware).
Install the app (there’s a QR code in the box, or you can search for Temp Master), plug the device in, and go!
The App
There’s something annoying about dealing with apps, but… such is modern life. Plug the gizmo in, launch the app, and you should see the home screen confirming that the camera is attached.

Most of the “Setting” section can be ignored. Really, all you’re going to want to do is set the temperature scale to your preferred mode (Celsius, Kelvin, or Fahrenheit), and change the default thermal emissivity settings.

The major setting you really should mess with is the “Variable Correction” section under “Temperature setting.” The defaults are bad. Emissivity is set to 1.0, and the measurement distance is set way too short for practical use unless you’re sub-foot distance. I suggest a custom mode with an emissivity of 0.95, and adjust distance (and ambient temperature) as needed for what you’re doing - though just setting the distance to 3m will cover a lot of cases better.

Why 0.95? Because it’s reasonable for just about everything - and far more reasonable than 1.0. The difference is minor, but you may as well tweak it while you’re in here. These settings won’t impact the general thermal image much, but they will impact the temperatures calculated.

Various Features
Like most thermal imaging systems, you’ve got a range of nifty little features you can play with. If you only want to know the temperatures in a certain range of the image, you can draw a box, line, or circle, and see what the temperatures are there. Slightly annoyingly, with the phone in landscape mode, the captions are in portrait mode. I don’t find this nearly so useful in “live mode” as in “go poke an image afterwards in the gallery.” You can do the same thing to images in the gallery, if you want to know the temperatures at various points. You can have three of “any feature type” - three points, three boxes, three lines. Beyond that, it starts removing the oldest of that feature type.

A camera overlay can be helpful to see what, exactly, you’re looking at. Unfortunately, with the way the thermal imager hangs off one end of the phone, and the phone camera is at the other end, there can be some fairly massively parallax errors. You can drag the overlayed image around wherever you want, but it doesn’t fix the fact that the thermal camera is centered on my laptop, and the phone’s camera is far from it.

This app also supports quite the impressive zoom factor - up to 15x. How useful this is… I have yet to be convinced. Thermal images are not high detail, generally. If something is hot, it heats up everything else around it - as long as they’re thermally connected. So I’m not certain if zoom is a particularly useful feature, especially when interpolated like this is. I’d say it’s annoying that the visual image doesn’t zoom, but also, with the parallax errors, it wouldn’t make sense except at infinite distance.

You can add a thermal scale to the image, which is quite useful! It gets you a sense of the temperatures and colors. Why the hottest point in the image is nearly 116F and the scale ends at 112F, I’ve no idea, but… uh… they’re close. It would make sense to me that the hottest and coldest points in the image would correspond with the scale.

Tap the “sliders” icon, and you can adjust the min and max range for the temperature scale! This is, again, useful if you want to highlight the hottest or coldest points in an image, but also, “Red Hot” does the whole “highlight the hot” thing fairly well.

Color Modes
Like most thermal imagers, there are a variety of color modes you can use. I’m only highlighting a few here, because I find them useful. Some of the others are pretty, perhaps, but don’t seem to communicate anything meaningful in temperature, so I don’t use them.
White Hot
The “White Hot” mode is simple: The hotter the pixel, the closer to white it is. Clear enough!

Iron Red
I’m a big fan of the “Iron Red” mode, and generally leave my thermal imagers in this mode unless I’m just screwing around. The color, as temperature rises, goes from black to blue to orange to yellow to white - same as a hunk of iron as you heat it up. I’m not a blacksmith, but this mode just makes sense to me in a way I find useful.

Red Hot
If all you want to know is, “What is the hottest thing in the image?” - the “Red Hot” mode will serve you well. This is similar to White hot, except that the very top of the scale is red. This is useful for looking for hot spots in wiring or such, as they stand out very clearly!

Dim Light
Finally, Dim Light is useful if you’re playing IR Tag late at night. It’s green scale thermal imaging, and is grand fun in a dark field! Or so I hear…

X3 Image Smoothing
One of the neat features of this model is the “X3 image smoothing.” This is selected in the top bar of the app - you can tap the “X3” icon to toggle this mode (and it’s on by default). With it off, you get the normal pixely noise of a thermal image sensor. The room temperature sensors have a lot of noise in general, and you’ll see that in the image as rapidly changing “grain” - it looks a bit like film grain, if you’re familiar with that.

With the smoothing on, though… it looks a lot better! It’s certainly a better looking, sharper image! The variance is removed, and it doesn’t seem to be adding any real lag to the system as I would assume averaging would.

Playing with the macro lens and a laptop cooling port, the difference is also obvious. This is without X3, and you can see the “grain” in the image, quite clearly.

Smoothed, you get the same thing, but rather better looking! The “grain” is averaged out and smoothed, and you do end up with a far nicer looking image out of the process.

Does it matter? For practical troubleshooting sort of tasks, not really. But I have to admit, it does look an awful lot better, if you’re taking thermal images of things! I’ve played with both modes, and I certainly find myself leaving it on. It doesn’t seem to lose any real data, but it looks a lot nicer.
The Thermal Macro Lens
What’s a thermal macro lens, you ask? It’s a magnetic attachment that changes the focal distance (somehow - the physics involved are way beyond me!) from the “infinity” of the normal imager lens to “about an inch.” This lets you get very up close and personal with things.
Again, this is my laptop exhaust port. You can clearly see each fin up close. This sort of focal distance is also great for troubleshooting PCBs - you can see each and every component and see if any are running too hot! If you need it, you need it. If you don’t, well, don’t use it.
Flip The UI!
Alright. Now. My main gripe with this app: Flip The UI! You see how the IR camera is hanging off the bottom of the phone? Give me an option to flip the UI so the camera shutter button (and video record button) are at the top of the phone! This would make it radically easier to use the interface. As it is, it’s a very much two handed interface, unless you want to use the phone camera too, then it’s… awkward. Really, really awkward.
Please. Support flipping the UI, somehow!

Should You Buy It?
Is this a useful thing to own? That’s a hard question, and I’ll answer it with my standard thoughts on thermal imagers.
If you are a DIY-sort, who works on your own stuff - cars, electrical, plumbing, house, whatever - if you stand a decent chance of being known by name at your local auto parts store, Home Depot, or anything like that? Yes. You should have a thermal imager of some variety! The ability to “see in heat” is utterly magical, and allows you to just… see things that you otherwise can’t. Clogged radiator tube? It stands out. Bad electrical connection? Stands out. Faults in your solar panel junction boxes? Glaringly obvious! There’s just a lot of troubleshooting that becomes radically easier when you can see in thermal.
That said, it doesn’t require super high resolution, and IMO you don’t need a range of imagers. If you have one, and it works, that’s probably good enough for almost everything.
The software remains, in my opinion, “slightly annoying.” It’s not broken, but there are a bunch of edge cases it doesn’t seem to handle well, and not being able to flip the UI so the “take photo” button is at the top of the phone, where you’d be holding the assembly, is quite annoying when out and about - but hopefully that gets fixed…
In any case, it does what it claims to, and the X3 smoothing seems to create some very nice images in the deal, as you’d expect from a far more expensive imager!
Right now, it’s on sale for $249 at Amazon, though the price will probably go back up after a bit. Otherwise, you can pick it up at the ThermalMaster store.
Comments
Comments are handled on my Discourse forum - you'll need to create an account there to post comments.If you've found this post useful, insightful, or informative, why not support me on Ko-fi? And if you'd like to be notified of new posts (I post every two weeks), you can follow my blog via email! Of course, if you like RSS, I support that too.


