
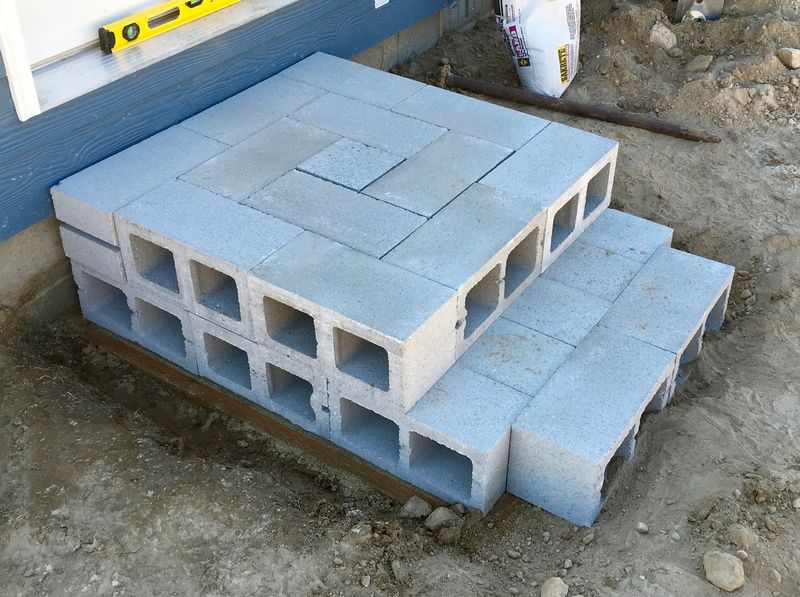
Last week, I discussed some temporary stairs built with cinderblocks to meet code for entry and exit stairs.
But those aren’t the only stairs I built! I also built a set with lumber, because I was sort of tired of working with cinderblock, I needed a bit more height, and lumber seemed an easier option. Variety!

As with the cinderblock steps, I’m no professional. I built these for my house, as temporary stairs, and I needed them to be and meet code. This set took me just about a day to build (I started the previous evening and finished mid-afternoon). So, don’t go about doing this and then complain that they don’t work for you.
If you’re interested in how I built them, read on!
Deck Blocks
The foundation for these stairs is somewhat different from the large sand areas I used for cinderblock stairs. I used concrete deck blocks, which are designed to do things exactly like this.
They’re a small square pyramid, with slots in the top to lay 2x lumber in, and you can fit a 4x4 post vertically in the center.
Because of how the soil around my house is (still fairly loose from the foundation work and backfill), I decided to bury them most of the way for improved stability. Stairs sliding away from the house doesn’t benefit anyone.
You’ll notice some plumber’s strap around the sides. I’ll show you exactly what it’s for later, though guesses are welcome!

Because I have full control over the area, I decided to put the deck blocks all at the same height. This means I don’t have to worry about cutting my uprights to different lengths. If you’ve got a good slope, you can bury them at different heights and cut your uprights to the proper length.
It’s actually quite easy to align and level deck blocks! A 2x4 and bubble level are all you need. Use the level directly in the gaps to make sure the individual blocks are level, then to make sure all the blocks are at the same height, run a 2x4 between them and check for level - like this. This also ensures they’re more or less square to one another - if they’re not, the 2x4 will bind in the slots instead of moving freely. This, of course, assumes the slots are square, but they seem to be pretty good.

Do this enough times, in enough directions, and you find yourself with four deck blocks, nicely buried, and level relative to each other! Or, at least, close enough for temporary stairs.

Building the Frame
Deck blocks in place. It’s framing time!
Because the stairs and uprights are close to the ground, code says I need to use either pressure treated lumber or redwood. I enjoy working with redwood more than I enjoy working with pressure treated, so redwood it is!
The posts are slightly shorter than the landing height - this gives me a bit of slop to work with to make sure the landing is fully level (or, actually, very slightly off-level so it drains).

With the posts cut, the next step is the frame. I built it out of 2x6s, because they seem a good size for such things. It’s probably very overkill, but overkill doesn’t cost that much more than underkill, and I like my stuff to stand until I want it to come down.
The extensions on the left side are for the stair risers.

So, about overkill. Those 2x4 supports are, oh, 13” on center? Give or take. You could throw a proper dance party on this and it wouldn’t budge. At least it’s not an old TV stand I built that was about 11” on center…
The stair risers are screwed into the frame where they contact it. There’s a 2x6 under the bottom end to serve as a pad and make sure they don’t dig into the dirt. I could have used a joist hanger for the center riser, but it didn’t seem needed.

Securing the Posts
I love flying things. Airplanes, helicopters, the works. However, I don’t like my stairs pretending they’re an airplane. And there’s plenty of wind to be had around here.
To keep the stairs from flying off without ripping out the deck posts and a bunch of dirt, I strapped them down.
It turns out, I couldn’t find much in terms of “things to tie lumber to deck blocks.” So I ended up with plumber strap. It seems to work just fine, and it’s galvanized, so it should last a decent amount of time buried in dry dirt.
I used two screws per side.

The first screw in each side served to secure the top of the strap - I pulled it tight, but I can’t really get that much force on it by hand.
However, it doesn’t matter, because I used PHYSICS!

Screwing in another screw lower pulls the strap in, shortens the useful length, and really clamps the 4x4s down!
My stairs may go flying, but it will take enough wind that it’s the least of my problems.

Top Surfaces
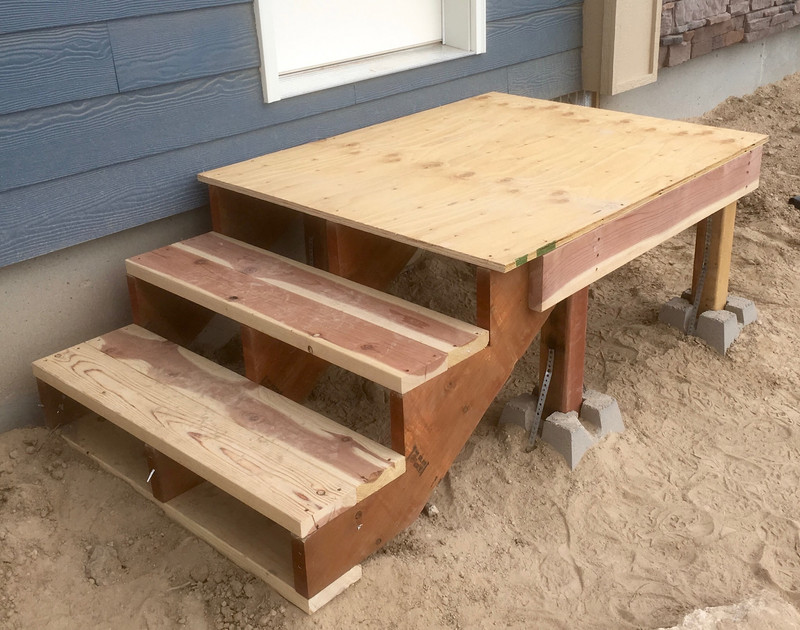
The whole point of the frame is to support the top surfaces - so I installed top surfaces!
The steps are 2x6 redwood, cut to length. They fit quite nicely!

And, for the final top, some plywood!
Done! And passed inspection.
Final Thoughts & Conclusions
Building a set of stairs out of lumber was certainly different from building stairs out of sand and cinderblocks, but I can’t say it was that much faster - at least for me. It’s a different set of skills entirely.
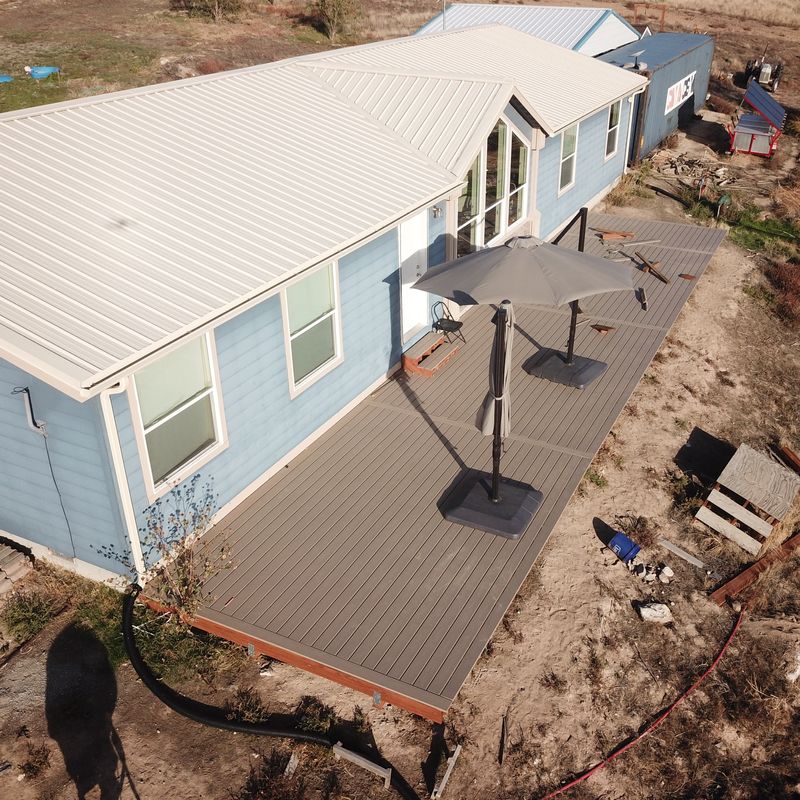
I do like the final result. I think I’d have preferred going with 2x8s or 2x10s across the top for the platform instead of plywood, but otherwise, it’s a solid set of stairs. I won’t be plywooding the deck, when I build it, though…
Comments
Comments are handled on my Discourse forum - you'll need to create an account there to post comments.If you've found this post useful, insightful, or informative, why not support me on Ko-fi? And if you'd like to be notified of new posts (I post every two weeks), you can follow my blog via email! Of course, if you like RSS, I support that too.


