

If your upright or chest freezer stops running, you’ll find out one of two ways: Before everything is thawed and ruined, or after. Hopefully you find out before, but often enough, you discover the freezer has quit when you walk past it and notice something leaking out. Or you open it and realize that it’s very warm and everything is very squishy. Neither situation is good, especially if you have an awful lot of locally grown beef in there.

This is why you should always purchase a freezer alarm with your freezer - so you can get warned before it gets too warm. But, if something goes wrong, quite often you can fix it yourself! The refrigeration systems are usually robust. The surrounding control systems? Less so. Often, disturbingly less so.
I’ve had this upright freezer (a Frigidaire LFFH20F3QWC - who names these things?) for about 2.5 years (with a warranty of 1 year - and, me being me, I didn’t buy the extended super duper mega warranty for half the price of the freezer). It recently quit on me. We caught it early enough and figured out that the thermostat was acting up, and would operate if twisted cold enough. With the help of a freezer alarm (and remote temperature sensor), I limped it along, keeping things frozen, until the new thermostat showed up and I could replace it.
So, if you have a freezer, and are curious as to how they work, join me for this interesting journey into replacing a freezer thermostat - and then pulling a freezer thermostat apart, because why would you ever remove a failed part without disassembling it to better understand it?
Frost-Free Freezer Control Systems
How does a frost-free freezer work? Do you know well enough to reason about what it’s doing? I didn’t - but I do now!
If you’ve ever had an old freezer or dorm fridge, you know that they frost up over time. The coils slowly get covered in layers of ice, which not only interferes with cooling, it takes up a lot of space, and can eventually wedge the door open (at which point things start frosting up a lot faster). My parents had one like this - some of the shelves were also the cold side coils, and we’d have to open it up and thaw it out every year or so.
Newer freezers don’t do this - they manage to keep themselves frost-free, almost as if by magic. But it’s not magic. It’s a series of fairly simple (often mechanical) systems that operate together to thaw the cold-side coils every so often, keep them from building up frost, and therefore keep efficiency high (which matters - frosted coils block a lot of air, and if they get bad enough, they stop airflow entirely). How does this all work?
For a digitally controlled freezer, this is likely to be controlled by a microcontroller. My freezer may find a microcontroller in the loop if it acts up again…
But, for a basic mechanically controlled freezer, there are three parts that control the operation (and can, of course, fail).
The first (and primary) control is the thermostat. This is set with a rotary dial, and we’ll go into the operation later, but this is just a thermostatically controlled relay. When things are too warm, it turns on power to the system. When things are cold enough, it turns off power. The rest of the system works on the power passed through this relay, so if it’s acting up, nothing else is going to work. It probably looks an awful lot like mine.

Next, there’s a defrost controller. This is a timer based relay that counts up when power is applied. It will run for some number of hours normally (running the compressor), then will switch, for a shorter period of time (15-30 minutes) to the defrost cycle. When the defrost cycle is engaged, the compressor is disabled, and the defrost coils are enabled. The defrost coils are a set of heating coils that heats up the cold-side fins to melt ice on them (draining into a drain pan which may then splatter water on the hot side coils - it improves efficiency somewhat). After a defrost cycle, the timer clicks back to normal operation and the compressor starts again.
Running a defrost heater for the whole defrost cycle is wasteful, though. Not only does it warm up the freezer, there’s no point in heating the coils more than is needed to melt off the ice. This is where the defrost thermostat comes into play. During a defrost cycle, the defrost thermostat will shut down the coils when the temperature reaches some set value - typically in the 40F-90F range (remember, this isn’t freezer temperature - just the temperature of the coils). Once this trips the heater off, the defrost cycle will continue without the heater until normal operation beings again.
Reasoning About Freezer Control System Failures
Given that (simple) system, it’s possible to reason about a variety of freezer failures and what might cause them. Obviously, if the compressor side of things has failed, none of this will help.
For the mechanical thermostats, you can hear when they toggle between on and off - there’s a metallic ping of the contacts, which will usually be followed by the noise of the compressor and circulating fan starting up. If you’re having trouble, play with the thermostat first (which should be self evident - it’s the only exposed control). When ours started having trouble, after I found the thermostat, the compressor started right up when I fiddled with the dial, which told me that the issue was likely in the thermostat. Over the next week, while waiting for parts, I had to mess with it repeatedly (about every other day), because it wouldn’t turn the system on properly. Temperatures would rise well above the set point, but reaching in and twisting the knob would move bits around and get the system to come on, at which point it would cool (for a while).
If the system is supposed to be cooling, and the compressor isn’t running, you may be in the middle of a defrost cycle. If the defrost timer is working properly, this will resolve in half an hour or so of runtime (as the thermostat is commanding cooling, but the system isn’t cooling, the thermostat will stay “on” for this time). Check again in an hour and see what’s going on.
Or, the defrost timer may have failed. If it fails, your freezer will eventually stop cooling properly. If it fails in the “normal” position, the compressor will run, but the coils will be badly iced up and won’t cool the freezer properly. If it fails in the defrost position, the compressor won’t run, and the coils be stuck in a permanent defrost cycle.
Finally, if the defrost thermostat fails open, you’ll never get a proper defrost cycle - the compressor will stop, but without the heating element, the coils won’t deice. If it fails closed, the heating coils will work fine, but the freezer temperature will rise more than desired as the heating coils stay on for the entire defrost cycle.
So, now you know the basics of freezer operation! Time to dive in and replace the thermostat.
Replacing the Thermostat
If your freezer looks remotely similar to mine, that’s probably because it’s made by the same parent company. Looking at parts compatibility lists, one might first be struck by how many different brands/models a particular part works for. On further investigation, they’re all by the same parent company, probably built on the same lines, with the label stuck inside being the only major difference between seemingly unrelated appliances.
My thermostat lives towards the bottom of the freezer, and the fancy control knob comes off easily if you tug on it. With the knob off, you can see the cutout in the metal shroud that holds the thermostat. We need to remove the shroud to get the thermostat out, though.

Removing the shroud requires removing shelves. I got free delivery and setup for the appliances when I bought them, so I hadn’t actually messed with the shelves before. They seem like they’re in there pretty well, and a quick wiggling back and forth doesn’t make it obvious how they come out. They do, clearly, come out somehow…

Further investigation revealed that the supporting rods can slide quite far to the right - if you lift them up slightly. The right side shelf support has fins inside that block the shelf from sliding back and forth if it’s all the way at the bottom (reasonably - nobody wants to have 50lb of frozen meat go crashing down if the shelf slides too far), but lifting the shelf allows it to slide far enough to get the other side out! It’s a pretty neat, and very simple solution to the problem.

With enough shelves out of the way, you can get at the whole rear shroud. If you’re fairly quick with the repair, there’s no need to totally empty out the freezer (I just piled stuff on the upper shelves), but you will need to cut power to the freezer! Conveniently, our house has a circuit breaker labeled “Freezer.” This does exactly what one might hope (and the house has a specific cubby in the utility room for a freezer, so this breaker controls the outlet hidden behind the freezer - it’s a quite nice touch in home design).
At a minimum, you need to remove the four screws along the top, and the two along the side. If you want, you can remove the ones along the bottom as well, but I found I could move the shield enough with those still in place to replace the thermostat. Be careful of the rubber gaskets along the side - they ideally need to go back to something resembling the same position. They help insure that all the air comes through the bottom (that opening is the air intake) and goes through the coils.

With the shield pulled forward, you can see the cold side coil (with some condensate on it). Out of frame to the left is the defrost thermostat, and I believe the defrost timer is under the freezer on the back (with the compressor and related hardware). Air flows up from the bottom, through the coils, and then the fan blows it to the top, where it comes flowing out and down through the freezer.
The thermostat is hiding behind the block of foam in the lower right corner, and there’s a metal thermal sensor coming out (the white-ish wire). This leads back to the goofy wire coil thing in the top right, which measure the freezer temperature and controls the thermostat. How? Don’t worry, I’ll get there later!

With the block of foam removed, you can see the old thermostat. It has a pair of wires connected to terminals on the bottom, a green ground wire connected to the casing, and the temperature sensor coming off the back. This is literally just a temperature sensitive relay that turns the system on and off.

The temperature sensor on the rear coils around like this. It’s a hollow wire - don’t bend it too sharply or you could kink it, crack it, or otherwise damage it and make it not work at all.

Unscrew the screw holding the temperature probe in place, unclip the thermostat from the shroud, and swap everything (including the insulation on the probe wire) to the new unit (which hopefully looks about the same). The polarity of the connections on the bottom doesn’t matter, if you happen to get confused, but don’t confuse the two large insulated terminals with the ground tab at the top.

I know everyone hates this, but installation is the reverse of the removal. Just put everything back together just like it came apart. You may want to test the freezer before putting everything back together, though. Turn the thermostat cold, apply power to the freezer, and make sure the compressor comes on (unless, of course, you’re in the middle of a defrost cycle). With everything back together, you should have a freezer that gets cold, stays cold, and regulates reasonably well again!
Ok, boring part over. What’s in this little gizmo that is responsible for keeping so much food frozen and safe?
Disassembling the Thermostat
Now for the fun part - pulling apart the old thermostat to see what makes it click!
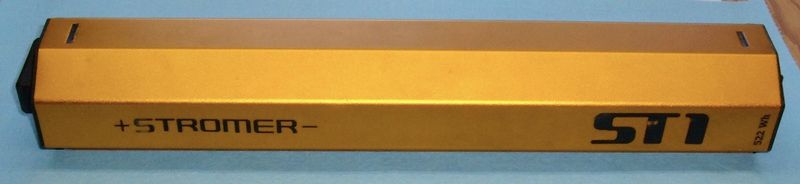
The side of the unit has some part numbers (WFP35.6W-700-121, 1601.WP0049B.B, A03407504), a reminder that you can lick this unit and not get lead poisoning (I’ve ranted enough about RoHS on my blog that I’ll spare the sermon), and the voltage/current ratings. It looks like this is a universal relay - 125V or 250V, supporting what I read as 5A peak, 4A sustained at 250V, or 8A peak, 6A sustained at 125V. At, of course, 50Hz or 60Hz (not that this matters for a relay).

Playing around with it, the center metal “circle” is actually a spiral cam. There’s a metal follower (on top) that slides up and down as you turn the knob. This movement adjusts something internally that changes the temperature setpoint.

Turning the knob all the way to “Off” pushes the lever up on the ramp and into a little detent at the top. It’s not just a “really warm” position, it’s something separate - and, later, we’ll see exactly what! The hard angle at the base of the “Off ramp” makes it obvious when you’re out of the temperature setting range and on your way to shutting the freezer off entirely.

Flipping the thermostat over, the back has this little tube leading off for temperature sensing. The flaps to hold it in place are stamped from the sheet metal, and the whole assembly is held on by some bent metal tabs. I wasn’t sure exactly how far I’d be able to get in without having to resort to brute force and pliers to get in, but it turns out that the whole thing comes apart fairly easily, with this back plate serving to hold everything in place (and the back plate is secured by the little bendy tabs). Well, nobody said I can’t unbend those - so, a tiny bit of work with pliers later, they’re straightened.

With the back off, you can see that inside are a set of Boingy Bellows. Or, possibly, some slightly more technical term. I think it’s a capillary tube thermostat, or a bellows thermostat. Some variant on that. The operation is pretty simple: There’s some sort of vapor in the tube that has a useful vapor pressure varying over the temperature range of interest (water wouldn’t work well as it would freeze). The hotter the environment, the more pressure is in the system, and the harder the little bellows push. The colder it is, the less pressure is pushing on them, and another spring could push back more successfully against them. The rest of the unit is the mechanism for making this happen, more or less reliably, without burning out relay contacts.

The bellows press against this pressure plate in the rest of the assembly. You can see a bit of grease in there, and also some wear marks where the bellows has been rubbing against the metal. If I had to guess as to why this thermostat failed on me, I’d guess that something at this interface was sticking more than it should (or that the bellows were going bad). The thermostat would let the temperature get way too high before turning the compressor on (or before I went in and poked at things). Nothing was obviously wrong, and I don’t have a handy temperature chamber to test things in, so speculation as to the actual failure is just that - speculation.

With the back plate off, the whole thing just starts to slide apart. The relay pulls off the bottom easily, exposing this plastic pushrod. The pushrod runs the relay, which runs the system. But what runs the pushrod?

Pulling things yet further apart (they just slide or clip together at this point), you can see what runs the pushrod. The upper end of the plastic pushrod sits in that weird-shaped hole in the rocker. You can also see, at the top, a loop of spring pulling one end of the L-shaped pivot. The other end is pushed by the thermostat bellows, and the whole thing pivots on hinges made of bits of sheet metal, bent in (you can see them just below the bend).
From this view, the entire operation of the thermostat can be imagined. As the temperature increases, the pressure from the bellows increases. That pushes on the lower side of the L, and eventually increases the pressure enough that the whole thing pivots slightly, pushing the pushrod down into the relay and turning the compressor on. Once the temperature drops enough, the bellows aren’t pushing as hard, and the return spring in the top pulls the assembly back, relaxing pressure on the pushrod.

What controls the temperature range? That’s set by the tension on the return spring - which is set by the tab sliding along the spiral cam rotated by the temperature set knob. Pulling off yet another panel (which just slides a bit and pulls off), you can see how this works. The top tab sticking out slides on the cam, and the further up it’s pulled, the harder the return spring pulls - which means that the bellows need a higher pressure to trip the whole assembly over and turn the compressor on.

I mentioned I’d come back to how the “off” position worked - and that weird dangling piece of metal on the left is for turning things totally off. With the slider pulled all the way to the top, this dangling piece of metal grabs the bottom of the L and secures it in place. No matter how much pressure the bellows exerts, the pivot won’t move, which means the pushrod won’t get pushed, and the relay won’t activate to turn the system on. With the control in any of the “on” positions, the metal latch dangles freely, and doesn’t interfere with anything. It’s a really slick little mechanical solution!

The Relay
The entire upper half of the unit exists to press on a plastic pushrod (plastic, so it doesn’t short the whole unit to ground). That pushrod drops down and presses on the actuating lever of a relay! The actuating lever uses an interesting little spring connector to flip the contact up and down to turn the whole unit on and off.

Here, the relay is open - the pushrod is in the retracted position, and you can see the geometry of that little copper “U” that means the contact carrier is down, and the relay is open.

If you push down on the center tab where the pushrod pushes, eventually the whole thing goes “click” and the contacts are touching! The weird mechanism is required to flip the contacts quickly. A relay needs to be open or closed - with enough distance to break any arcs. If the relay contacts are “barely touching” or (worse, after being closed) “barely not touching,” you’ll get arcing. Air is a really good insulator, but it’s not perfect. Over a very small gap (especially with an inductive load like a motor), you could get arcs traveling that would rapidly heat up and then destroy the contacts. Plus, arcing is really, really hard on downstream electronics - it would probably destroy the compressor motor as well. So, this is one of many solutions to snap things open or closed, and the relay will never spend long in the middle.

Final Thoughts
That’s it! That’s the cheap little bit of mechanical engineering that keeps your half cow, breast milk, tortellini, lunch meat, and everything else frozen!
I’m always interested in different ways of solving problems than I would tend to use. Mechanical solutions, to me, are foreign. If you asked me to design a freezer control system, I’d immediately start thinking about some cheap microcontroller, a sensor or two, and I’d probably do something with an airflow sensor of some variety (hot wire?) to detect when the unit needed defrosting. Put a little digital readout somewhere with some buttons to set it, and have the output of the microcontroller drive either a hefty mechanical relay, or some sort of solid state relay.
This? I definitely wouldn’t design this - but the people who designed this almost certainly wouldn’t start thinking in terms of microcontrollers either.
It’s a neat solution. But I’m not sure I consider it a good solution, in that it failed inside three years (to be fair, warranty was 1 year, so it met the design criteria), and it nearly destroyed a lot of locally grown beef in the process (I’d say there’s still about 1/8 cow in there). Worse, it didn’t have any way to warn me that things were going wrong. A digital system could indicate that something wasn’t as expected, and an old process node microcontroller is a properly reliable little gizmo.
Yes, more expensive freezers have a digital system on them, and can warn you if something’s gone wrong. I didn’t buy one of those because I figured a cheaper freezer would be just fine. It may well be, and this may have been a fluke failure, but… it’s hard to tell.
In any case, I’ve got a freezer alarm now. If this system craps out again, I’m going to replace it with a microcontroller. That’s apparently a thing you can buy (digital freezer controllers), but I’ll probably make one…
And what do you do with an old, broken thermostat? If you’re me, you bend the temperature wire and bellows into a flower to go on the counter next to the hard drive platter flower!

PS: Freezer Alarms
Do you have a deep freezer of any sort? Do you have a freezer alarm? If you don’t, you should spend the couple bucks to buy one, because we nearly lost about $500 of food in the freezer for lack of a $15 freezer alarm.
You can find them on eBay or Amazon, and features vary. I’m a fan of the wireless models, but… have something. I didn’t know these existed until recently, when I realized that someone, somewhere, had to have built a device to tell you your freezer wasn’t anymore. Amusingly, the appliances sales people at Lowes (where we got our stuff) have no idea this sort of thing even exists, and don’t sell any. You’d think this would be an easy upsell with a freezer purchase…

Ours is a single channel wireless model, which means I put this little transmitter gizmo somewhere in the freezer and it broadcasts out the temperature every minute or so. I can see the current temperature, high temperature, low temperature, and I can set an alarm to go off if the freezer gets too warm. The defrost cycle does tend to bring the temperature up a bit, so don’t set it too low or you’ll drive yourself nuts. If you want to monitor a fridge/freezer combo, you can get a unit with multiple sensors.

Seriously. If you have a deep freezer, put food in it, and don’t have a freezer alarm, go buy one.
And now you know more about freezers than you likely did last week!
Comments
Comments are handled on my Discourse forum - you'll need to create an account there to post comments.If you've found this post useful, insightful, or informative, why not support me on Ko-fi? And if you'd like to be notified of new posts (I post every two weeks), you can follow my blog via email! Of course, if you like RSS, I support that too.


