
A little while back, I left things on my office install with the footings poured and the side rails mounted. This week, it’s time to build and mount the As that go on top!

ARM posts are delayed by a bit, mostly because I was up super late last night trying to get pictures of a comet (and succeeding, mostly).
Original Designs & Reconsiderations
Why on earth am I putting A-frames up for solar? Panels point south, silly! Why would you point them east and west?
South facing panels optimize per-panel production, but at the expense of the length of solar day. On summer mornings and evenings, south facing panels are literally lit from behind - the sun rises and sets far north of the east/west line. Yes, I know they’re aimed wrong for summer. I still have plenty of power.

Panels facing east/west can capture this early sun to start charging early, and can hold charging late into the evening - which lets me use my battery less and run more Folding@Home and such. But more importantly, it’s a test for what I’m doing with the house system.
My original A-frame design was… well, let’s just say it was over-complex and failed to recognize that really, I’m building rafters! I came up with a complex way to cut the frames, made a few, and then realized that they were kind of dumb.

It probably would have worked, but the stresses are such that enough load would split the wood - and rafters aren’t built like this for a reason. Throw in the complexity of building them, and I decided to find something simpler and a little bit more proven.
But I did find a bonus praying mantis while getting photos of my abandoned frames!

Waxing the Jig
I built a jig for the A-frames - it’s something to clamp the wood to and hold things tight while gluing the gussets in place. But, with the test A-frames I built earlier, I learned something - wood glue, well… sticks to wood. This sounds obvious, but when squashing a bunch of glue out of joints, I hadn’t really thought through it. Wax paper helps some, as does just scrap newspaper, but I figured I could do better if I waxed the jig. I’m sure there are many ways to wax a jig, but this one is mine!
One old candle I rescued from the trash somewhere, one hot air gun, a cinderblock, and some shade.

Heat the wood, apply wax, repeat. This works better than trying to melt the wax onto the wood, because the wood is then hot enough to keep the wax liquid as it soaks in. I’ll suggest that if you start seeing your wax smoking, it’s a good time to pull the heat off very much right now. I’m not entirely sure how combustible wax soaked wood is, but I’m willing to bet on “far more than I care to experiment with.”

I used a chunk of paper towel to help rub the wax in and push it into all the corners. After a while, no more wax would soak in, so I considered it done!

Building the As
Like most projects recently, this one starts with a bunch of wood and a rather nice 12” compound miter saw. Chop to length with 45 degree angles at one end. These are 5’ long tip to end, and most 10’ lumber is actually slightly over-length (by 1/8” or so). Measure and cut both pieces to length.

The plywood gussets are 18” squares cut in half. The exact dimensions don’t really matter, but try to make them mostly consistent. These are the main structural connections at the top. I’m using exterior rated plywood, though I’ll be painting them as well. Plus, they’ll be under solar panels. Plenty of protection! For these, I used my jig to hold them - though this led to some issues doing the birdsmouth joints later as they weren’t entirely consistent at the bottom.

Instead of my previous “glue and clamp it for a day” technique, this approach uses the simpler “glue it and screw it.” The screws (deck screws) are designed to pull wood down against the backing wood. Using 1 5/8” screws means that they go through the 1/2” plywood and most of the way through the 2x10, but don’t poke out the other side. Spread glue, screw it down, wipe the edges. Quick, easy, and a lot less annoying than the previous technique. I’m trying not to put the gussets all the way to the edge, because they can slide a tiny bit as they’re getting screwed in. The goal is that the 2x8s handle the rail mounting load, not the plywood.
Both the 2x8 and the plywood were sanded and wiped down prior to gluing. This should allow maximum glue penetration and the best strength.
I’ve cut some small triangular pieces for the bottom (trying to fill in to keep the wasps out), but they kept splitting while screwing them in. I’ll use larger ones next time - these were cut from 2x4s.

Screw both sides in, wipe the glue up, and let them dry. If the plywood wasn’t quite tight on a corner, I tossed a clamp on, but mostly the screws do the job of clamping it until the glue is dry.

Finally, just for some added strength (as if these need it), I sank a 4” screw through the joint at the top, such that it had about 2” on each side of the joint. Why not? Screws are fairly cheap, failure is expensive!

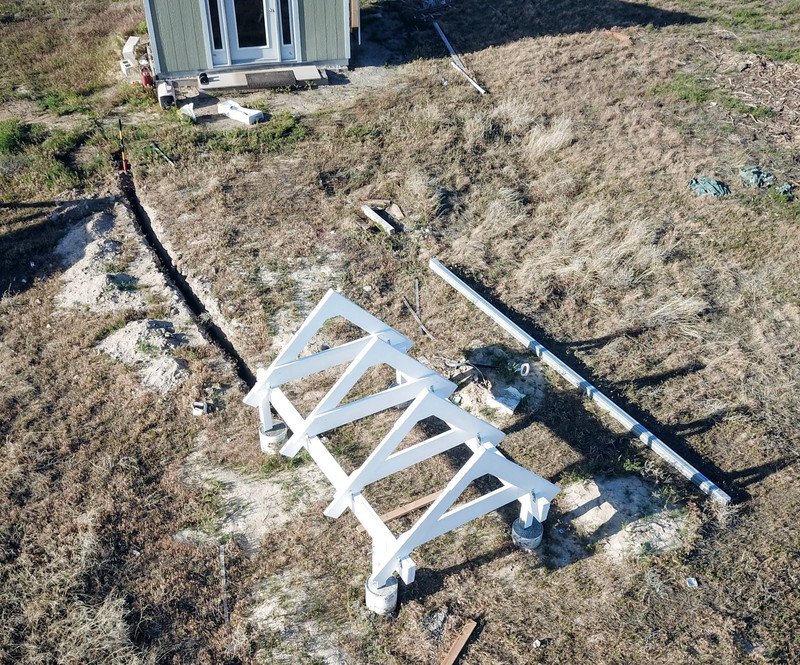
All stacked up and ready to go! The house build will have 18 or so of these - that’s going to be a project.

Birdsmouth Joints and Fitting
The usual cut for a roof rafter is called a birdsmouth cut. Sometimes it looks more like a bird’s beak than this, but mine is just 45 degrees on the frames. Measure for the correct width, cut (which is a bit more complex than I was hoping - part circular saw, part reciprocating saw), and you’ve got something that should sit nicely on the side rails. The weight is sitting on the flat part, which isn’t deep enough to run the risk of splitting the beam. However, weight pressing down on a setup like this will try to spread the bottom apart - and that’s just no good for long term strength.

So, we cut another hunk of wood to go across the bottom! I used 2x10s because I had some laying around, and this was done during the major Covid shutdowns - so no point in running to hardware when I had something perfectly good. Under weight, the top is pressed together (and held by the gussets), and the bottom is pulled apart. With this cross member in tension, it resists the spreading forces.
Yes, this thing is utterly overkill. No question there. I could probably build it with 2x4s and be fine, but the goal is a long service life and not having to mess with it, even in 40 years.

I then proceeded to give everything some good coats of paint - two coats of a good outdoor latex primer/paint to provide for weather protection.
Installation
As usual, the best kind of kill is overkill. These are firmly into the overkill camp, and installation is just as bad. I had a clear day when it was quite windy, which made it challenging - but I got them mounted!
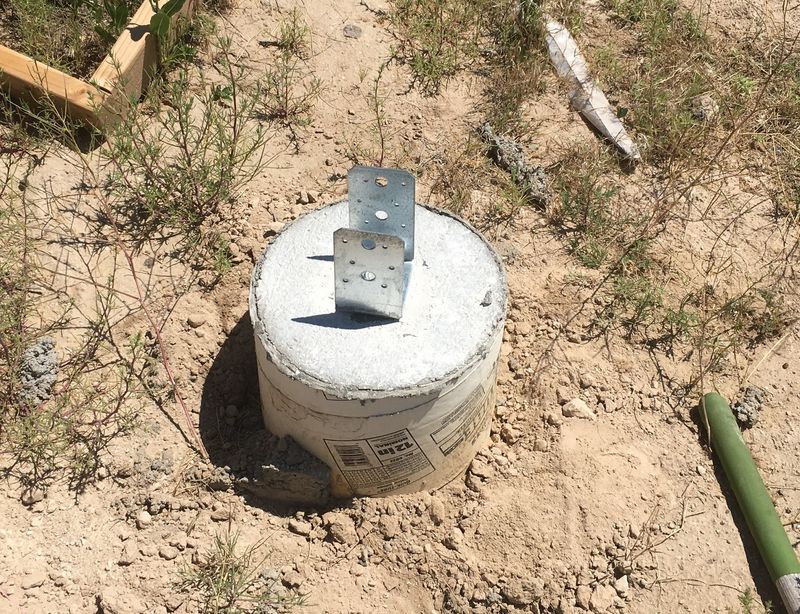
The birdsmouth cuts sit on the side rails, and the crossmember also sits on the side rails. They’re screwed into each other, and I’m using rafter supports to secure them - four per A, which, again, overkill. But wow are they stout once installed!

Out of general laziness and the side rails not being quite perfectly aligned, I installed the two end ones first, then the centers. Square them up to the rails, and start driving the screws. The whole thing is driving into double thickness 2x lumber, so I’m using 2.5” long structural screws. I could probably get away with 3” and not poke out the other side, but 2.5” is plenty to get into the other piece and leaves some room for countersinking if the impact driver is feeling feisty.
For reasons consisting mostly of “I’m sure this is fine” and “I don’t want to drive too many screws too close together and split the wood,” I only use three screws per rafter tie - but these aren’t going anywhere after being tied down!

Weight straight down is mostly handled by the birdsmouth and the crossmember. The spreading loads are countered by the lower crossmember, which keeps the legs tightly into the rails. And, just for good measure, everything is firmly tied together with those rafter ties, so the rails can’t move, and the As can’t move on the rails.
I’d originally intended on doing some diagonal bracing, but after feeling just how firm this is? I’m not going to bother. These things are stout!

What I’ve Learned
Part of the reason I’ve done this small scale setup is to learn what works well and what doesn’t before I go on to build a massive number of these for the house.
Cutting the birdsmouths at the bottom was quite a pain, because the angles weren’t perfectly aligned. I had to deal with each of the As separately, as a fully constructed unit - which wasn’t easy. For the house ones, I’ll be aligning them at the proper distance at the bottom instead of the top.
This means that the jig at the top isn’t really the most useful. I might use it for a clamp base, but I could just as easily put the gussets on and clamp them against each other for half an hour - which would likely be faster anyway.
The little triangles I put in the base are too small and kept splitting. I’ll make them larger for the house frames.
What Else I’ve Been Up To
Two weeks ago, if it seemed like I’d been populating posts with some local wildlife, well… that’s what I was doing. I picked up a used Canon PowerShot XS30 IS - B&H Photo’s used section is a scary place to browse if you’re not in the market.
This is in the category of “SuperZoom” cameras - 24-840mm with optical stabilization that is impressively good. It’s from late 2010 - but it’s still quite new to me, and after most of a decade of cheap point & shoot and camera phones. Yes, they’re nice, but they still lack some of the ability to really just reach out and grab the wildlife. Or the local air traffic, as the case may be.

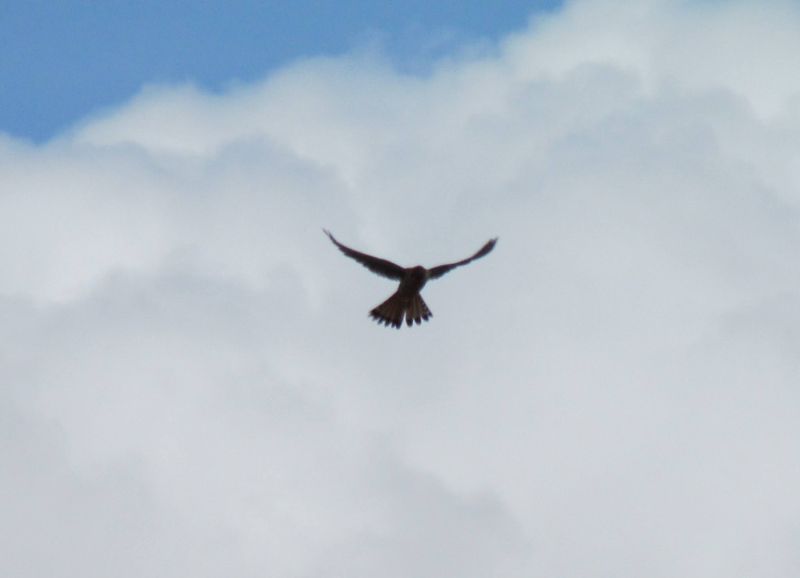
We have a lot of hawk traffic out here. I’m still working on catching them in flight, but I can certainly catch them at rest on occasion! This one was hanging out on power poles, looking for dinner, and generally didn’t like the fact that I kept getting closer. I eventually gave up and went home, but I’ve seen two or three hawks in the air before, all orbiting and hunting. We had a pair nesting on the ground down our hill this spring, but they seem to have found a better spot.

Some of our kingbirds just don’t like each other, which makes for a rather alarming way to wake up some mornings (seriously pissed birds shrieking and fighting over something).

And while my night photography skills need work (use the self timer to avoid shake), comet!

This is about the max of what my camera can do - ISO 1600, 15 seconds. I should figure out how to adapt it to a telescope at some point…

I’m having a lot of fun!

And, of course, collecting farm equipment photos for my son (who will point out any tractor within a mile or two from our house).

The next few posts might be ARM related if I get any finished, or they might just be solar progress. My main focus right now is getting solar done in my free time, because it has to be online by December or I lose my potential grandfathered net metering - and that’s worth a lot to me, even if I don’t exactly agree with it. I’ll still take it if it’s offered!
Comments
Comments are handled on my Discourse forum - you'll need to create an account there to post comments.If you've found this post useful, insightful, or informative, why not support me on Ko-fi? And if you'd like to be notified of new posts (I post every two weeks), you can follow my blog via email! Of course, if you like RSS, I support that too.

