
For this week, let’s take a break to examine the hardware I’m using for my solar install.
The core bits of the hardware involved are ITEK 295SE panels, Sunny Boy inverters, and Midnite combiners/fuse boxes, in various configurations.

ITek 295SE Panels
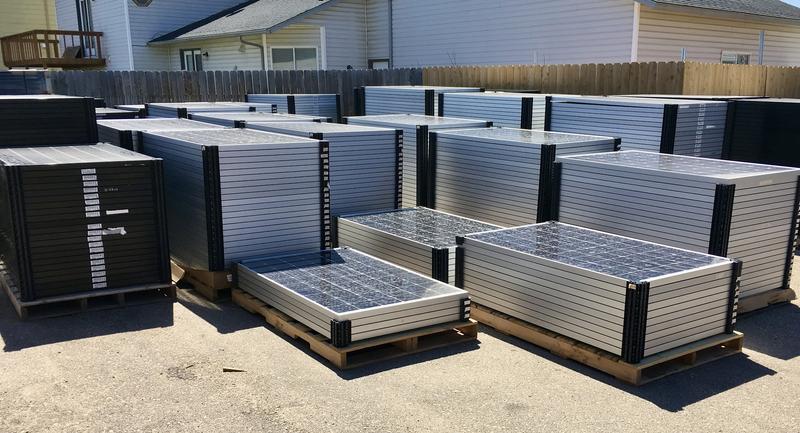
Why these particular panels? I got them in new-old-stock condition (so new, just had been sitting around for a while) last year for something around $0.50/W. There’s a local panel recycler that does this sort of thing, and I rather optimistically bought panels midway through last year - assuming, of course, that plans would get approved. They didn’t. So I had the panels just laying around for a year.

As it turns out, this wasn’t a half bad option. Idaho Power changed their net metering schedules in late 2019, got smacked down hard by the Idaho Public Utility Commission (something about “When we said research to back numbers, we actually meant research, not you pulling numbers out of somewhere and claiming they’re valid”), and the end result is that if I get my system online by December this year, I actually can be grandfathered into a 1:1 kWh based net metering. Because I’d made a financial investment in the system (buying a ton of solar panels apparently counts), I have a window to get it finished.

These panels are actually quite good looking panels - pretty much jet black except for some lines. The house system is going with black frames and rails to try and match the panels, and I hope it looks good!

In terms of electrical data, these are still pretty standard panels. The 295 is the bottom end of the options, and makes some of the math a bit easier in terms of open circuit voltage in the winter, and some of the wire derating due to temperature. I was able to spec 12AWG for most of the runs and still be fine.

Sunny Boy US Inverters
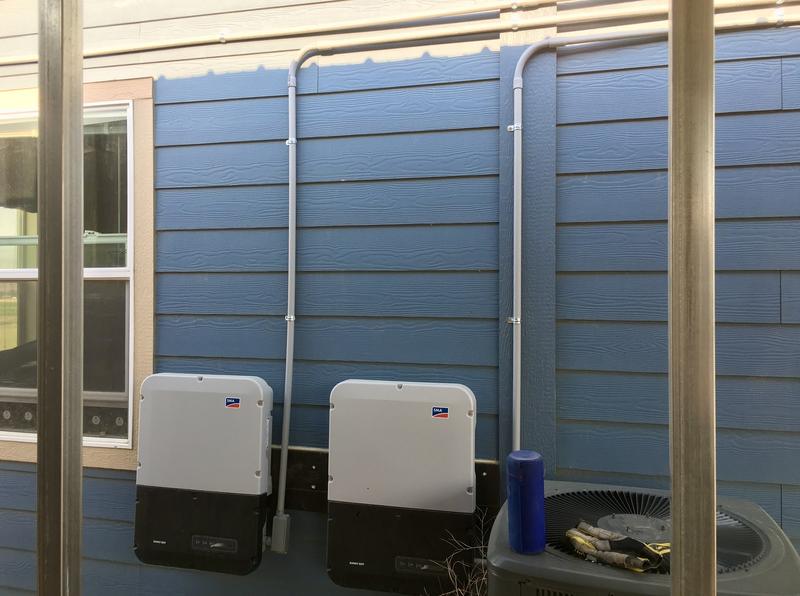
The approved design utilizes a pair of Sunny Boy US-6.0 inverters and a US-3.0. These are string inverters, intended for use with long series arrays of panels, and have the benefit of some limited backup capacity if the grid is down. What’s inside? Let’s take a look!
The first layer in the top of the box is some test data (yay!), a hardware bag, and a manual. Use the manual for your delivered hardware, as it may differ from the online manual.

With the top part out of the way, we get the inverter - which is actually quite a bit larger than I’d realized. They fit where I want them, but “measurements” and “removing it from a box” are two very different methods to learn the size of something. I really like the corner packing - they’ve done a good job with these boxes, and even UPS probably won’t destroy the inverter!

Flipping the inverter over, you can see the mounting bracket bolts on the bottom, and the giant heatsink fins on the back. If it looks a bit like there’s a thermal tunnel to route airflow to them, you’re right - this should have pretty good convective flow when working hard.

The bottom cover comes off (captive screws - very nice!) to reveal the main connections for power, and the low voltage communication interface. This plate is just a simple plastic plate with a good seal on it (plus the display). If you wonder why there are warnings about opening the panels in the cold, my guess is that these seals get hard and then don’t properly seat again.

On the left, a six pin connector offers inputs for three strings of solar - the “big” inverters have 3 MPPT inputs and the “small” inverters have two, but they’re the same physical connector. One of the pairs just isn’t connected on the smaller inverters.
On the right, the three pin connector is for the normal grid interconnection (L1/N/L2), and the smaller two pin connector at the far right is for the backup outlet - just 120V, L/N.
The low voltage interface at the bottom handles communication (WiFi, cell, wired), and handles various control relays/switches. The switch for the secure power supply (backup outlet) interfaces with this box, and it tells the main power electronics what to do.

With the top off (not captive screws), you can see the main power conversion guts. This is a large, high quality PCB. This particular inverter is the 3.0-US - so only two MPPT strings. And you can see an awful lot of “two wires” chasing around.

Compare with the guts of a 6.0-US (with three MPPT strings), and you’ll notice that where a lot of things in the above unit were in sets of two, here, they’re in sets of three. You might also notice that the boards appear the same, with empty solder points in the above unit.

And they have conformal coating over the core electronics. This is very, very good for longevity.

The coating appears to cover the digital control parts, but not the whole board. You can see the end of it along the top, behind the transformer. My guess is that either for cost or component replacement reasons, they don’t do the whole board. Works for me!

Looking more closely at a corner, you can see that below the circuit board, the rear of the chassis is “fully potted” - there’s some sort of goop poured in there that hardens and keeps wires in place. It also serves to encapsulate the DC disconnect switch, and probably serves some thermal purposes as well. Unfortunately, I don’t know what all is down there, and I’m not about to rip it out on an inverter I’d like to work.

Taking a closer look at the solar/AC connections, you can see two screw holes on the left and right that are used to secure the spring-fasteners to the chassis. Why do it this way? As near as I can figure, this allows one to swap the upper inverter guts out without having to remove the wires from their connectors. You can (with the array shut down!) unscrew these connectors, remove them, and swap the whole top part (all the power electronics) quickly and easily. No having to undo connectors, no chance of an inadvertent arc fault because wires touched, etc. I think it makes sense…

The connectors themselves are interesting little gizmos too. It’s hard to tell from this angle (or any photo I got, really), but there’s a spring loaded ramp in there. You push the wires in, they slide in easily, and then lock in place. You can’t pull them out, and they’re firmly pressed against more metal that makes up the contact plate. Does it work? I’d assume so, based on this being a UL listed and reasonably common inverter!

MNPV6-AC Combo
The next bit of interesting hardware I’m using is the Midnite MNPV6 Combo - this is an AC/DC combiner with a large (and satisfying) external switch that can be locked in the off position as required by most power companies. I’m using these as both combiners and disconnects between the inverters and my outside breaker panel.
Are they overkill? Yes. Do they solve a few of my problems and look good in the process? Also, yes. I could get away with a basic disconnect and another panel for a combiner, but why not just do it in something that looks good?

Opening it up, you can see the slider that operates the circuit breakers, and the handle that grasps the slider. It’s really quite simple - rotate the handle, it rotates the thing inside, which moves the slider up or down to open/close the circuit breakers. Screw the whole thing shut, and you’ve got breakers and a disconnect, all in one!

Like all the other Midnite boxes, the front panel holds the sides in, which holds the front panel in. Pull it off by closing it on a screwdriver, and you’ve got the front panel exposed. I tossed a few breakers in for demo purposes.

The back of the false front shows the removable breaker knockouts, as well as how the slider slides up and down. One can easily remove the slider if one wishes, and the non-disconnecting boxes use the same front, just without the slider.

Going further in, you can see the rail on the back that breakers mount on as well as the neutral bar (left) and the ground bar (right). The black material is a bit of insulation that helps prevent any wires from making contact with the box (ground) unless intended, though I’m not sure exactly what valid use case has loose (live) wires that might make contact with the box. If they did, I’d think shorting to ground and popping the breakers would be the right option. In any case, the insulation is easy enough to remove if you don’t care for it. Also, a torque spec sticker!

Neutral and ground busbars are for connecting, perhaps unsurprisingly, neutral and ground wires. Neutral and ground are typically joined at one point (usually the main meter box), and while both (should) have a zero volt potential relative to ground, neutral is designed to carry unbalanced current, while ground is designed to carry fault current. The neutral bar, therefore, is insulated from the box on some risers. You can put small wires in the small holes and large wires in the large holes!

To use a box as a disconnect only, all you need is breakers. But if you’re going to use it as a combiner, you also need the combiner fingers. These are big busbars that connect into alternating breakers to allow you to merge current from multiple different sources. Each pair of two breakers will be L1/L2 of a split phase connection, so if you wire it properly, one phase comes out the left, the other phase comes out the right, and the busbars are far enough apart from each other that nothing arcs across. In theory.

Connecting wire to the ends is easily accomplished with the terminal blocks - they just come in a separate bag and screw in place. Busbars are fun!

The bottom contains the usual selection of knockouts. On this box, the center knockout is for 1 1/4” conduit, and the rest are 1/4” or 1/2”. If you need larger, drill them out!

The back contains a single knockout, perhaps useful for routing power in, or going through a building wall. It also contains some screws for the ground busbar, which prevents it from sitting perfectly flat against a wall.

MNPV6: For Fuses
An almost-identical box is used for my panel string fuses. This doesn’t have the lever on the front, but is otherwise pretty much the same.
Why do I have a fuse box for the panels? Legally, it’s not required. The wires from the panels are capable of handling the indefinite short circuit current, so there’s no specific requirement. However, I need a box to go from PV wire to long haul XHHW-2 wire anyway, and I’d rather have separate fuses out with the panels so I can ensure they remain disconnected while I’m working on them. Mostly, “This is a convenient way to join wires and I’ll use it.”

The false front has no slider but is otherwise exactly the same as the other box.

And, inside? Exactly the same! This is a standard configuration box that Midnite can configure as needed for what exactly you want to use it for!

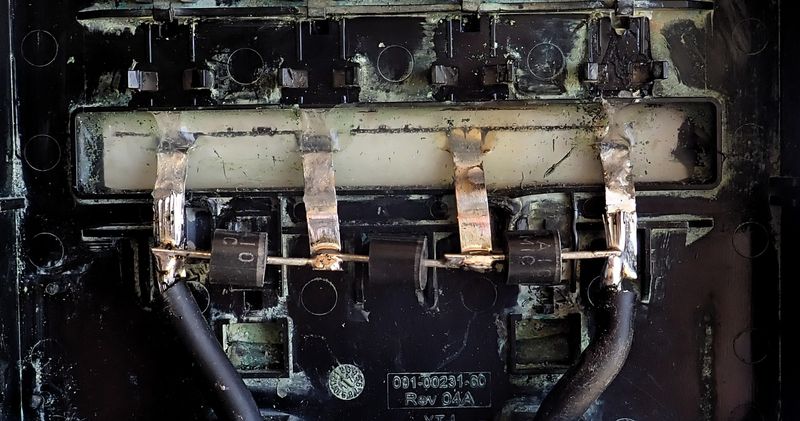
Fuse Holders: Midnite Touch Safe
In these boxes? Fuse holders. These are not the same as circuit breakers - they’re not designed to be opened under load. Midnite has some rather stiff warnings about opening fuse holders under load. These are not designed to break an arc, and solar is a DC arc. AC arc faults, in general, will tend to self extinguish. The zero crossings of current/voltage tend to make the interruptions easier, though given enough potential they can arc for a while. DC arc faults? Congratulations, you’ve made a welder.

Specs include fuse type (10x38), wire gauges, and voltage ratings.

The fuse slides down in here, then the fuse holder pivots shut. A good press later, the fuse is making solid contact with both ends.

And, finally, the fuses! These rather chunky little bits of metal are designed to fail before the rest of the system. Should they ever pop? No, but that’s why they’re here - to pop before something else does.

MNPV3
I also have a MNPV3 for the south frames. Same thing as the MNPV6, but narrower!
That’s the Core!
And in two weeks, I’ll cover attaching most of that stuff to the side of the house!
Comments
Comments are handled on my Discourse forum - you'll need to create an account there to post comments.If you've found this post useful, insightful, or informative, why not support me on Ko-fi? And if you'd like to be notified of new posts (I post every two weeks), you can follow my blog via email! Of course, if you like RSS, I support that too.


