
This week and next week, I’m talking about the Raspberry Pi 3. This week, my focus is the thermal throttling behavior - and how different heatsinks impact that.
I’m a big fan of the Raspberry Pi platform - especially the 3rd generation (“Pi3” at many places in this post). They make great little “light utility” desktops, and great little utility servers. They’re cheap, they’re “fast enough,” and they’re “good enough” to make them fit a whole bunch of roles fairly well. Plus, they draw basically no power when idle - which matters, a lot, to me, since my office is solar powered and overnight power draw is a thing I’m concerned about - says the guy with the 30W idle draw beast of an inverter…
One downside to the Raspberry Pi 3, at least, is that it runs hot. It’s not a big deal if the system sits mostly idle - the little ARM chip is efficient enough that temperatures aren’t an issue. Load it up, though, and you’ll almost certainly see the little thermometer icon on the right side of the screen before long. On the Raspberry Pi 3, that means it’s already thermally throttling back performance - and on stock Pi cooling (none or a dinky little heatsink), it’s not at all hard to get that icon to light up.
There are some standard small heatsinks that are sold with a lot of the Raspberry Pi boards - and they’re only barely better than nothing in terms of throttling. But, fear not! I’ve found a pretty good solution. A cheap, $8 solution (shipped from eBay). And it solves another problem in the process - this case and heatsink combo just looks incredibly cool!

Is it any good? Does the heatsink really work? How do you detect Raspberry Pi 3 throttling? Read on!
Raspberry Pi 3 Thermal Issues
The Raspberry Pi platform, if you’re not familiar, is a little ARM system on a small form factor board. It’s gone through several iterations, and the current iteration, the Raspberry Pi 3, has a quad core 1.2GHz ARM processor with 1GB of RAM. If this sounds nicely powerful, well, you’re right - it is. Especially given that you can get one for under $40 shipped (or a bit more if you need a power supply and microSD card).
The Pi3 is actually too powerful. The chip has a problem with sustained high load - it rapidly gets too hot, especially in warmer ambient conditions. Push it hard, and you’ll eventually see a little thermometer icon on the screen (at 80C). With recent firmwares, this little icon means that the chip is throttling the clock rates back. It’s slowing the chip to reduce heat and keep the chip cool. Slower clock rates mean slower performance, obviously. And that’s just not good for anyone! Emulators stutter, browsers slow down (even more), kernels take longer to compile…
Raspberry Pi heatsinks are common enough in kits, but based on my testing, the small ones (shown here) simply don’t work very well. I have one Pi3 mounted vertically on the back of my desk with a small heatsink, which is a good orientation for cooling (the air can freely flow through the fins). Despite this, I can drive the temperature up to the thermal throttling point rather quickly with sustained heavy CPU load. If it’s warmer, the throttling point comes earlier.

Without the heatsink, a Raspberry Pi heats up a bit even faster, but not by that much (the heatsink isn’t doing that much). I’ve got another Pi3 in a small case without a heatsink, and… well, it’s not something to load up for very long. These are all running at stock clocks and voltages, so nothing particularly exotic going on - no fancy overclocking or anything like that. The Pi3 just cannot stay cool without extreme measures.

Measuring Raspberry Pi 3 Throttling
If you’ve been around the Raspberry Pi scene for a while, you’ll probably have seen various throttling analysis posts. They’re quite common, but anything (recent) using the /sys/devices/system/cpu/cpu0/cpufreq/scaling_cur_freq value for detecting throttling is missing all the data - that’s not where one finds throttling! It may have been at one point, but in 2018? Nope.
You want ‘vcgencmd measure_clock arm’ to show frequencies! This will show something very different from the scaling_cur_freq value in thermally throttled cases (which, for the Pi3, is pretty much any heavy load).
Unfortunately, the reality is that a Raspberry Pi 3, under sustained load, will throttle without a fan. Period. And probably even with a fan, if you put a worst case load in it (assuming it doesn’t brown out your power supply first - sagging supply voltages will also trigger throttling).
But what you can do is increase the delay before it throttles, and reduce the magnitude of throttling. Does this heatsink do it? That’s what I’ve set out to explore!
Stress Testing a Pi3
There exist plenty of ways to stress a Raspberry Pi CPU. The worst one in terms of power consumption (and therefore heat dissipation), by far, is a little tiny program called “cpuburn-a53” (fun with a few lines of assembly). You want to cook a Pi3 CPU, cpuburn is the most pathological case. It will absolutely roast the CPU. Don’t say I didn’t warn you!
wget https://raw.githubusercontent.com/ssvb/cpuburn-arm/master/cpuburn-a53.S
gcc -o cpuburn-a53 cpuburn-a53.S
./cpuburn-a53
This draws a ton of power, loads the CPU to 100%, and will punch your temperatures through the roof (into throttling) in less than a minute with a typical heatsink - if it doesn’t brown out your power supply first. If you want to watch this process, you might try this command in another terminal:
watch -n 1 “vcgencmd measure_clock arm; vcgencmd measure_temp”
This will show you the current clock and the current temperature. When idle, the clock will sit at 600MHz. Once the system has some load, that will rise to 1200MHz, at least until the temperature hits 80C. Then, you’ll see the clock rate drop as the frequency rises, eventually stabilizing somewhere around 82C with a clock rate determined by your cooling.
With the small heatsink, I see the frequencies cycling in a loop from 600-900MHz, cycling from 900MHz down to 600MHz over a few seconds, and then back up. With the large heatsink and new case under test, it won’t drop below 1000MHz in identical ambient conditions (65F or so).
However, cpuburn is a very synthetic test, and not at all realistic. I chose to do my analysis with something a bit more realistic - compiling the Linux kernel. I actually had exciting reasons to build a new kernel, but I’ll talk about that next week.
My kernel builds are pretty standard (I simply enable a few extra features). To load up all the cores, I ran the make with the “-j4” parameter to use four threads.
make -j4 zImage modules dtbs
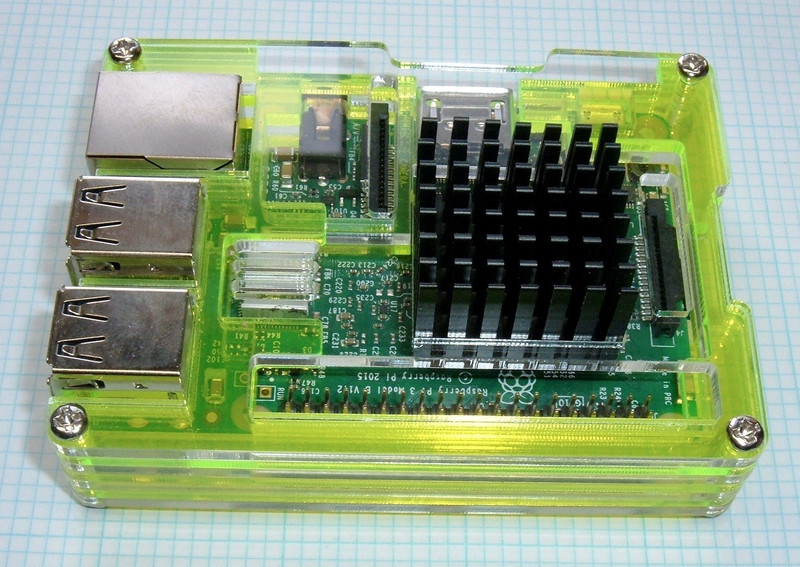
Assembling the “Moster” Case
I’m always one to buy something that looks like it could be decent on eBay and try it out. The “Moster” case seemed like one of those things that could be good, or could be junk. At the very least, it looked more promising than other heatsinks I’d seen, and the case design (stacked acrylic) is unusual - worth messing with!
To test out the heatsink, I need to assemble the case. This particular case ships stacked together (at least, mine did). It comes with the large heatsink, as well as two smaller heatsinks (one for the memory chip on the backside, one for the USB controller chip that, on the original Raspberry Pi, got excessively hot on some systems because it was powering the system). You can put them there, or put both on the memory chip - either way is probably fine. There’s a vent hole for the USB controller, but the newer Pis don’t suffer from hot USB chips either.
But, if you compare this picture to the title picture, you’ll notice the case looks very dull. This is because it has protective coatings on all the acrylic pieces! You can remove them, or, if you prefer the dull look, you can leave them on. It doesn’t make any functional difference. I removed them, which is a project that requires a bit of patience (and a sharp fingernail).

I’m particularly excited by what I see on the bottom of the heatsink! Instead of a thick, foamy piece of tape (that is sometimes better at insulating than transferring heat), there’s a little copper square and very thin adhesive on both sides! This bodes well for heat transfer. The copper spacer is there so the (large) heatsink doesn’t contact any of the passive components around the chip. Most of the heatsinks for the Pi are very small because they limit themselves to the area over the actual chip, but this little shim allows the use of a much, much larger heatsink.

With the bolts out, the case comes apart - this is when you might want to remove the protective film from everything. I left it on for this picture because otherwise you can’t see the clear pieces against the background.
Try to keep the pieces in order and properly oriented while working with them. You can puzzle them out if needed, but it’s a lot easier to just keep them in the proper order while working with them.

With the film removed, the case looks a lot more impressive! The cutouts fit the ports tightly, and the precision of the unit is excellent. I’ve worked with some other acrylic Raspberry Pi cases that form a more standard box, and they’re a lot more fragile than this design (snapping a tab off is pretty much given if you throw the unit in a bag to take anywhere). The stacked acrylic design here is much more robust, and I’d happily use this case for something that I took with me in a backpack or saddlebag - the acrylic would get scratched, but the case would protect the Pi wonderfully. It’s a far better design for a case (plus, looks better).

Install the two smaller heatsinks where you prefer, but don’t install the big heatsink yet. It fits the case opening very precisely, so you want to install it after assembling the case. Before you install the heatsinks, wipe the chips down with a little rubbing alcohol wipe to clean them off for best adhesion (I don’t believe dousing the Pi in ~Everclear~ sousaphone deicing fluid counts). Then, start assembling the case. If you’ve kept the layers in order and aligned properly, simply restack it as it came, but with the Raspberry Pi inside. If you scrambled them… well, you’ve just created a puzzle. The top and bottom pieces are easy to identify, and the others stack up reasonably obviously while alternating colors. It’s really, really well designed.
When you put the screws in, don’t clamp them down hard! Acrylic is fragile, and will crack easily (or, at least, spiderweb around the screw hole) if you crank the screws down. Finger tight plus about a quarter turn is enough here! If you’re going to be carrying the case around, use some blue thread locker on the nuts so they don’t back off. For general desktop use, the nuts shouldn’t go anywhere, so there’s no reason to use a thread locker.

Once the case is together, install the big heatsink. It will fit fairly tightly in the hole, aligned over the main CPU, and should stick to the CPU very firmly!
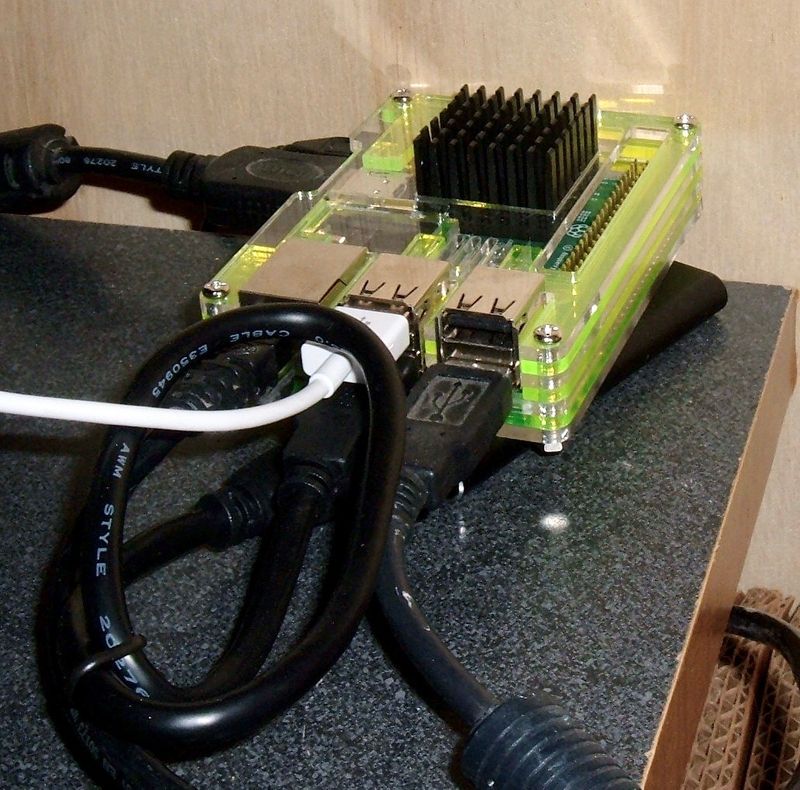
I really like that this case leaves the GPIO pins open, as well as the camera and display ribbon cable connectors. It’s not compatible with a lot of hats, due to the heatsink size, but you can connect other things in with this case, which isn’t true of a lot of the cheap cases.
How Does it Work? Absolutely!
On powering the Pi3 back on, the first thing I noticed was the idle temperature of 30C (after boot). Wow! That’s definitely lower than I’m used to seeing (normally mine sit around 45-55C after boot).

As mentioned above, I couldn’t get the CPU to throttle below 1GHz with the cpuburn utility either. It’s clearly working very well at first glance.
But what about the all-important kernel builds?
Kernel Build Thermal Analysis
It’s not a proper analysis post without some good data, and I brought plenty of data here! While the kernel was building on the two different systems (one with the standard heatsink, one with the Moster heatsink), I logged temperature and frequency data. Kernel builds will mostly use all the CPU cores (“make -j 4” is the magic incantation here), but there are some serial steps that relax the CPU load a bit and let the CPU temperatures drop.
Reference: The Small Heatsink
The small heatsink is the reference case here. Temperature is on the right (with the red line), frequency is on the left (the blue line). The frequency stays up at 1.2GHz for a very short period, then starts dropping rapidly (“falling off a cliff?”) as the core heats up. It spends most of the time under 900MHz. The few dips to 600MHz at the end are the chip being idle enough to drop back - that’s not throttling behavior, just idle behavior. At best, you get 75% of rated performance (which is still better than no heatsink).

Heatsink Under Test: The Moster Heatsink
With the new heatsink, the chip still gets hot and throttles, but the throttled frequencies are much higher - it only drops below 1GHz a few times, and only briefly (performance is about 87% of peak, though it holds peak frequency for much longer at the beginning). Plus, there are more times when the chip can “race to idle” and drop back to 600MHz in this graph. That cools the chip enough that it can briefly run at 1200MHz when loaded up next. It’s a really big improvement, but it’s more obvious with the traces overlaid on the same graph - which I’ll show next!

Comparing the Heatsinks
With all the data on the same chart (please note the chart doesn’t start at 0), the difference between the two heatsinks becomes quite clear! Not only does the big heatsink let the chip run at a far higher frequency throughout the test, it lets the chip run at full speed for far longer at the start than the small heatsink. As one might expect, this means the kernel build finishes a good bit faster than the slower chip - there’s nearly a 10 minute difference on a two hour build.

Zooming in on the first 1000 seconds makes the real differences crystal clear. With the small heatsink, the chip started throttling around 150 seconds in - two and a half minutes. At that point, the frequency went down very quickly, passing through 1GHz by the 5 minute mark.
With the large heatsink, throttling didn’t even begin until nearly 10 minutes had passed, and the rate of drop of frequency was much, much lower as well. The large heatsink benefits both from thermal mass (it takes more energy to heat it up), as well as from the massively improved radiation that means it can dissipate more heat. This is why the chip can run faster with the large heatsink - it can dissipate more heat at a given temperature.

Raspberry Pi 3s Need Heatsinks - and Benefit from Cool Cases
I know the Raspberry Pi 3 doesn’t really need a heatsink, at stock clocks - at least as long as it sits idle for the vast majority of the time and only runs faster in brief bursts.
HOWEVER. If you actually use it for anything beyond looking pretty and sitting idle (running a browser, running an emulator, anything that involves actually using the system), the Pi3 will throttle - badly - without a heatsink. It will throttle with the typical heatsinks sold, for that matter. It even throttles, eventually, with a massive spiked heatsink on it! There are some passive cooling cases that will keep it from throttling, but they use the entire top of the case as a heatsink and don’t allow easy access to the GPIO pins. Those may work for some people, but I do actually use my GPIOs on occasion.
So, for now, this is the most reasonable option I’ve found to both protect my Pi and keep the CPU up at maximum clock rates. I tend to have bursty loads and ten minutes of maximum CPU time before throttling works for me, though it would be a limit for emulators and other systems that run wide open for long periods (you might want one of those passive cooling cases).
The other important takeaway here is that the throttling, at least for current generation Pi3 firmware, starts at 80C. By 85C, the chip is down to 600Mhz, but as soon as you see the thermometer on the display, the chip is starting to slow down. This is different from the older Pi behavior. Keep your chips fast!
Beyond just keeping the chip cooler, this is a seriously cool looking case.

There’s only one seller of this case I’ve found so far, and I have no idea how long it will stay on the market - but, for now? For $8 shipped? This case and heatsink combo is one of the best deals out there for a Raspberry Pi 3 case and heatsink!
Do you have one of these? Have you found something better? I’d love to hear what works for you. And don’t forget to check back next week to find out why, exactly, I was recompiling kernels!
A Quick Note on BionX
I feel I should also comment on the fact that BionX has entered receivership. It’s quite unrelated to this post, but timely. They appear to have fired all 80 employees (or told them to stop showing up to work and stop expecting paychecks, one of the two), and are fishing around for a buyer.
What this means is that if you own a BionX system, good luck. I really wish I had more to say. I’ll certainly keep doing what I can to help people keep them on the road, but… they are a perfect example of a “throwaway” system. Which I’ve accused Tesla of being. The BionX system is radically simpler than a Tesla, and I expect no end of contact in the coming months from people looking for any solution at all to the fact that their $2000 ebike kit has stopped working, they can’t get warranty service, and nobody works on them beyond replacing entire modules.
Back in 2016, I posted a small rant about repairability. Like the iFixit folks, it bugs me when new things come out that are hard to fix. BionX makes bikes that are hard to fix. We’ll see how maintainable they are with BionX down for the count, and presumably less interested than ever in supporting their old customers if they do come back.
It’s been a long while since I’ve posted about ebikes beyond battery pack teardowns, partly because I haven’t done much interesting in that realm lately, but there’s an awful lot to be said for the “Chinese Standard Interfaces.” Volts & Amps to the controller, a 5V Hall sensor throttle. Or something like the BBS series mid-drives, which have been quite hacked apart and are repairable.
Consider your vulnerabilities to unmaintainable technology as we continue our slide down the backside of empire. I hate to end this on a downer, but this is exactly the sort of thing we should be thinking about - now - before it’s too late.
Comments
Comments are handled on my Discourse forum - you'll need to create an account there to post comments.If you've found this post useful, insightful, or informative, why not support me on Ko-fi? And if you'd like to be notified of new posts (I post every two weeks), you can follow my blog via email! Of course, if you like RSS, I support that too.


