
One of my goals with this blog is to also cover things I’ve done that didn’t work. It’s common in blogs to talk about a build, and leave it at “I expect this to work well!” - but it’s fairly rare to find someone saying, “Nope. That was a terrible idea, and I’ve reworked it.”
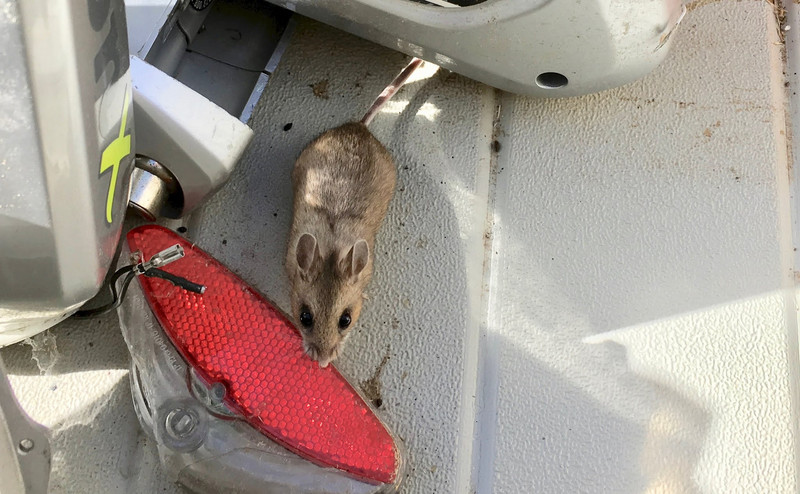
Well, my storage deck box, the way I had it set up, was a terrible idea. Mostly because, with the bike wheels leaning against the rear wall, it eventually racked over enough to open some gaps at the bottom. What’s the problem with gaps at the bottom? Deer mice. This cute little guy. And his entire family, plus the extended family. It’s an awful year for them out here, and we’re finding them in absolutely everything. Including my deck box.

I don’t mind them finding shelter, but I’d rather they not find shelter in my deck box, because they leave droppings all over everything, shred cardboard/plastic for nesting material, and chew on wires. They didn’t do much damage, but… still. Not OK. So I fixed the glitch - and improved a deck box in the process!
Deck Boxes for Storage
When I was building my office, I needed something to store batteries in. Instead of building something custom, I just bought a $100 desk box from Home Depot (this sort of thing is way cheaper to pick up locally), put a sheet of foamboard on the bottom to help insulate things thermally from the ground, and tossed batteries in. This has been working great!

So, logically, when I needed more storage out by my office, I added another deck box under my solar panels. Toss stuff in there, access it when needed, and it was working fine for storing random ebike R&D parts, generator tools, network cables, Nerf weaponry, and the like. You can see it in the lower right corner, behind a set of panels. Yes, the two banks are aimed rather differently. No, it doesn’t make as big a difference as you might think.

Oh Dear! Deer Mice!
Unfortunately, a few weeks ago, I was rooting around in there when something went scurrying past. I had my suspicions about what it was, because if it’s a little critter, it’s almost certainly one of these deer mice, but moving stuff around indicated that, yes, I do have critters living in this box, and, yes, they’re making a mess of things. Yuck. Also, did I mention yuck? They can live outside, I’ll think they’re cute (from a distance - they tend to carry all sorts of nasty diseases for humans), but in my storage box? No. Not acceptable.

I finally had time a few weekends ago to empty the box out, and figure out how they were getting in (I chased two or three out, and I think there were more in there at some point). I’d noticed the box had racked back slightly, but what I hadn’t noticed was that the tilt meant that there was a gap under the side panel. A mouse sized gap, because those little critters can get through anything their head fits through. I’d stacked ebike wheels against the rear of the deck box, and that was enough, over time, to separate things such that mice could get in.

I mean… they are really cute! Big eyes, big ears… but they crap all over everything and rip up any sort of paper or fabric they can find for nest material.

Disassembling and Cleaning
My initial plan was to move stuff out of the deck box into our shipping container, since I had no idea how mice were getting in, but once I found the gap at the bottom, a better idea formed - I can just strengthen the box so it doesn’t rack over and leave gaps!
Before that, though, I had to clean it out. Because, seriously, lots and lots of mouse droppings. There have been a lot of mouse-months in this box, and it shows.

Disassemble box, move to lawn, hose down. Spray down until clean. Then move over to my normal construction zone by the shipping container.

Also, I found a Canada Thistle I need to kill. The things creep via their roots and are quite the pain to kill off if left alone. Sadly, I may need to poison or rip up some entire areas to get rid of them - they’re persistent and hard to kill. Pretty, but also pure evil.

Strengthening the Box
My plan for strengthening the box without a trip into town involved the fact that I’ve been trying to buy more lumber than I need for projects, with a goal of keeping a useful stock of material around for random afternoon projects (like this). Before I had good storage, I had to go into town to get lumber for everything. Now that I’ve got the shed and shipping container, I can keep enough material around to complete small projects without a trip to town. It saves me time and money (the lumber hauler is not particularly cheap to run). When I fit out the inside of the shipping container with shelves, part of it is going to be set up as a “lumber yard” so I can keep even more around. There’s nothing wrong with keeping a dozen or two assorted 2x4s, 2x2s, and 4x4s around, especially if you’ll use them eventually. When we first moved out here, I had to run into town for every project, often multiple times, and that’s just inefficient.
In any case, the main problem with these deck boxes is that the sides aren’t particularly well secured (to the base or each other). If you have them on perfectly level ground and don’t load the sides up at all, they’re fine (so, you know, “using them for the intended uses,” or at least a battery box with weight only on the bottom), but the sides don’t latch into the bottom particularly tightly - and that’s what caused my problem.

How do you solve it? My current theory is that putting a 2x2 frame around the inside corners, gluing them down, and screwing them into place will prevent any relative motion and will keep the deck box tight and relatively critter-proof!
Unfortunately, some of the pieces are a tiny bit bent from sitting skewed. It’s not a problem, but if I’d done this when I first got the deck box, things would have matched a bit better. Oh well!

Gluey, Screwy, and Louie
Related: If you haven’t seen the new Duck Tales series, it’s well worth watching! I really enjoy what they’ve done with it.
Step one: Measure inside box.
Step two: Cut 2x2s to length.
Step three: Apply some construction glue. I also try to keep a few tubes of this stuff around, because it’s useful often enough. I glued two adjoining sides of the 2x2 so it would be fully secured.

Step four: Put the piece of wood in position. If you’re careful, you can do it without making a mess. If not, you smear a bit of construction glue around as you slide things into place. It’s a deck box, but you’d still be better off not making a mess inside.

Step five: Screw through the outside of the deck box into the 2x2. It’s harder to hit than it seems like it should be. You don’t need a ton of screws, just enough to pull things tight for the glue to set up and to keep things from shifting. Try not to drive the screws all the way through the outer layer - it’s possible, but not recommended. I also put a few in from the bottom to hold the lower framing down.

Do that with a few 2x2, and eventually you end up with a substantial amount of internal framing! I considered, briefly, adding some diagonal braces (or fully framing it in across the top), but experimenting with it at this point indicated that it wouldn’t rack back and forth at all, for any reasonable amount of force on a deck box, so I stopped here. The screws hold the corners tightly together so they can’t slide relative to each other, which was the main problem.
I probably could have accomplished my goals with just the uprights, but that would still have allowed the bottom to separate over time, and I really just don’t like mice in my stuff. Having the bottom corners secured means that it won’t come apart without an awful lot of effort (more than will be reasonably exerted by stuff inside).

Those Darned Deer Mice!
What sort of things do these critters do beyond crap everywhere?
Under the box, there were a few tunnels. My initial thought, having seen the openings for the tunnels, was that they’d gotten through the bottom of the box, but it turns out that they just went under it, instead of around… for some reason.

The main problem is that they shred anything paper or plastic to nest. And then crap. This is a box of old ebike parts (and stuff I had laying around to evalute) that’s gotten torn up. There wasn’t much damage, but I had to shake everything out and toss a lot of bags/boxes that were half gnawed.

The only real damage I found was a bit of bike light wiring that had been torn apart. It’s easy to fix, and it’s not that big a deal, but it’s definitely not going to work as-is right now (it’d probably short out the battery, which isn’t any fun with lithium - on the plus side, 24AWG is a fuse at some fairly low current level).
I’m still not sure how long they’ve been in the box - I don’t have a good metric for just how rapidly they do damage. But, given that I’ve chased two out, I expect there were a few more in there at various points.

Repacked and Ready to Go!
But, after a bit of afternoon project time (slowed substantially by the process of documenting the project and the 3 year old “helping”), the box is clean, reinforced, and repacked with random ebike parts that I need to get around to analyzing or tearing down. I moved some stuff that didn’t make sense in this box out (monitor stands for my monitors that are now wall mount, and some network cable), reorganized it slightly, and I have plenty of room for other stuff in there.

But, just to be sure, I tossed a few local hunks of basalt (I had to haul them at least a few feet…) on the corners to try and discourage anything coming in the top. We’ll see how it works! The box is far, far more sturdy feeling than it was before, and I can’t come up with an easy way for mice to make their way back in - short of literally eating through the plastic, which is a somewhat legitimate concern.

It’s been holding for a few weeks now with no signs of resumed mouse infestation, so… hopefully!
I’ve also been fighting some mice in the trash trailer, have chased one out of our car (!), and talking to other people around here, they’re just really, really bad this year. My guess is that there was a bit of a population boom from the excessive growth last year, from the really wet winter before. But, in any case, I’ll keep sealing stuff up over time as I find it to be a problem, and I’ll happily use assorted styles of traps to discourage them. I don’t want to poison them because I like our property cat, who enjoys playing with them as any good cat should, but I also don’t want them making a mess of things.
Book Review
Red Storm Rising by Tom Clancy
Backfire. Tomcat. Badger. Fulcrum. November. Tango. Alfa. Papa. Bear. Hawkeye.
That list of names either means absolutely nothing to you, or it means an awful lot, and you’re wondering what sort of epic story one might weave from that. Red Storm Rising is an awfully good war story, tested with tabletop miniatures with the Harpoon game rules. The Soviet Union, suffering from an oil shortage, attempts to push west into Europe to destabilize NATO so they can then push into the Middle East and seize oil fields. And they succeed - for a while. Until NATO learns about their real fuel situation.
This novel is notable, for me, in it’s inclusion of the (presumably still fictitious) F-19 Stealth Fighter - an airframe of much speculation and one very good computer game, in the late 80s. The game shipped with a heavy box filled with solid documentation and technical manuals on then-current weapons systems.
But, if you like war stories firmly grounded in reality, and you haven’t read this - you’re in for a treat!
Comments
Comments are handled on my Discourse forum - you'll need to create an account there to post comments.If you've found this post useful, insightful, or informative, why not support me on Ko-fi? And if you'd like to be notified of new posts (I post every two weeks), you can follow my blog via email! Of course, if you like RSS, I support that too.


