
If you’re a regular reader, you’ve probably been wondering a bit about the last two weeks of posts. I’ve gone on, in depth, about a passive NUC case, and about speaker stands. Obviously, this has been building to something - and, the something is a rather significantly cleaned up TV install in the living room, with a hidden computer behind the TV! *confetti pops*
Not all my projects are based around weird electronics out in my office. Some are for the house, and aren’t really for any reason other than to make the house look better. And, in this case, to reduce the visual impact of the TV after having improved the system quite significantly. Without cables, the TV doesn’t attract as much attention when back against the wall, and we value that greatly.

The cables are hidden. The TV computer is wall mounted (and absolutely invisible unless you’re up against the wall looking for it). And everything looks good. What’s involved in cleaning things up like this? Read on and find out!
The History
Our TV is a Vizio M43-C1. This is a 43” 4k TV, and while it seems entirely excessive (and probably is) for our fairly limited TV watching, it came well reviewed on The Wirecutter, and, well, I’m happy enough with how it works. The feed comes from a little TV computer that has varied over the years. It started out as a Mac Mini, and when that started struggling with some of our needs, I put a newer Intel NUC in - and it turns out that the NUCs get loud, which I’m also solving here.
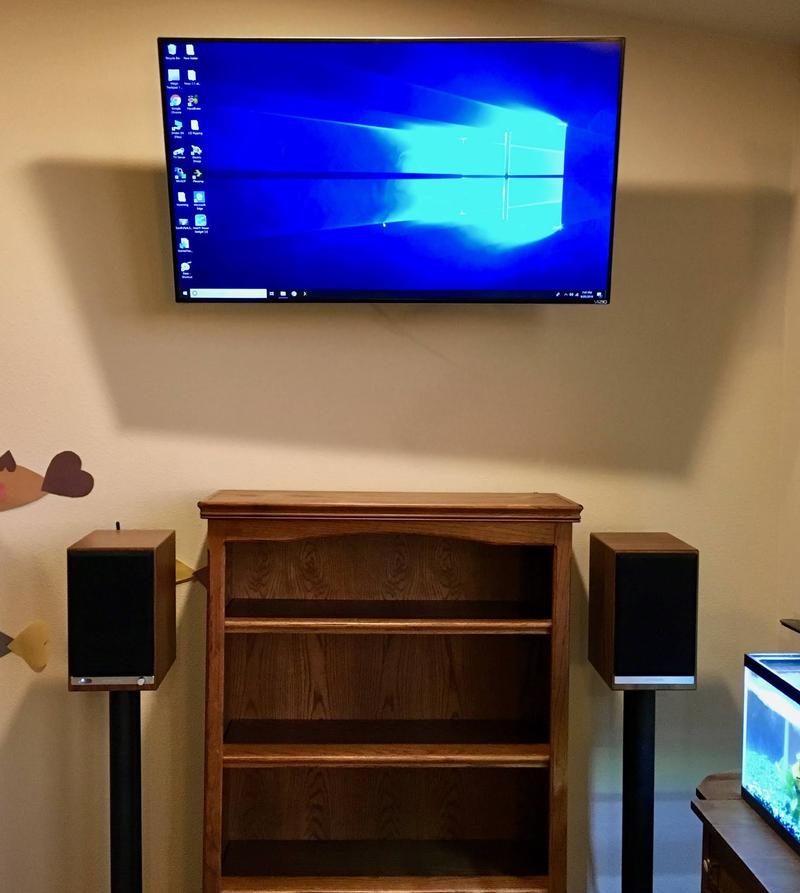
With the large speakers, the amp, and cables running down the wall, the TV area was quite visually cluttered. It worked, but I wasn’t happy with how it looked.

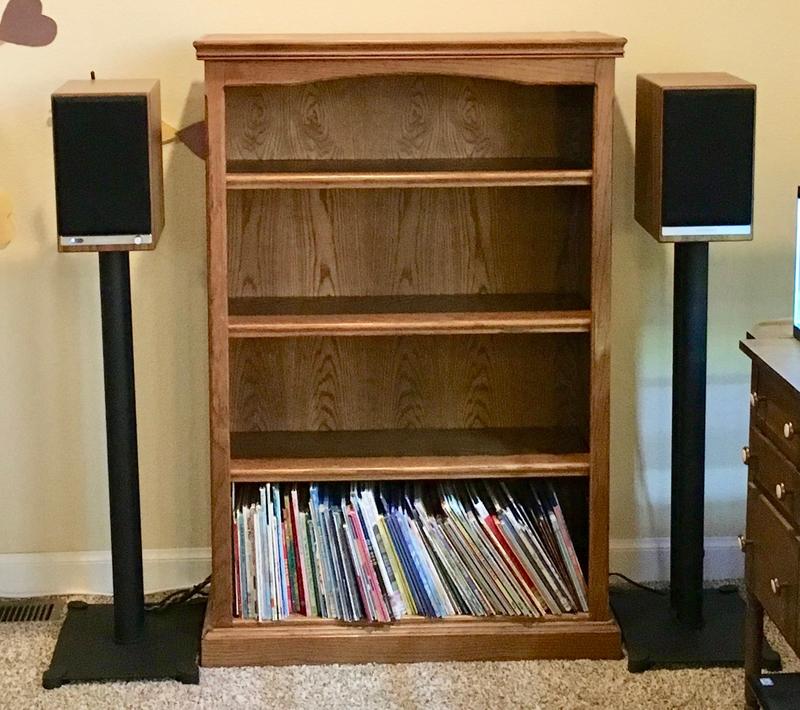
After a while, I decided to upgrade from 1970s speakers (they’re nice, but… audio quality just isn’t amazing on them by modern standards). I picked up the AudioEngine HD6s, which are great, but putting them on the bookshelf was a temporary solution.

With the big speakers moved (they ended up briefly in the shipping container, then feeding white noise into the bedroom for the new kid), things were better, but… it was still messy.
So, I decided to fix it - properly. No wires, a clean bookshelf speaker install on stands, and the computer hidden and silent (a NUC will get quite loud when the fans spools up).
Hiding the Cables
I’ve known about the various cable hiding kits at Home Depot for a long while. They looked really exciting, and I’ve finally purchased one to use! They come with everything needed for the install, and then some (including a hole saw - not a great one, but it’s more than good enough for a couple holes in drywall). This particular kit comes with a cable conduit that lets you make the connection airtight, if you’re installing it in an exterior wall (otherwise the openings would leak cold air). As I’m installing on an interior wall, I don’t need to use those parts. The kit also has a proper extension cord rated for in-wall installation - running a normal extension cord through an enclosed wall cavity is a code violation pretty much everywhere, so… don’t do that.
I picked mine up from Home Depot, though you can find similar kits on eBay.
The instructions are comprehensive, if a bit hard to understand. Read through them a few times, playing with the parts, and it should make sense. The kit also comes with a very nice multi-part fish for pulling cables through wall cavities. Or bonking small children when they ask what it is repeatedly. It’s surprisingly flexible!

The next step is to figure out where you’re putting the holes. They need to be at least three inches away from studs (so you don’t cut into the stud and the insert can fit properly), and they obviously need to be in the same stud cavity. Marking your local studs with a stud finder is helpful here.
No, they’re not vertically aligned. It’s not just an artifact of the photo. For how we have things laid out and where the vents in the floor are, it’s easier to hide things with the holes offset slightly.

Now is a good time to think through the cables you’re running. Most normal AV cables can go through the openings provided, but if you have some weird low voltage cables (say, a NUC power supply - 19V, so well within low voltage wiring ranges), and those cables have a large end at one end, you may need to fish it through the ends from one direction (and through the face plates) before you start installing everything.
I’m running the NUC power through the low voltage side, as well as a TOSLINK optical audio cable. Since the video source is the NUC, which will be mounted behind the TV, I don’t need to run the HDMI cable through the hider. Since we don’t have any game consoles or anything, I don’t have to worry about those. I can fish stuff easily enough if needed later.

The in-wall power cable comes from the top down, and then you clip it into the bottom connector using the provided block. It’s a bit stiff to get installed, but, hey, you only have to do it once!

Run the cables through as needed, then put the wall junctions in place! You’ll need to install the low voltage ends first, then slide the power cable parts in. It doesn’t work the other way, but, fortunately, it’s easy enough to remove the units if needed. Once they’re in place and aligned, tighten the four screws that flip out little grippers that hold them in place. No need to really crank down hard - you’ll just crush the drywall. Once they’re making contact, nothing is going anywhere.

Once all the in-wall boxes are installed, clip the face plates on, and you’re done hiding cables! Use the provided extension cord to connect the bottom outlet, plug the TV in, and you’re done! The instructions are quite a bit more intimidating than the install, at least if you’re not using the air tight connections. As mine is run through an interior wall, I didn’t need to use those. The air tight stuff is for exterior wall use, and prevents the holes from leaking massive amounts of cold air (it connects the top and bottom with an airtight tube).

Mounting the Plato X7 Case
With the cables hidden, I next set out wall mounting the computer. The case has large fins, and if it’s vertically mounted, they should effectively move air through themselves when the case is hot - at least, well enough for my needs.
The case comes with some VESA mounting brackets, and a set of little pegs that screw into holes - it’s designed for mounting on the back of a monitor, which is all well and good, but not terribly useful for my install. You can see the four mounting holes here - obviously, install them so the various screw grippers are pointing in the correct direction for your intended mounting direction.

A bit of experimentation with the screws I keep in the shed indicated that some of my smaller structural screws fit perfectly - they fit through the fat part of the opening, and then sit nicely in the ears (or whatever you call those). Plus, the smaller screws aren’t long enough that they would penetrate into the other room.
I’m not going to be able to get them into the studs, but as the case really isn’t that heavy and the load will be spread across 4 screws, I just don’t care that much. Drywall will be more than enough support for the NUC.

However, getting it mounted properly and evenly does require some properly spaced holes - or I might find it actually hanging on one screw, with the rest slack. Not ideal. Digging around the box of NUC parts, I discovered the VESA mount for the stock NUC case - which, conveniently, has the proper hole spacing and is quite square! This will be a perfect template for marking the screw holes in the wall, and it beats trying to freehand mark a 100mm square on the wall by quite a bit.

I figured out where I wanted the computer so it was properly hidden by the TV, marked the rough spot on the wall, and then marked a level line to use as reference. With the handy template, marking where the screws go was an easy task!

A short time later, four precisely positioned screws were driven into the wall. A bit of experimentation indicated that I could drive them pretty deep - as long as a tiny bit stuck out, the case would latch on properly.

And, while not the easiest thing to mount (finding the screw heads is a quite blind process), the NUC sits in place firmly on the four screws, with no wiggle or movement that would indicate it hasn’t engaged all four properly. Yay!
This positioning is selected so the computer is invisible for all normal TV positions. I can move the TV around through the likely viewing positions and fully hide the computer - which I think is slick. You can see how the fins are vertical here, which will cool fine. The antennas sticking out the top work wonderfully, as our environment is a rather quiet RF environment. You might not be able to get away with streaming over wireless at your place, but it works great for us! I’ve considered running ethernet to the TV box, but with how well 5GHz wireless works, I just don’t see a reason to bother.

With the TV pushed back against the wall, you can’t see the NUC from anywhere in the living room except right under or next to the TV. There’s basically no indication we have the computer back there, except that the TV has Windows running.

Finishing Up
The last steps are simply cleaning up the wires, rubber band or twist tying them out of the way, etc. If you lack good wire ties, I suggest some black wire - 12 gauge or so. It makes great wire ties if you need some, and it’s easy to adjust while playing with the positioning.
I put the power strip down behind the book shelf, ran the cables to the speakers through the wire guides, and fired everything up - and it actually worked!
The Results
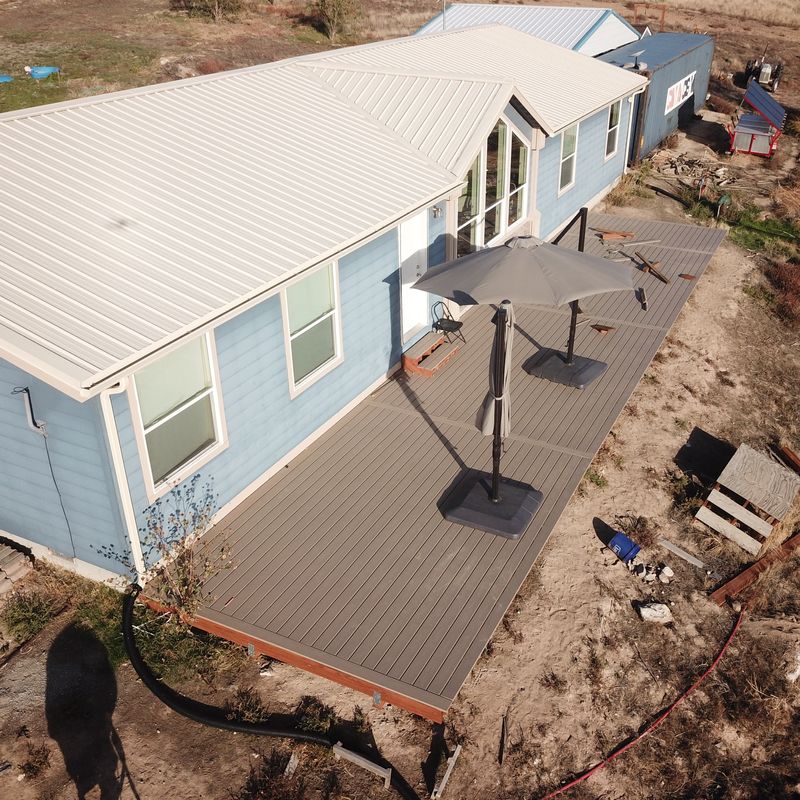
Quite satisfying! The install is much, much cleaner than it was, and everything is hidden away. I’ve very much accomplished my mission of cleaning up the install. We’ve got better sound, a cleaner install, and less cable clutter - what more can one ask for?

Ah, but there is something to adjust. The TV is off center in the above image - and I’m sure that will annoy a few people. Fortunately, with a tiny bit of adjustment, the TV can be centered above the bookshelf. I normally don’t bother, as it doesn’t make a big difference for our use cases, and it is further away from the wall (which means it catches a bit more afternoon glare). But, I can put it there.
If I were to do the install again, I might consider running a piece of plywood between the studs and bolting the TV arm to the plywood. The TV being off center from the bookshelf is just a result of where the studs are and where the heating ducts are. I can fix it if it bothers us, but it generally doesn’t, and we prefer the TV as close to the wall as possible to reduce the visual impact of it on the room. I can’t make it hide completely (unless I were to, say, set the background to be an image of the wall - which I may consider), but I can reduce how noticeable it is.
NUC Performance - Mounted
How does the NUC perform in this case, mounted like this? Quite well! We use it as a Plex client and to run music through a web browser (Pandora or Napster, usually with huge playlists), so it’s not sustained CPU load - but, even with sustained CPU load, it holds up well!
The maximum turbo frequency of this system is 3.4GHz - quite the bump from the stock clock of around 2.2GHz, but the NUCs are designed to run fast if they can, and throttle back (quite a bit) if they get too hot.
With a synthetic load of Prime95, the CPUs will clock up initially, but will then back off to the package limit of 25W (and 3.2GHz). For something that isn’t designed as a high performance system, I consider this perfectly reasonable behavior. It holds 3.2GHz for quite a long while, though I expect it might throttle back more, eventually, if it’s really hot in the summer.

For a somewhat more useful workload that isn’t quite as much of a thermal stress, I ran the Folding@Home client in a browser. This is a multithreaded scientific workload that does quite a bit, and for this workload, you can see the CPU package sits slightly under the 25W limit, running at a brisk 3.4GHz. It stays there without getting too hot for as long as I’ve felt like running things.

In any case, thermal performance of a NUC on a wall isn’t a problem at all!
Lighting: Install the Dimmers!
The final step of the install: Dimmers! I’ve been slowly adding dimmers in the house, because, well, I can install dimmers in my house. The living room now has a nice dimmer switch on the wall, and some of the Philips Warm Glow bulbs installed. If you hate dimmable LEDs because they turn a genuinely disgusting looking grey when dimmed, try a Warm Glow bulb. They redshift as they dim, so they behave closer to an incandescent. It’s not perfect, but it’s far, far better than a stock LED.
End Result? Totally Worth It!
This ends the three week series on home theater improvements. Was it worth doing? Very much so! The install is far neater, the living room looks better, and I don’t have to listen to a silly NUC fan whirring away. The TV is even less obvious than it was, and I can dim the lights now instead of playing with what lights are on and where the glare is. If you’ve got a wall mounted TV and haven’t done this, I wholeheartedly suggest it!
Comments
Comments are handled on my Discourse forum - you'll need to create an account there to post comments.If you've found this post useful, insightful, or informative, why not support me on Ko-fi? And if you'd like to be notified of new posts (I post every two weeks), you can follow my blog via email! Of course, if you like RSS, I support that too.


