
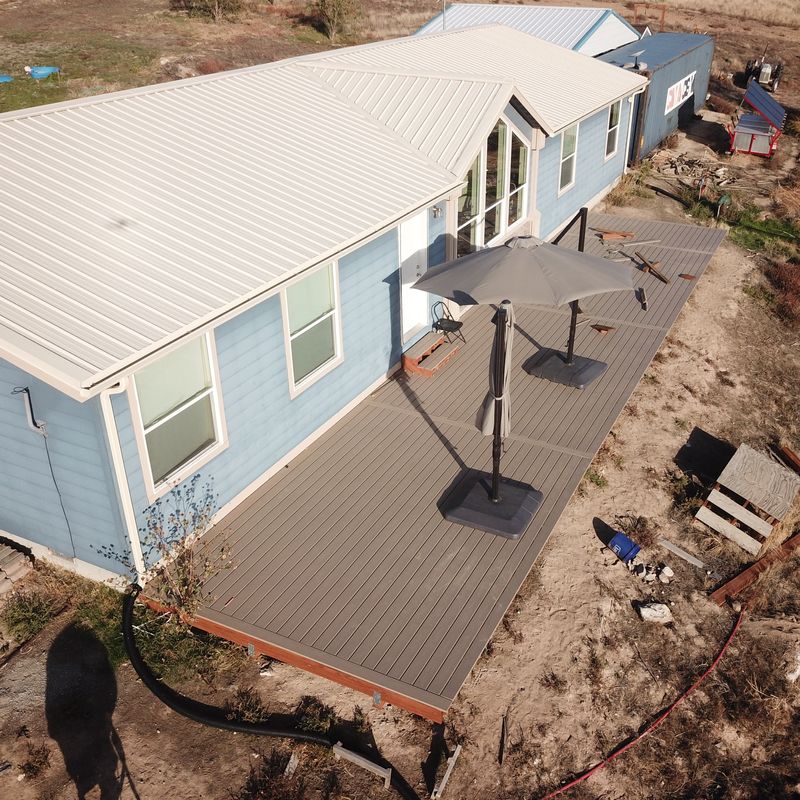
I ended the last deck post with the full row of concrete pilings completed, and the ledger board on the house. That still leaves a few holes left, and, of course, the rest of the wood framing! But after that, I’ve got something ready to Trex!

Figuring Out the Mid-Beam
Like most of my projects, I tend to buy ahead of time. This pile of framing lumber spent a while on the trailer until I needed it for something else, at which point I offloaded it (while rather sick - it wasn’t much fun) over to the side of the house.
Pressure treated is always annoying to stack and dry, because it will warp given half a chance, so take the time to make sure it’s going to dry at least mostly straight. I probably should have added a few more spacers in the middle between boards for air circulation here, but it was more or less fine.

You’ve probably seen regular joist hangers - but did you know there are “hidden” style ones for the corners? This neatly avoids having bits of metal hanging off to the side, or the joist somewhat inboard on the framing. I’ll eventually have another joist just inside this for deck surface reasons, so I’m not too worried about the strength of this hanger (it’s a lot of screws into the very edge of the ledger board).

The reason for getting this joist mounted is so that I can start working out the beam heights - both for the far beam, and then for the midpoint beam. I know I have to dig down some for the mid-beam - but the question is, “How far?” And to answer that, I need some good references. A five gallon bucket and some rocks makes a fine temporary support for deck joists! If you’re wondering why I’m putting in a beam at what looks like the 5 foot mark for something that doesn’t need it, the intent is to eventually put a hot tub on the deck, and this is just extra support in the section that’s likely to be heavy. If it’s worth DIYing, it’s worth over-DIYing!

Cut some posts, temporarily align things, add a few more joists to get the spacing, and I can place the mid-beams to figure out exactly what has to happen to make everything fit properly.

The general concept here is simple enough: Pour concrete, add supports for the beam. I dug down so the beam would clear the holes, worked out heights for the supports (which you’ll see a bit later), and got ready to do yet more concrete pouring.

For these holes, since the height of the top mattered a bit more, I did anchor the form tubes in place. A 4” long screw or three, driven through the side of the tube, straight into the dirt, will work very nicely indeed to anchor a tube for concrete pouring! I didn’t have any problems with the tubes shifting during the pour. Because they had to be low to the ground, I wasn’t able to use my normal elevated form holders (squares of 2x4s).

Once the concrete had cured for a week, I brought out the usual set of tools: A rented hammer drill, and my air compressor. Bore a hole, blow it out. Repeat until done. At this point, I really should probably just buy a hammer drill…

The post bases I found for this support beam are almost perfect for the sort of thing I’m doing here. They have the post cup at the top, then a 3/4” threaded rod welded on, with a nut and washer to set the height. As long as the top of the concrete is close, these can be adjusted up to fill the gap and spread the load! Again, avoiding precision concrete work is ideal for me, though I’ve recently learned some tricks I want to try next time I have to bore precision holes in concrete.
I’m using two beams, and the center point has two of the post bases - one for each side. This gives me some adjustment, and doesn’t involve having a beam only halfway supported at the end where they butt together.

The beams even fit! Once the joists are in place, I can lift these beams with the nuts and secure them in place. If there’s a bit of tweaking that has to happen later, someone small can slide under the deck and add another turn or so to them - but I’ll set them on the tight side initially to compensate for some sag.

Moving More Rocks
Like any project on our hill, “putting holes in the ground” means “removing rocks from the ground.” This is no exception, and the tractor, complete with new tires, does a wonderful job of moving rocks around the hill. With the pallet jacks on the back and a random pallet (this one is from one of the loads of concrete), the rocks can be rolled on easily, even if they’re too large to lift - though nothing here was quite that large. I collect all the rocks I remove over on a corner of the property for later use - and the pile is getting rather impressive!

Finishing the Beam
Once I finally had some tolerable weather, I finished out the beam. The first few segments were done, but that’s hardly a full deck worth. Keep working down, leveling things, cutting to fit, and eventually the beam runs all the way down the house! Here, it’s just sitting in place for test fitting, because I had it in and out constantly to adjust things - but ready to secure.

Before anchoring everything together, I actually followed the recommendations and put some wood preservative stuff on the cut ends of the posts and beams. I don’t think it really matters out here, but you’re supposed to do it, and I want the deck to last, so I got a bottle and applied it. The stuff I found is insanely thin, and wicks into the wood like nothing I’ve ever used before - which, fortunately, is exactly how it’s supposed to work. You can dip the wood in it, or apply multiple heavy coats with a paintbrush, which is the method I used. On the shorter posts, it would sometimes run all the way down through a crack in the wood and pool on the underside - exceedingly low viscosity for something you apply with a brush.

I ran into an interesting problem once or twice as well: My post bases wouldn’t fit on top of the beams. Like any lumber project, dimensions of lumber are variable (moreso for pressure treated), and some of my posts were cut from something that varied wide. It wasn’t going to go on without cutting the wood down - I tried.

Nothing like a good miter saw for shaving a tiny bit off the edge! One clamp to hold the wood in place later (because I’m not going to put my hand quite that close to a blade!) and I was able to shave just a bit off the edges.

After shaving a bit, the wood still has the pressure treatment slits, and can see sort of how the stuff soaked in - the top stretch is harder wood, and the preservative didn’t soak in as deeply. I’ve never shaved the edge off pressure treated before - it leads to some visually interesting results!

The posts are held down, and the beam brackets are held on, with a large number of screws that are sold by the same company (Simpson), and are designed for this sort of thing (they’re structural screws). Often, stuff like this is held together with nails, and I just hate driving that many nails. I also lack a good nail gun. So, screws it is. You can see the wood preservative on this piece of wood, having soaked in and through it. These will be well hidden under the deck, so I don’t care that they look a bit weird.
Before putting the beam in, it’s important to tighten the post base to the concrete. Once it’s tight, it’s not going to lift - but you can also adjust it slightly side to side if needed by using precision taps from a sledgehammer. Try to get it right before you tighten it, though!

The beam slips in, and an awful lot more screws go in the side to secure everything in place. Even without any joists in place, the beam is solid.

And one beam, very well secured in place, with a midway beam also ready to help support the hot tub.

Adding the Joists
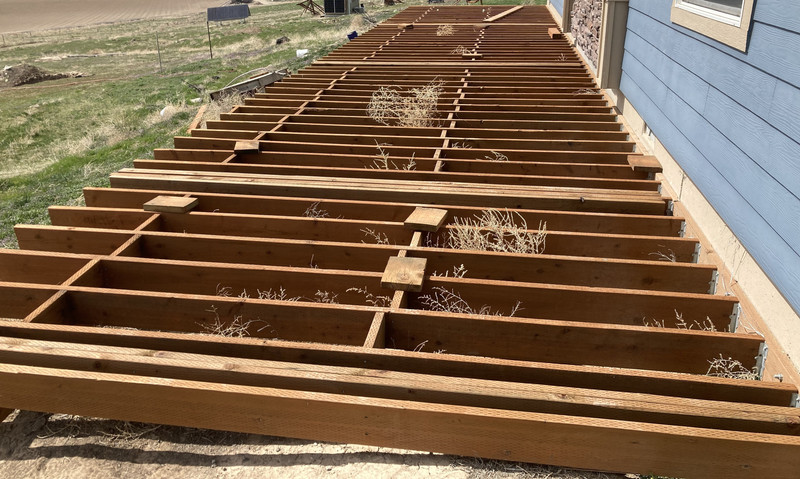
The process for adding joists is as simple as it is repetitive: Add a joist hanger to the ledger board, add a joist. Secure at the far end with a hurricane tie to the beam (we do, on occasion, get a lot of wind out here). Then add the blocker boards in between them to prevent the joists from “racking” and collapsing.

It eventually ends up looking something like this - after a lot of joists and blocker boards. I’ve used the wood protectant on all the various cut ends here, which involved a lot of letting things sit, standing upright, in paint trays. If some boards are being obstinately twisted and need pulled back into shape, a selection of clamps and ratchet straps goes a long ways - apply as needed. You can get a lot of force on big ratchet straps, and once the boards are secured at a few points, they’ll relax over time into the desired shape.

One thing that’s been very, very useful for this project is a long fiberglass tape measure. I spent a lot of time making sure the end joist was straight, so I can use it as a reference point for all the other joists. I spent a lot of time with this tape laid out over the joists for reference - with everything being 12 inches on center, it didn’t take much math to figure out the alignment!

Preparing for Railings
My local railing supplier gave me a handy template for pre-drilling the joists. I’ll be bolting the railing supports to this after the deck is finished - but it’s easier to drill them now, before all the decking is on top.

How does one fit a normal drill between 12 inch on center joists? You don’t! You just get a “stubby” bit for your impact driver and use that instead!

Right Angle Drives and Final Framing
When I did the initial framing, I knew I was going to have to replace a few sections for the deck surface design I planned - but I’d not yet finalized what I wanted to do (I eventually went with “the cheaper option” instead of “everything even”). Working between joists when you need to add a range of “blocker boards” can get tight - so I had an excuse to pick up a 90 degree impact driver adapter! Somehow, this manages to survive the abuse of an impact driver and turn the impact torque 90 degrees. I’m interested in what the gears look like, and will probably pull it apart after it fails just to see what’s in there - because “impact driver” and “gears” aren’t two things I normally consider compatible.

But you can fit it in some nice tight spaces! The only thing I wish it had were some way to anchor it to the gun - it turns most things into a “Well, I could use three hands…” sort of challenge.

And, while I won’t claim this style of “Two boards, a roughly 1.5 inch gap that doesn’t matter, and two more boards” is the most efficient way of accomplishing the task, it does work! How this interacts with the final design, you’ll see in the next post.

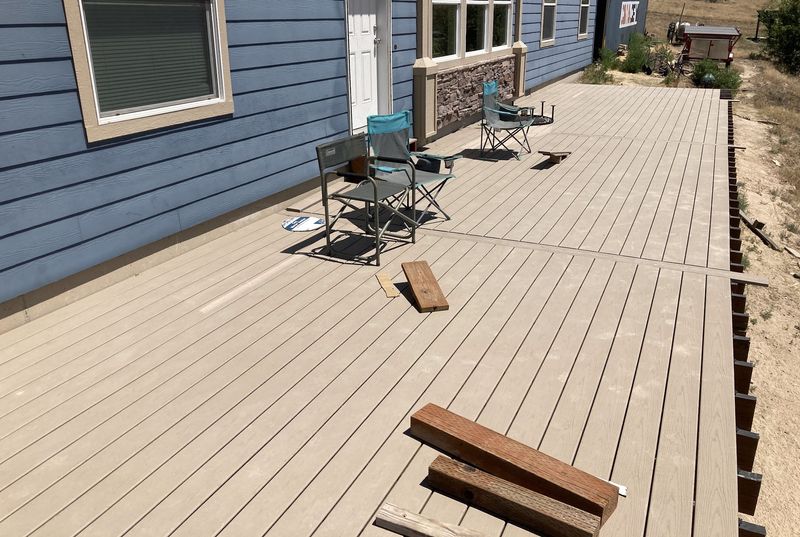
With the framing done, all I have to do is plane the boards so the top is level (it matters with Trex, far less so with wood decking), apply joist tape, and lay down about 660 square feet of Trex…
Comments
Comments are handled on my Discourse forum - you'll need to create an account there to post comments.If you've found this post useful, insightful, or informative, why not support me on Ko-fi? And if you'd like to be notified of new posts (I post every two weeks), you can follow my blog via email! Of course, if you like RSS, I support that too.


