
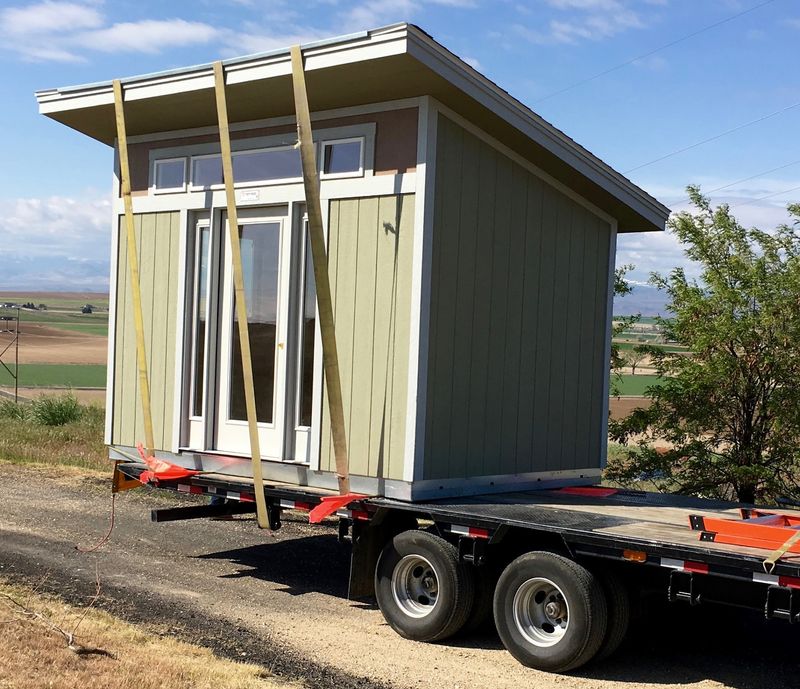
I’ve got a shed on my foundation with bare studs. It’s time to get insulating!
If you just showed up and have no idea why I’ve got a shed with studs I’m about to (over) insulate, you might want to take a quick glance at what I’m doing (building an off grid office). If you wanted to be really caught up, you could check out building the foundation and the delivery as well, but those aren’t as important.
Read on!
Insulation Plans
This being a Solar Shed (powered by solar panels, including HVAC), insulation is important. Poorly insulated enclosures take more energy to cool, more energy to heat, and I’m fundamentally energy limited. If I were trenching power to this (which I’m not - the basalt outcroppings say “You can’t afford that”), I wouldn’t bother with such extensive insulation - I’d just run more HVAC.
However, I need a good bit of insulation to keep energy costs down, and insulation is cheaper than solar panels. It also has the benefit of working when the sun isn’t out.
My plan is to use rock wool (mineral wool) insulation between the studs, and then cover this with 2” of foamboard for additional insulation and to break the thermal bridge as much as possible. I’m not going to run any electrical in the walls, so there won’t be any gaps or air leaks from that - it should be a nice, tight setup!
Why rock wool instead of the more standard fiberglass? Simple: I hate working with fiberglass. It’s nasty, evil stuff to be around, and I have the opportunity to try something different. And significantly less hostile.
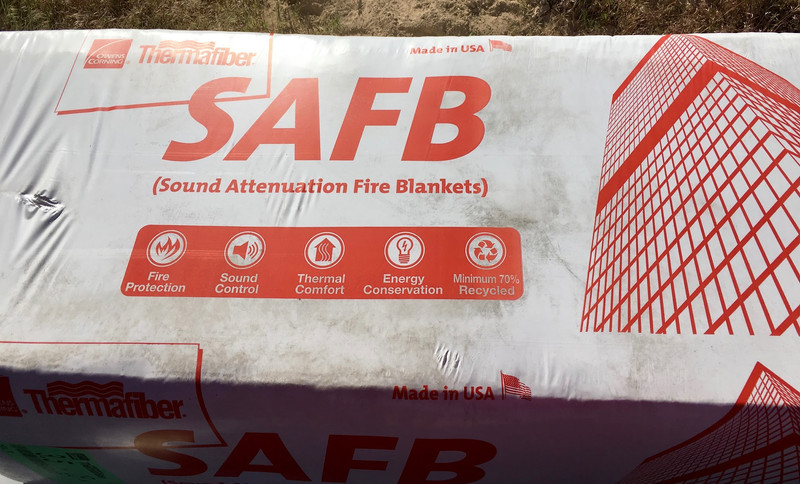
In either case, I wasn’t going to go with the standard roll stuff - I want to use batts to fill the space, since they’re less likely to sag over time. So, rock wool it is! Thermafiber SAFB, to be specific.
Why Thermafiber SAFB? I’ll tell you!
It was in stock locally. I wanted to use Roxul, but nobody had it. Oddly enough, Roxul is available on eBay - but Thermafiber isn’t.
This stuff is around R13 for 3.5” - the same as fiberglass.

What about double vapor barriers?
A common concern raised about what I’m proposing is that I’ll manage to create a double vapor barrier, which is bad - it leads to condensation in the walls, which leads to mold, which leads to weird illnesses, which leads to writing about Cthulhu or something. I’m a bit fuzzy on the details, but apparently this double vapor barrier thing is Bad.
I’m not concerned about it, though, because I’m not actually creating a double vapor barrier! In the process of researching this and coming to this conclusion, I learned quite a lot about construction materials.
The outside layer that might be a vapor barrier (between the studs and the siding) is DuPont Tyvek Home Wrap. From their website:
DuPont™ Tyvek® HomeWrap® is the original house wrap, incorporating unique material science that helps keep air and water out, while letting water vapor escape.
The tough structure of Tyvek® is engineered to create millions of extremely small pores that resist bulk water and air penetration, while allowing moisture vapor to pass through.
It sounds like it’s not a vapor barrier - moisture vapor can pass through.
Reading on, the FAQ is even more explicit about it not being a vapor barrier:
Q: Is DuPont™ Tyvek® a vapor barrier?
A: No, DuPont™ Tyvek® is not a vapor barrier. It is made with unique material science to keep air and bulk water out while allowing moisture vapor inside walls to escape.
So, I’m fine on the outside, which means I can’t actually have a double vapor barrier problem.
In addition, the XPS foam I’m planning to use inside isn’t really a very good vapor barrier either.
Owens Corning (one manufacturer of XPS foam) has a whitepaper on their Foamular insulation and water. They specifically cover the double vapor barrier issue as well.
For example, unfaced FOAMULAR® XPS 250, 1” thick, has a rating of 1.1 perm. 2” thick has a rating of 0.70 perm, or, about equal to that of 15/32” oriented strand board sheathing (OSB). A common interior vapor retarding material such as 6 mil poly has a rating of 0.06 perm.
The Department of Energy also has a whitepaper on insulation and foam. It observes that while XPS insulation at 2” thick is a vapor retarder, it does not qualify as a vapor barrier.
If I were using faced insulation, it might be a problem, but I’m not, so no issues there, either!
So, I’m not worried about this at all! As near as I can tell, I have no vapor barrier, or perhaps half a vapor barrier. Definitely not a double vapor barrier! And I know a lot more about foamboard and house wrap than I expected to learn.
But I’m sure going to block the wind.
Removing the Workbench
There’s a problem that has to be solved before I can insulate.
The shed comes with a very nice workbench and pegboard that takes up one whole side. It’s a nice touch, but it has to go - at least for a little while.

The pegboard comes down easily enough. It’s just nailed up, with a few screws holding loose sections. I’d like to say I removed the whole pegboard without breaking it into pieces, but I’d be lying. I just ripped it down. Pegboard isn’t really my thing - I’m more about small shelves.

Why does everyone insist on using nails? The workbench is nailed together. The top board is nailed to the frame, the supports are nailed to the studs, etc. I guess air nailers are the fastest way to attach things.

Well… I could use a crowbar. Or I could use an 8lb sledgehammer. The sledgehammer has the advantage of being down at the site already from driving the stakes for the foundation. Sledgehammer it is!

Bang. Bang. Off comes the top - in one piece! Pop it a few times on the bottom and it loosens the nails enough I can pull them out easily with a claw hammer.

A few more good hits, and there’s nothing left of the workbench except a few nail holes.

Foaming the Window and Door Gaps
It’s hard to type “Window and Door” - my fingers want to type “Windows and doors.”
There are some good sized gaps around the window frames and door frame. Some of them aren’t air gaps, but I still want to fill it with something insulating. I need something that will block any air drafts, keep the window frame from condensing water in the winter, and ideally will insulate tolerably since I can’t cram regular insulation in there.
The window frame has a decent gap around it - this is about 1/2” wide, maybe a bit more, and would otherwise let the hot or cold window frame interact directly with my interior air. No good!

The door frame is a bit worse. That’s daylight peeking through in the top left corner. I’m pretty sure if I can see daylight, air can get through.

This, certainly, needs some work. I’m going to need some good stuff to fix this.
Good stuff? No, Great Stuff!
I picked up a few cans of Great Stuff foam. You can find it at your local home improvement store, or you can find it radically cheaper, in bulk, on eBay.
It’s a bit tricky to use the first few times, but you get the hang of it eventually, and end up with something along these lines. I can’t say it’s particularly neat, but it does work, and it’s easy enough to clean up later.


The foam takes about 8 hours to set, so while it’s curing, I went about cramming insulation batts in the wall.
How do you tell if the foam is cured? Just like a cupcake! Stick a toothpick in it, and see if it comes out wet. Or, in my case, stick the tip of a drywall saw in it, and when it comes out sticky, spend a while trying to remove insanely sticky foam from the end of the saw. So, use a toothpick. Or just wait 8 hours.
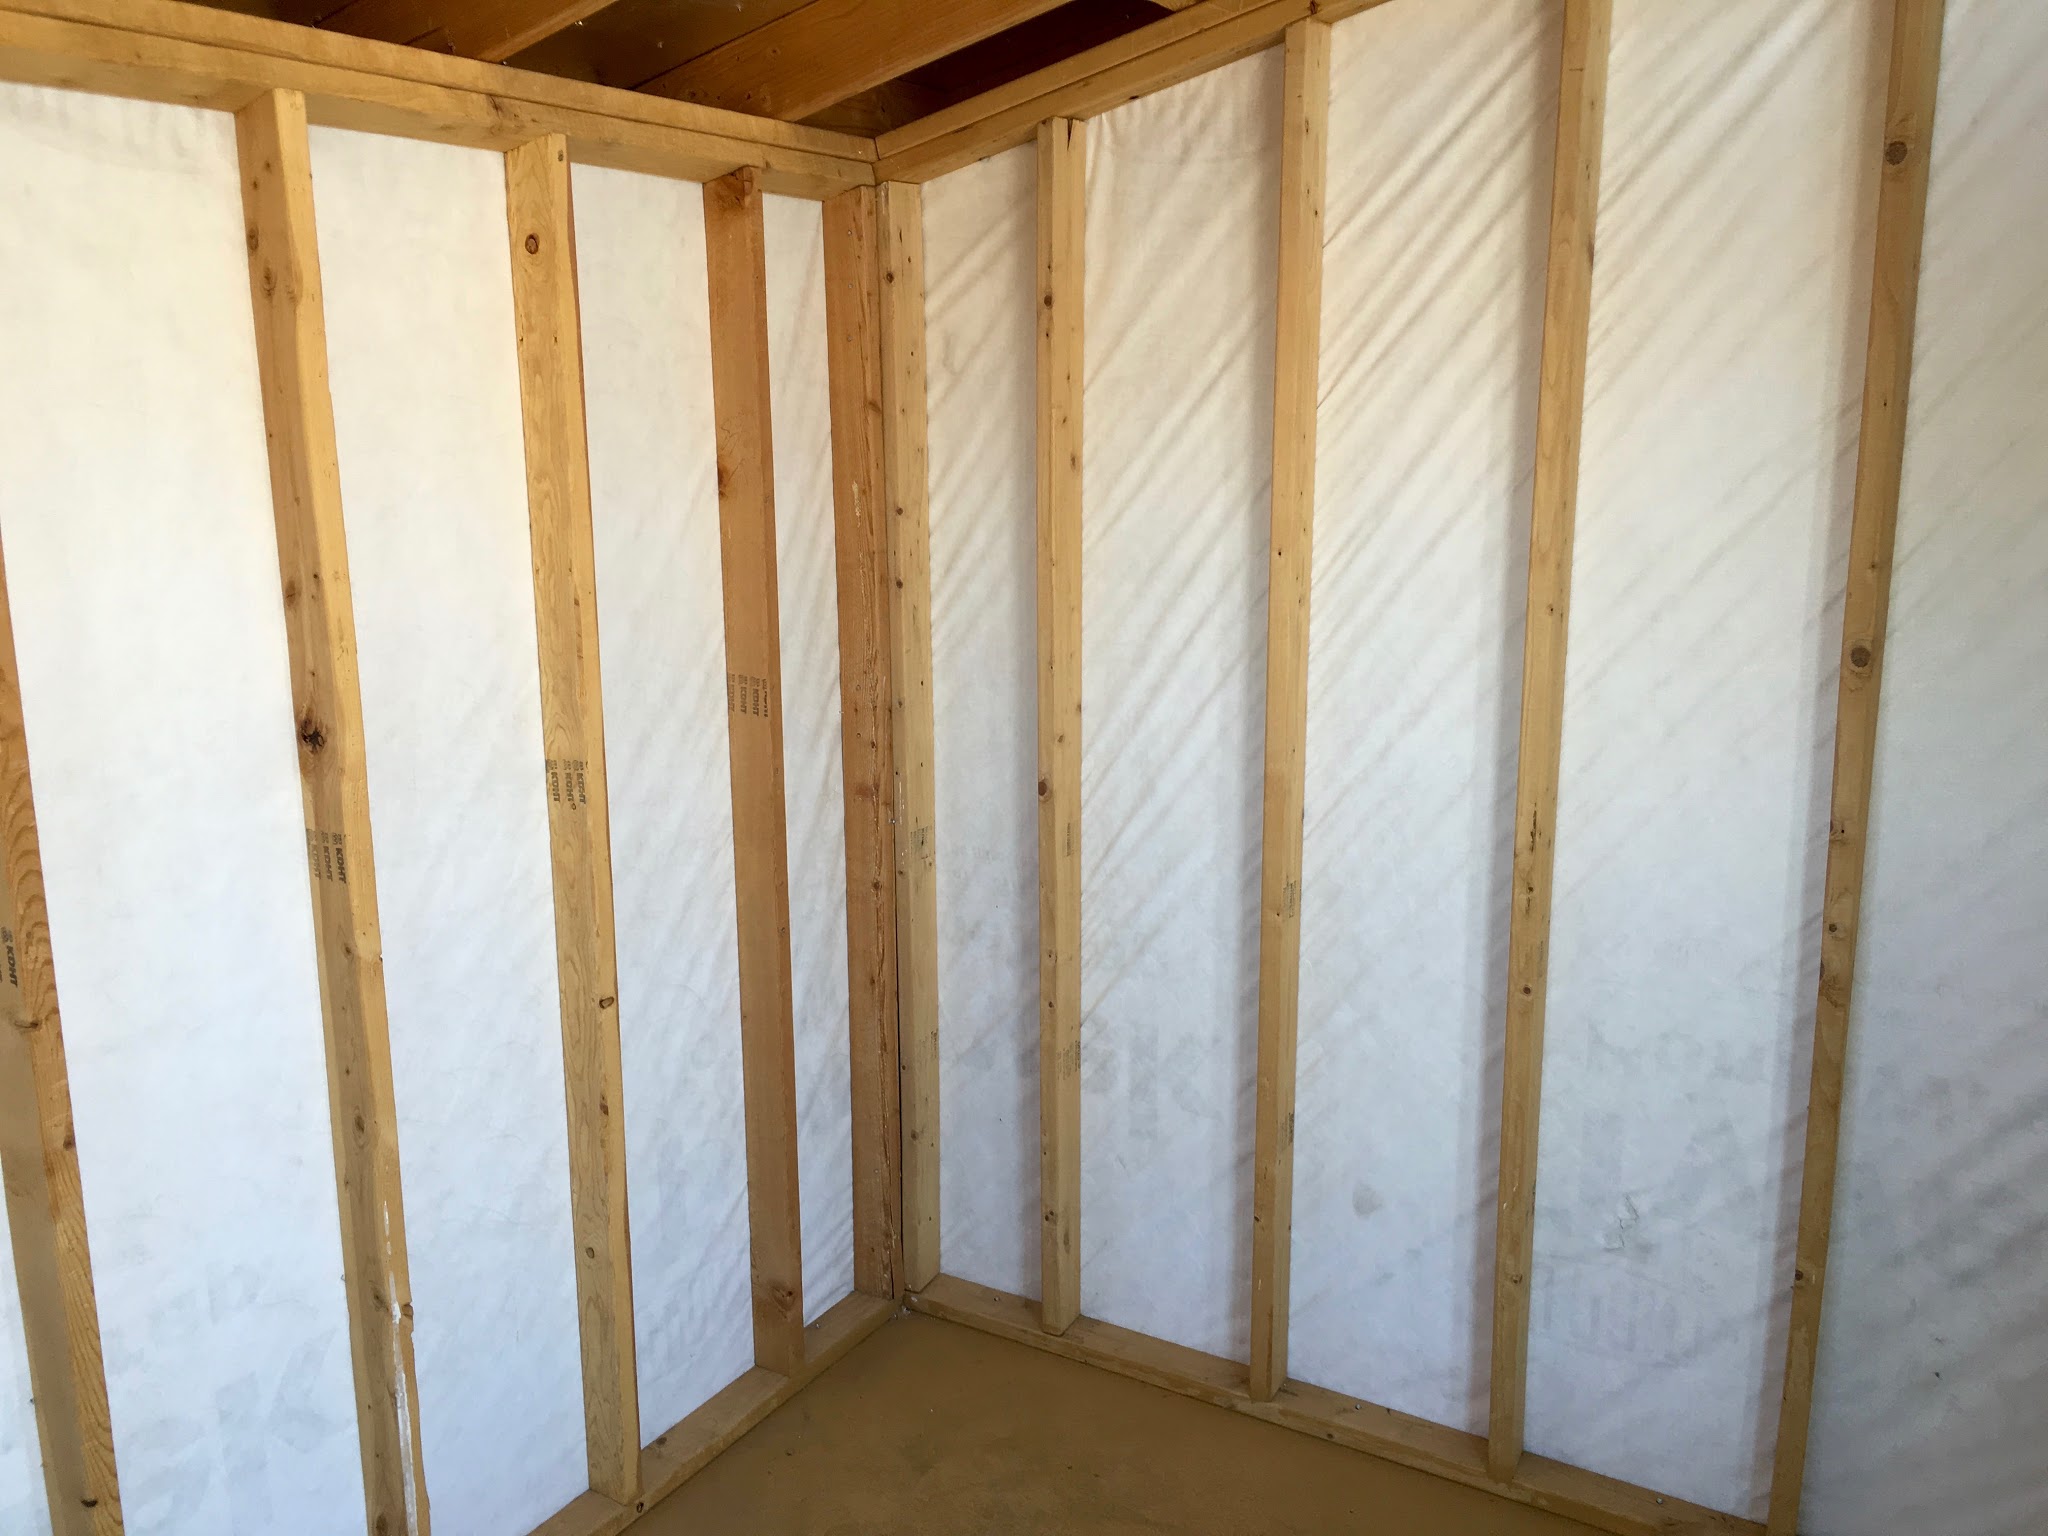
Installing Rock Wool Batts
What, exactly, are batts of insulation? They’re these somewhat firm rectangular things that you cram in between the studs, and fit with friction. You can cut them to shape, and generally work with them a bit more easily than the floppy fiberglass stuff. And they don’t cause lung disease.
They’re sized based on standard stud spacings - so you can get 3.5x16x48 batts, which are designed to fit 2x4 walls (3.5” thick) with 16” on center spacing (so somewhat less than 16” of actual gap). You can also get sizes like 5.5x24x48 - so for 2x6 framing with 24” on center spacing. Of course, I couldn’t find that stuff locally…
This is what a package of them looks like when you cut it open.

Installation is simple: Cram into the gaps between studs. Literally. The first ones are easy - just remove a batt, cram it in.

Of course, it’s not always that simple. Once you have the easy ones done, it’s time to start cutting, because either the length or width is wrong for the rest.
This upper one, for instance, had to be cut short so it would fit. I used a drywall saw, but utility knives can work fine as well. The corners are currently empty because they’re narrower than 16” - so I have to cut batts down for them as well.

But that’s the process! Cut them to fit, cram them in place, and move to the next one. I got the walls done in about 4 hours.


Back to the Foam - Cutting to Shape
After finishing the insulation and doing a few other things, the foam was cured. Time to cut to shape!
The foam continues expanding while it cures, and if it were black and oozing, some of the results would look right at home in an H.P. Lovecraft movie.


The can says you can cut it to shape with a knife.
So I did. It worked surprisingly well.
My pocket knife is now rather dull, but two cuts do the job. I made my first cut along the frame (so the tip of the knife into the wood) to separate the foam from the window, then made another cut along the wood. It came right out, and was not at all difficult to cut.


Much cleaner looking! And a properly beautiful day.


I may have used more foam than I really needed to. The remains are quite significant - it keeps expanding long after you’ve squirted it in.
However, the gaps are most definitely filled! No air leakage through those now.

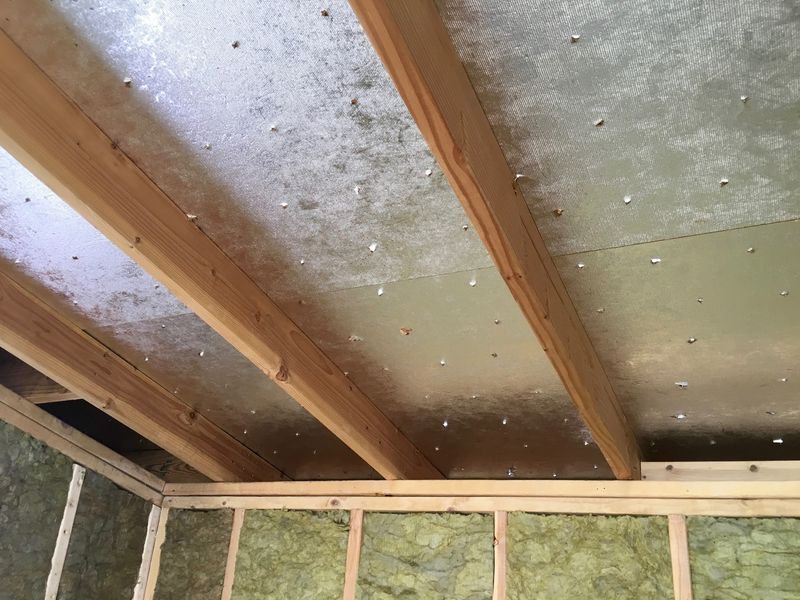
Join me next week as I follow up my highly successful wall insulation and foaming with a series of comical and mostly failed attempts to insulate the ceiling! I get it eventually, though…
Comments
Comments are handled on my Discourse forum - you'll need to create an account there to post comments.If you've found this post useful, insightful, or informative, why not support me on Ko-fi? And if you'd like to be notified of new posts (I post every two weeks), you can follow my blog via email! Of course, if you like RSS, I support that too.


