
The next posts from this blog are going to be a series of posts about what I’m calling “Syonyk’s Solar Shed.”
Syonyk’s, because it’s mine, both in ownership and design. Beyond the base shed, all the design and labor are coming from me. I expect a lot of labor to be involved.
Solar, because it’s an off grid office powered by solar and battery. Why off grid? Keep reading to find out!
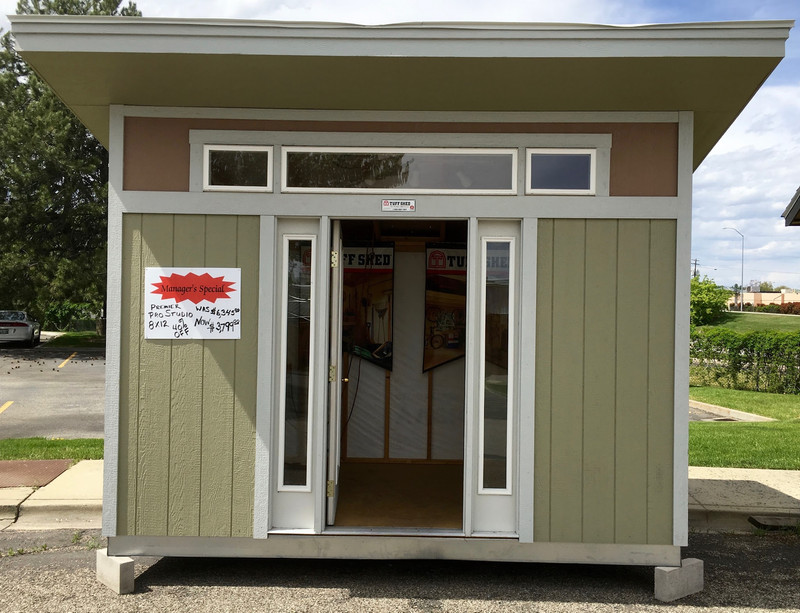
Shed, because it’s based around a Tuff-Shed Pro Studio (which is still built like a shed).
This is the shed I’m using, before moving it to my property.
I’m going to be turning it into a small, efficient, well insulated off grid office for year round work!

Keep on going for a lot more detail.
Why I’m Building a Solar Shed
I moved recently, and I’m going to be working from home.
In the past, I’ve worked from home where I shared “office space” with home space, general computer space, and at times, bed space. This doesn’t work for me. I’ve tried it multiple times, and I have a very difficult time separating work and not-work - an email comes in, and all of a sudden I’m working at 8PM, look up, and it’s 1AM.
With a wife and kid (contrary to the belief of some based on my beard and ebike habit, I’m not a single, childless, Bay Area hipster), this just isn’t something I’m willing to do. So, I need a separate space.
Also, with the battery pack rebuilds and teardowns I do, some of my projects are not at all house-friendly. I don’t want to work from a bedroom of the house, because I’m playing with high energy systems, and sometimes things stink (or get more exciting). Soldering stations stink, power supplies occasionally blow up, spot welders certainly blow up, and frying electronics to see what sort of voltage abuse they can take can be smelly. Having a place I can do this work safely is important, as is not making the house stink of magic smoke. The office location gives me options for building external fireproof enclosures as well - what, exactly, does happen if you cycle formerly dead LiMn packs a few hundred times?
Why Solar/Off Grid?
There are several reasons I’m going with a solar/off grid system. First, I’ve wanted to play with an off-grid solar system for a long while, and this is a great opportunity. Second, our property has a lot of lava rock. Very, very hard lava rock. Outcroppings of lava rock poking through the surface between my office and the home external panel. Trenching power out to where my shed is will quite literally involve explosives. I have to cross several rock outcroppings, and they’re hard enough that the excavator for our foundation ripped a steel tooth off a bucket trying to deal with one.
Having an off grid system also gives me a perfect test bed for a variety of interesting and cheaper solar trackers/panels/inverters/etc. How does a $200 MPPT tracker compare to a higher end one? There’s a great way to find out, and it seems remarkably few people are doing this type of research. Since it’s my shed, I’ll only annoy myself if something doesn’t work properly.
Since I’m going to be energy limited, insulation is important to reduce how many panels I need.
As a result, a well insulated little shed seems a great foundation for my office & workspace!
My Shed
The shed I picked up is one that’s already assembled, and therefore on sale for 40% off list. Normally, Tuff-Sheds come partially fabricated (flat sections built and stacked), but are finished on site. Because this shed is already built, and is therefore tough to get on site (don’t worry, I took photos of the process), it’s for sale! I like saving money…
It’s the 8’x12’ Pro Studio shown above. The shed comes with Tyvek housewrap, exposed 2x4 studs, and is basically perfect to cram full of insulation.

The left side comes with a very nice pegboard and workbench installed. Sadly, they’re in the way of installing insulation, so they have to get removed. I like the concept, though, and will eventually do something similar.

Design Details
I’ve been thinking about how to do this project for a while, and the following lays out my general design thoughts/concepts and where I’m planning to go with the project.
Insulation & HVAC
I live somewhere where it’s hot in the summer and cold in the winter (I’m not in Seattle anymore, and don’t miss it for even a second). Dealing with the temperature extremes on a tight energy budget (which solar systems are) requires spending as little energy as possible on heating/cooling. To make this work, I need some serious insulation.
The default insulation people go with is fiberglass, but I really don’t like working with it much. It’s nasty to work with. I’m much more interested in playing with rock wool insulation.
Rock wool insulation is quite literally rock (or more usually furnace slag) that’s melted, spun into fibers, and woven into batts. It sticks in place with friction, doesn’t sag like fiberglass, is fireproof, and absorbs more sound than fiberglass. It’s also less awful to work with.
My current plan is to stick a bunch of rock wool between the studs (about R15), then cover that with a 2” thick layer of foam board (another R10) for a total wall insulation of R25. Doing this on the roof (2x6 construction) will get me closer to R35, and I can add another layer of foam if I want to increase this to R45.
Aggressive insulation, combined with some sealing of gaps, should keep the inside temperature where I want it on a reasonably low energy budget. I hope. I’m a bit concerned about the doors & windows, but they’re double pane, so at least they’re not completely terrible. I’ll play with various films and coatings, though.
I found a small window/wall mount air conditioner that also works as a heat pump (proper heat pump, not just electric coils). This should handle my cooling/heating needs for most of the year, and it’s more efficient than using an electric heater (which is to say, “I can’t power an electric heater in the winter”).
For the depths of winter, I’m almost certainly going to end up with a propane backup heater, though I plan to mess with solar thermal heating as well (panels to collect heat, not just passive heating).
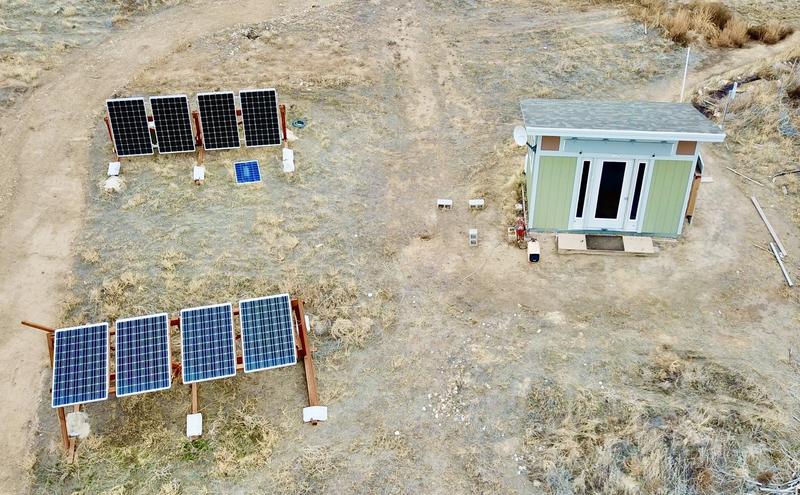
Solar Panels & Power System
Obviously, for an off grid system, I need an off grid power setup. I’m planning to install around 1.5-2kW of panels, a bunch of batteries, and the needed chargers and inverters to power my system.
Details of this will depend on what I can find, but at this point, it’s looking like I’m going to use lead acid batteries for storage. Most of my power demands will be during the day, when solar is generating, and right now I just can’t afford the cost of going with lithium storage batteries.
I may build a lithium based storage array at some point, but buying a storage bank of lithium batteries is more than my budget has room for at this point.
Building a bank of lithium batteries for storage is certainly something I have the knowledge and equipment to do. Unfortunately, doing this requires a workshop. Which… requires having batteries. You see the problem? I do plan to play with lithium storage, though. I’d hope to be fully lithium within a few years.
My panels will be ground mounted, facing south. I don’t intend to bother with a tracker at first, though I may play with them long term. I do intend to allow for seasonal angle adjustment, because I want more power. And, realistically, it makes a big difference. More servers and AC in the summer, more “not needing the backup generator” in the winter.
Interior Details
I don’t like drywall that much (I think it looks cheap, I don’t like working with it, and I’m no good at working with it), so I intend to use plywood for the interior sheeting. This also makes it easy to mount things - instead of having to find a stud through 2” of foam, I can simply screw things into the plywood.
In addition to my desk, I’ll need a good workbench (non-conductive) to do pack rebuilds and similar.
To deal with the fumes from soldering or frying electronics, I’m planning to run a vent system with flexible pipes through the shed as well. Think “portable fume hoods” - I expect this will involve some 4” stiff dryer hose, a fan box, and a variable speed fan ranging from “minor exhaust flow” to “this bit of frying electronics stinks, get the magic smoke outside!”
Lighting will be LED based, of course. I expect a blend of LED strip lights, LED bulbs, and probably some artistic LED based lighting.
Permits & Code
My shed is quite small. It’s 96 square feet, to be exact (though interior space will be somewhat less). This is below the minimum number of square feet I’d need a permit & inspections for, so I don’t need any of those.
I intend for it to be a safe place for me to work, but that doesn’t mean I’m going to be strictly obeying code requirements for house and office construction, because some of them aren’t relevant to what I’m doing. For instance, you can’t plywood the walls of a house most places because of fire ratings (even though getting thick plywood to burn through is remarkably hard). This is not a relevant concern in a single room outbuilding. If it’s on fire and my fire extinguishers (I have several fairly large ones for doing pack rebuilds and such) don’t take care of things, I’m exiting the building in a hurry.
What to Expect in Future Posts
There’s a decent bit of information on the internet covering people’s tiny offices in their yards.
I haven’t seen many detailed posts on building one from start to finish. I’m going to be doing a series of very detailed posts, with lots of photos, explaining what I’m doing, why I’m doing it, and how I’m doing it.
And then, over time, follow up posts discussing what works well, what needed changing, what was an idiotic idea, and such.
At some point, this will begin to include data logs from the solar panels and batteries. As well as a bunch of posts analyzing cheap trackers/panels/etc, since I’ll have a convenient testbed for them!
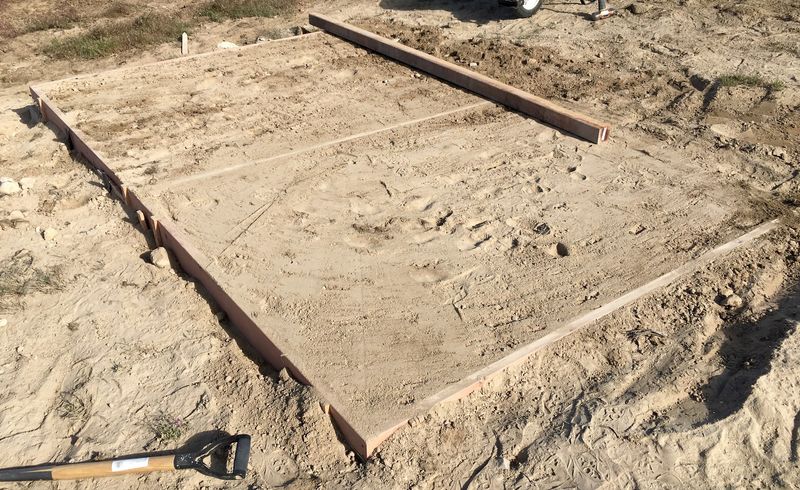
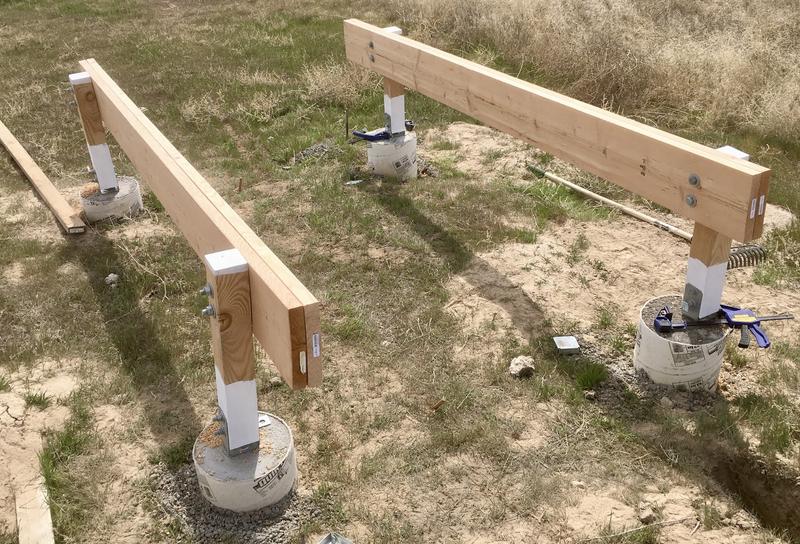
New posts will show up weekly, usually on Saturdays, as has been my schedule for a while. Follow along if you’re interested. Next week, I build a foundation for the shed!
If you have suggestions for improvements, or especially if you’ve done something similar and have advice, let me know in the comments!
Links to Future Posts
For convenient reference, this is an index of all the published posts so far.
Solar Shed: Part 2: Foundations
Solar Shed: Part 4: Wall Insulation and Window Foam
Solar Shed: Part 5: Roof Insulation
Comments
Comments are handled on my Discourse forum - you'll need to create an account there to post comments.If you've found this post useful, insightful, or informative, why not support me on Ko-fi? And if you'd like to be notified of new posts (I post every two weeks), you can follow my blog via email! Of course, if you like RSS, I support that too.


