
After finally getting the rock wool insulation up in my Solar Shed (the walls were easy, the ceiling was quite hard), the next step is to install 2” thick foamboard to cover the insulation, and seal all the joints.
If you have no idea what I’m talking about, click the “Solar Shed” link above to see the overview of this project. I’m building myself an off grid office out of a Tuff-Shed for a variety of reasons, and I’m in the process of insulating it.
Why am I installing a layer of 2” foamboard over the rock wool? There are several reasons.
- A layer of 2” foamboard adds something around R10 worth of insulation to the walls and ceiling - bringing me to about R23 for the walls and R35 for the ceiling. Since this is a solar powered office, insulation matters more than it would if I were grid tied.
- Having a layer of solid insulation between the studs and the interior plywood will break (at least mostly) the thermal bridges that might otherwise exist to help transmit heat through my walls.
- By sealing the gaps between the foamboard panels, I should have a pretty much airtight enclosure, even if the outside walls leak a bit. This should help with reducing heat loss to airflow - I can control airflow more intentionally instead of having “whatever happens” with regards to air. On windy days, I expect this will make a big difference - and I definitely have windy days to deal with.
In theory, all this will work. Since I don’t have any in-wall electrical runs (I’ll use surface mount conduit), I can really make my shed nice and tight without that much work.
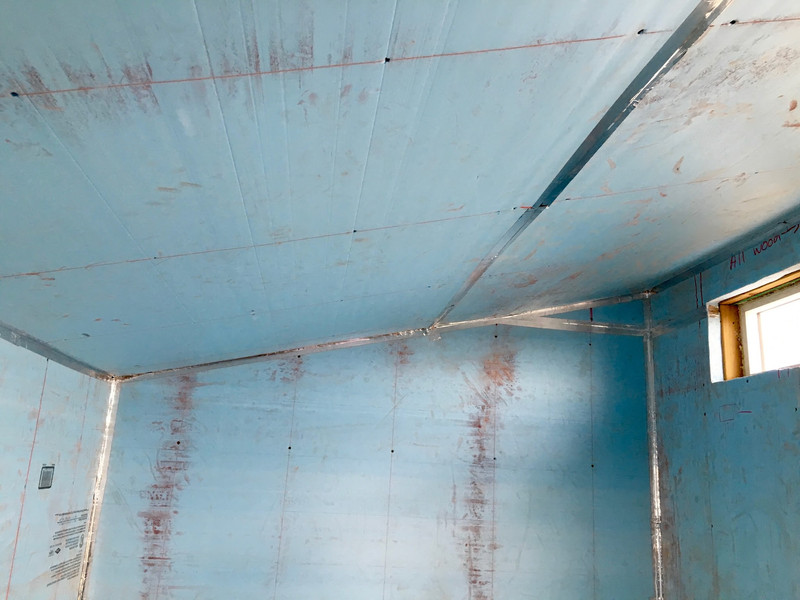
In the end, the interior looks something like this (at least until the plywood goes up). And, yes, I’ll explain all the chalk.

Read on to see how I get there!
Cleaning the Mess
First step: cleaning up the horrendous mess. Rock wool is easier to work with than fiberglass, but the stuff is still messy, and I’m moving on to the next stage of project. I don’t have an inverter capable of running a vacuum yet (my 750W modified sine wave unit won’t run a shop vac), so a broom it is…

Much better.

Marking Studs
This is what you do with a can of spraypaint, trying to tag older male horses at night, right?
Before I put the foam board up, I need to mark where the studs are. You can’t drive screws into rock wool and expect them to hold - you must ~bullseye womp rats~ drive the screws into the studs. So, after I’ve cut the panel (if needed) but before installing it, I mark the stud locations.
The big red marks on the end are quite literally crayon. Not Crayola, though. DeWalt lumber crayons. They’re basically big, fat, chunky crayons that also work well for letting a 1 year old draw with. I marked the location of the studs on both ends of the foamboard, then used a DeWalt chalk line to make a line between them. Chalk line doesn’t mark particularly well on foam, but it works well enough to be seen.

With the stud locations labeled, I laid strips of construction adhesive on the studs, stuck the foam board up, then used some GRK cabinet screws to hold the boards up. I used 3 1/8” screws (the longest I could find), because they have to go through 2” of foamboard and still have enough thread left to grab the stud.
Why cabinet screws? Because they look like this.

They have a large, wide, flat head, which is perfect for holding something soft like foam board. They drive in, compress the foam, and secure it in place until the glue dries.
I’m not particularly concerned about the long term holding power in foam, because the foam is glued with construction adhesive as well - this is going to be a solidly built office. These really just need to hold the foam tightly against the studs until the glue sets in a day or so.
The joint between boards is covered with some aluminum insulation tape. This tape is insanely sticky, and provides an airtight seal. I’m not worried about it coming loose over time - and there’s going to be plywood over it anyway.

That’s the basic process. Cut board to shape, mark studs, run a bead of glue down the studs, install panel, tape joints.
I did the cutting with a reciprocating saw (Kobalt - one of the Lowe’s house brands). It works well enough, though towards the end of a cut there’s a tendency for the panel to vibrate along with the blade and lead to no actual cutting happening.
After a bit of work, this is one end. It’s not entirely done, but it’s close!

With the addition of a few more panels, that corner is now done.
“All Wood” refers to the 2x6 over the window, and means I can drive screws anywhere. I’m making notes to myself for later use. Also visible here is my UE Mini Boom speaker (yet another eBay purchase), which works quite nicely for listening to good music while working.

More Uses for Duct Tape
The duct tape that didn’t work well for holding rock wool overhead does work well for holding a block of foam up, though! Why am I doing this?

To keep the door knob from crushing the insulation! Cheap, made of spare parts, and works. Good enough for me! This won’t be a problem once the workbench is installed - just during construction. Also, you can see my cheap doorknob. That has to go.

Chalk Lines and Markings
In addition to using the chalk line to mark studs, I’m using it to mark cut lines as well. This is one of the more heavily-marked boards I made - multiple lines for cut alignment, and a lot of studs as well. It’s kind of pretty! The chalk line does make a mess on the foamboard since I have to pluck it a few times to get a nice line, but I’m going to cover all of this with plywood, so I really don’t care.

And the board, installed. You can see the double studs on either side of the window I marked, as well as the cut lines and how they line up with where I made the cuts.

The wall with the window is a good bit more complicated to cover than the other end. I ended up using quite a few more pieces of foam and taping the gaps. I probably could have used fewer pieces, but I don’t really see the point in making this harder for myself than it already is on a layer that’s getting covered.

Corner Taping
Taping the corners took some work to figure out. My first attempts consisted of trying to get it crammed into the corner as it came off the roll. This didn’t work well - I ended up with some rounded corners, and very uneven tape. After some experimentation, I finally ended up working with 2-3’ strips of tape, creasing them down the center first (with the backing paper on), then putting them up one side at a time (get one side pressed down before trying to attach the other side). This is much easier and leads to a much sharper crease in the corner. Since I’m going to be covering this with plywood, a sharp crease right against the corner is much less likely to get torn.

Construction Art
Ever wonder why people working on houses write on the walls? Because they’re there, it’s convenient, and it’s going to get covered anyway!
This is some of my construction art - it’s all measurements and notes. In crayon. Construction crayon! Yes, I do work in inches for construction - all the materials I’m working with come cut into 4’x8’ chunks.


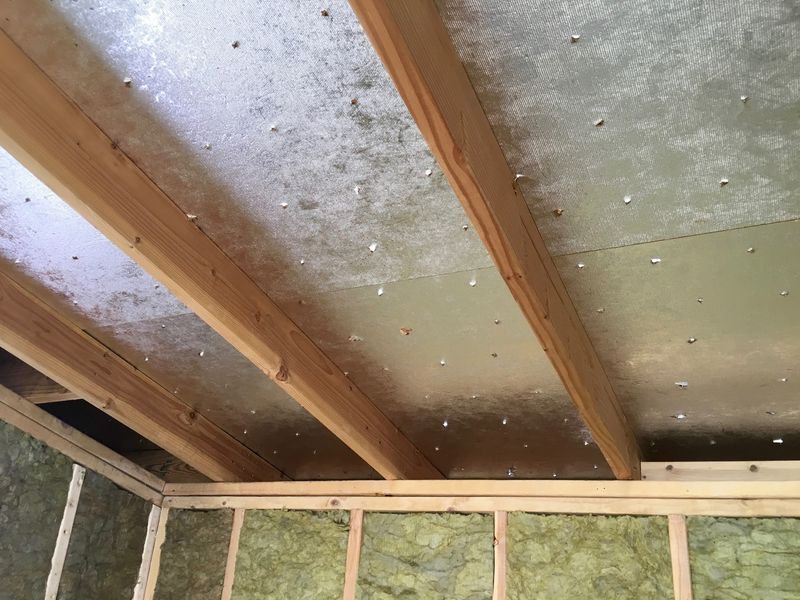
Paneling the Ceiling
Getting 2” thick foam board onto the ceiling solo is also a bit of a challenge. It’s glued to the lath holding up the rock wool (you can see some of the glue oozing out against the lath), but it’s screwed directly into the rafters.

I did find this one weird trick to help hang my foamboard, though (this will drive contractors crazy!) - drive screws most of the way through on the ground, so you can use one hand to hold the board up, and run the drill with the other. Once one or two screws are in, it’s not going to fall down and you can drive the rest in at a more leisurely pace.

Three panels, and the ceiling is up! The last panel took more cutting and trimming to fit than it probably should have. But it’s up!

An awful lot of tape later (the three panels plus all the edges), and the shed has a sealed layer of insulating board over the inside.

This process really wasn’t that bad. Things that would have made it radically easier:
- A table saw for cutting the boards down - much faster, and better for cutting straight lines. But I didn’t have one, so I worked with what I had.
- Using a circular saw (which I do have) still would have been better than using the reciprocating saw for most of the work, since it’s just straight lines. I realized this sometime shortly after I finished.
Overall, this really wasn’t that bad. I got it done in two days, and could certainly do it faster now that I’ve worked out the bugs in the process. Get a table saw if you can!
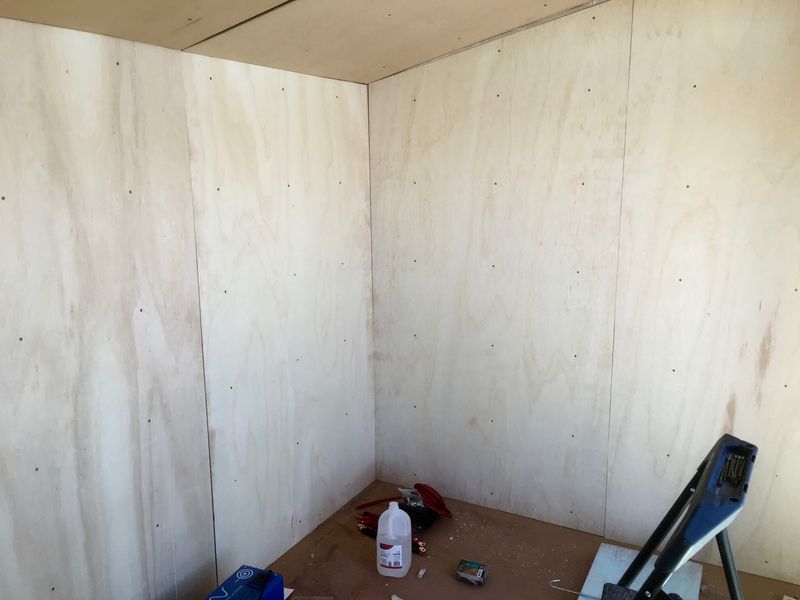
Next, the plywood!
Comments
Comments are handled on my Discourse forum - you'll need to create an account there to post comments.If you've found this post useful, insightful, or informative, why not support me on Ko-fi? And if you'd like to be notified of new posts (I post every two weeks), you can follow my blog via email! Of course, if you like RSS, I support that too.


