
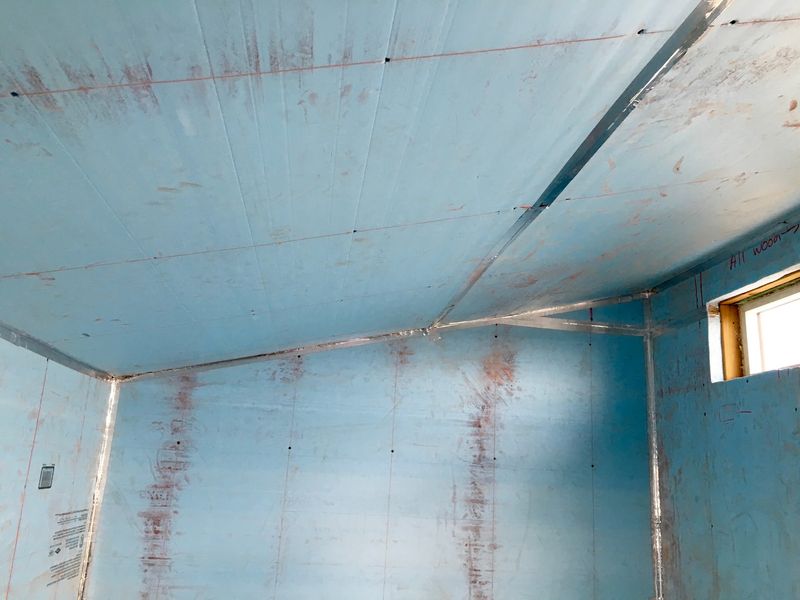
With the interior foamboard up and sealed, it’s time to install the plywood!
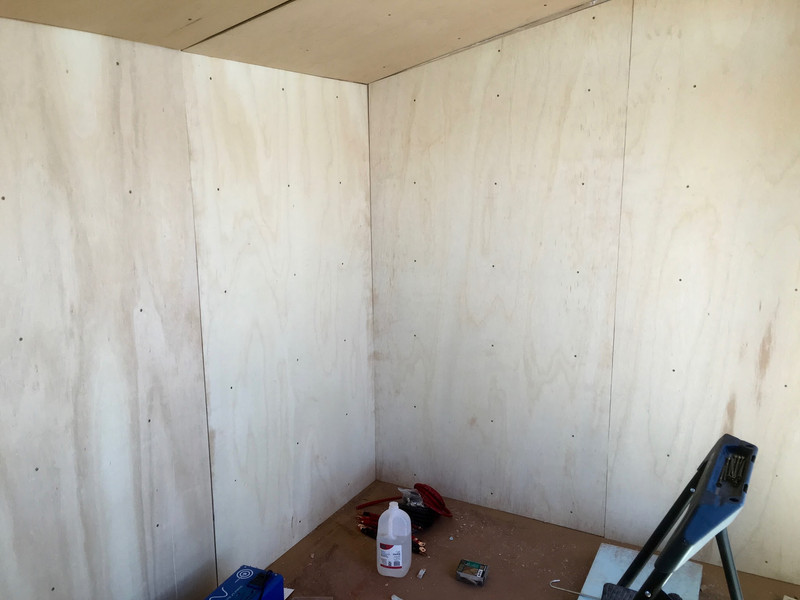
I get here:

From here:

In only two days of work!
If you have no idea at all what on earth this is, check out the overview of my project! It’s a solar powered office, made from a Tuff-Shed.
How and why? Read on, of course!
Why Plywood?
Plywood is certainly not a common option for interior wall work - so why am I using it?
Several reasons.
First, I like how it looks. It has a nice warmth to it, and I like the exposed wood grain of plywood. I’ve seen it in a few other places, and it appeals to me.
Second, and more importantly, it gives me a solid base to mount wall-things to. I can screw shelves and monitor arms and the like straight into the plywood instead of having to find studs. And if I do want to find studs, the exposed screws guide me right to them.
If I were to drywall, it wouldn’t look very good unless I taped and mudded it. Were I to do that, I wouldn’t be able to find the studs at all, and I’d have 2.5” of foam and drywall to secure things to - which is basically useless for any sort of structural mounting heavier than a photo.
So, aesthetically, I prefer plywood, and functionally, plywood is a whole lot better for my needs.
I’m using 1/2” plywood for the walls, and 1/4” plywood for the ceiling. I thought about going heavier, but 3/4” is difficult to hang solo, and I don’t think it gains me much. Anything heavy will run through to the studs, and anything lighter (monitors and such) will be just fine secured into 1/2”.
The Walls
Putting up the wall plywood involves measuring, cutting it to size, and installing it - sounds simple enough, right?
Unfortunately, I didn’t have good power out at the site. My 750W inverter would run a drill, but not the circular saw - so I had to measure, head up to the house, cut a few sheets, bring them back down, and install them. I got pretty good at driving back and forth between the house and the shed…
One thing I tried to do when possible is not have the plywood joints at the same place as the foamboard joints. The goal here is to have a smoother surface. I was mostly able to do it.
The plywood is hung with 4” screws driven through the foamboard and into the studs. It’s a bit of a challenge to find the studs, but fortunately I’d labeled them with red chalk on the foamboard!
The piece of blue tape off to the left is marked to help me line up the screws. It’s marked at a consistent interval, and I copy the measurements of stud spacing from the wall to the plywood, then mark the screw holes. And it mostly works, though sometimes it takes driving a screw a few times to find the stud. You can feel the screws hit the studs easily - they “bite” when they hit, and it’s a very distinct feeling.

And the back wall is done! That was easy - three bits of plywood, and a bunch of screws.
The gaps are a bit more than I’d prefer, but… oh well. They’re down low.

Going around the corner, things get a bit more complicated because I need to measure and cut angles on one end to match the roof slope. It’s pretty much what I did with the foam board, though.
The screws are in a nice grid, except where they’re not because I drove some extra ones at an edge.
All the plywood is glued as well as screwed. I ran through a lot of construction adhesive during this build… I hope I never have to try to take it apart. I won’t be able to.

More done. It’s tedious, but fairly straightforward. Measure, drive to the house, cut a few boards, drive back, install.

The window wall is the most complex wall - 5 pieces, total. There’s going to be a workbench over there to hide it, though - so it just needs to be covered.

A few more panels, and that wall is done! I like how it looks - it’s a unique interior, especially with the paneling still visible and the screws lined up with the studs.

Hanging the Ceiling Plywood
The ceiling plywood is 1/4” - I’m not going to be hanging anything more than lights off it without driving through to the rafters, and it’s hard enough to hang sheets of plywood solo without making them heavier.
The process is exactly the same as for hanging the foamboard. Get it up, start screwing it in, then finish up.
One problem is that the edges don’t line up with rafters. In retrospect, I should have designed it so they lined up and I could screw both sides of an edge into something. Foamboard just doesn’t hold a screw.

With all three panels hung, the ceiling is done!
The uneven edges are visible here - I couldn’t find a way to tighten those up. If I were to do it again, I’d probably plan the plywood before I did the insulation, and add some 2x2 strips to the rafters so I could screw the plywood edges in and tighten things up. I’ll keep that in mind if I ever do another one of these, but for my version, I can yell at the guy who did the work easily enough…
Really, this just isn’t something that I’m going to worry about. There are plenty of rough edges - this is the first time I’ve done anything nearly this scale, and it’s a learning experience. It may make running lighting a bit tricky, but… I’ll figure something out. Probably just run it along the walls instead of on the ceiling.

This corner is where my desk will go! I’m really quite happy with how this project is turning out. It’s a very unique interior, and should turn into a wonderfully functional space in another few steps.
And that’s it for the walls.
Join me next week as I cut a large hole in my brand new walls to install the HVAC system!
Comments
Comments are handled on my Discourse forum - you'll need to create an account there to post comments.If you've found this post useful, insightful, or informative, why not support me on Ko-fi? And if you'd like to be notified of new posts (I post every two weeks), you can follow my blog via email! Of course, if you like RSS, I support that too.


