
This is the eighth post about my solar shed, and I can say that the shed has been working very nicely for me!
After installing a bunch of plywood for your walls, one should, of course, immediately go about cutting a large hole in it!
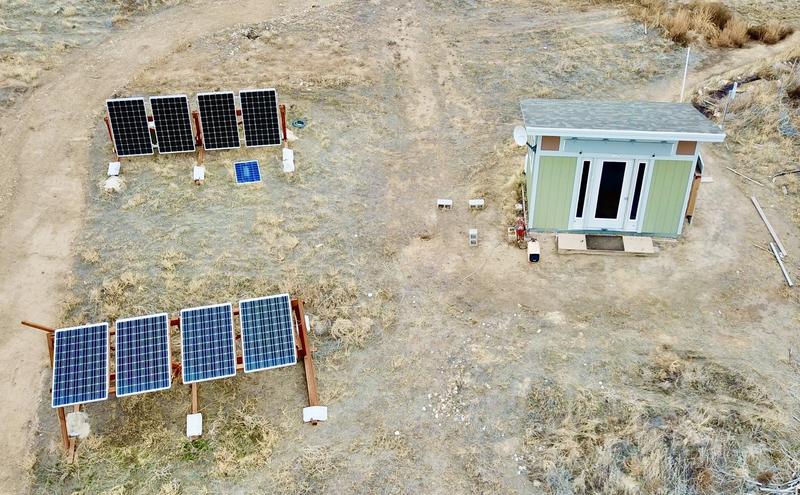
If you have no idea why I’ve covered walls in plywood, or why I’m installing an air conditioner, you should start here. This is my off grid, solar powered office!
Quick quiz: How long does it take to cut a hole in a wall and cram an air conditioner in it, when given a selection of power tools and saws?
Answer: A whole lot longer than I expected! Walls don’t give up as easily as I thought they would.
But I did succeed!

How? And why this particular unit? Read on!
Wall Mount Heat Pumps
When searching for an HVAC solution (not just an air conditioner - an HVAC solution!) for my office, I really, really wanted to find an air conditioner capable of operating in reverse cycle (or, to use the more common term, as a heat pump). There are plenty of air conditioners that offer heating, but almost all of them heat with a resistive element (backup coil). This consumes insane amounts of electricity for the heat generated. At one level, it’s “100% efficient” because 1kWh of electrical input gets turned into 1kWh of heat, but it’s not a great way to heat compared to pumping heat around (a 3-5x multipler on energy to heat).
Why do I want one that works as a heat pump? A heat pump is, quite literally, running an air conditioner backwards - instead of the inside coils being cool and the outside coils being hot, the inside coils are hot and the outside coils are cool. The advantage here is that when the outside temperature is cool enough to require heat but not insanely cold, it uses far less power than coils. The unit is just moving heat, not creating heat. This makes a huge difference in power, which is really important for an off grid solar office.
That said, it’s remarkably difficult to find one of these things smaller than a mini split unit. There are very few self contained heat pumps out there.
However, I found one!
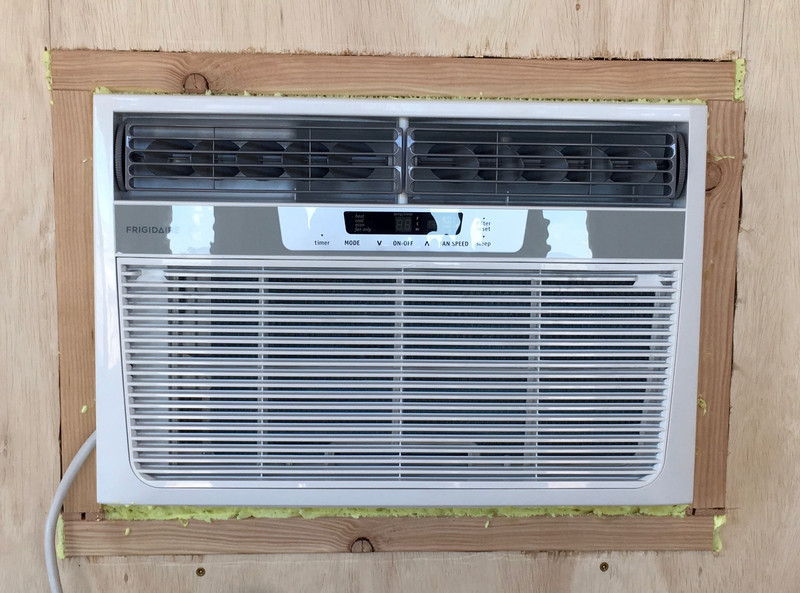
The Frigidaire FFRH0822R1 (easily found on eBay) is exactly such a unit! This gem is a window/through-wall unit that operates as an air conditioner in the summer and a heat pump in the winter. It includes an economy mode, in which it will turn the fan on for 15 seconds or so every 10 minutes, sense the air temperature, and only turn on if needed. This thing is basically custom designed for off grid use, and many of the Amazon reviews mention it’s getting used in exactly that type of situation.
I do understand that it will turn on the backup coils around 40F, which I’m going to keep track of and see if I can work around - I have a few ideas up my sleeve.
In any case, I need to get it through my wall. Which, conveniently, is a whole section in the included installation direction booklet!
Frames, Instructions, and “Not Believing the Lies in the Instructions”
The instructions come explaining how to window mount it and how to through-wall mount it. Since this is intended to be a permanent installation, and my window is going to be, you know, a window, I decided to go with the through-wall mount. It seems nobody has actually done this with the current revision of the cabinet.
Step one is to build a frame of a given set of dimensions. Specifically, 22 5/8” wide. Which, I should point out, does not fit the cabinet.
Why? There are some tabs on the side to mount the accordion window gap sealer things, and they stick out!
Here’s the cabinet: 22 5/8” is a perfect width for a frame for the cabinet - if only that were the widest point.

Here are the tabs that stick out the side, and are entirely unmentioned in the instructions. They add about 1/4” to the total width needed. Which means a tightly fitted 22 5/8” frame does not work. At all.
Options included “pounding these flat” or “adjusting my frame.” I decided that pounding them flat was going to be more trouble than it was worth, and might interfere with something inside.
The reason this posed a problem is that I’d already built the frame based on the instructions, assuming they were correct…

So I adjusted my frame. Sigh. Read the instructions, then sanity check before building something.

Cutting Holes in Walls
The next (somewhat terrifying) step is to cut a very large hole in one of my walls. The air conditioner is mounted on the back (north) wall, centered. This puts it near the inverter, gives it a good position to blast conditioned air all over the office, is on the shaded side of the shed, and is out of the way of other things (the center of the back wall is mostly for the mechanicals).
The hole I’m about to cut covers two studs, and is level based on my best ability to level things with a level.

Ignore the lower right hole. I forgot you can’t turn a saw blade rapidly. I then proceeded to drill sane holes in the wall.
It takes a good bit of time with a hole saw to punch through half an inch of plywood, two inches of foam board, three and a half inches of insulation, and another half inch of siding - mostly because you have to keep stopping and clearing the hole saw out. The plywood needs to come out, then the foam, then the insulation, and if you try to keep drilling, you make no progress until the contents of the hole saw have been removed.

About half an hour of solid work later, I had a proper hole in the wall. I obviously fixed the lower right corner.
I expected punching a hole in the wall with a saw to be a quick, easy, painless process. It was none of the above. Getting through the studs took a long time, in no small part because there were screws in the studs I had to slice through.
It’s not as easy as it sounds. If you’re tempted to use the phrase, “As easy as slicing a hole in a wall with a reciprocating saw” - don’t.

Installing the Frame
After I finished cutting the opening to shape, I stuck the frame in.
Or, really, I should say, “I pounded the frame in with my trusty sledgehammer.” The frame fits in very tightly against the studs, and I’m totally fine with that.
I did have to do plenty of trimming as the frame went in. The outside needed to be trimmed, and I trimmed as I went, finding the high spots and trimming them as I crammed the frame through.

Can you tell I haven’t done this before? Tolerances aren’t amazing, but nothing some foam won’t fix.


I also, apparently, did not cut this hole particularly straight. Foam it is! This is, quite literally, the first time I’ve ever cut a hole this large in a wall.

After getting the frame all the way through, I screwed it into the studs - not that it was going anywhere, but I may as well be sure. Besides, the instructions said to screw it in!
Installing the Heat Pump
A very, very nice feature of this unit is that the guts can be removed from the cabinet. This means I’m not trying to wrangle a heavy unit into the frame - just the exterior. So, of course, I did things this way.
The cabinet mounts easily in the frame, once you’ve adjusted the frame to be the right size.
If it looks like it’s slightly tilted down, you see properly. The unit is slightly tilted to help drain water off and out. It’s about half a bubble down in the rear.

Once the cabinet is installed, the actual guts slide right in! This is much easier with two people, and I actually did use a second person for this.

So, uh, I have air conditioning now!

Final Steps: Foam
The final step is to foam the gaps so air can’t leak through. The cabinet isn’t the tightest fitting thing in the frame, and air (and dust) gets through easily.
So I fixed the glitch.
The foam expands a good bit while setting up (that’s it’s purpose in life), so there’s plenty of excess after things have dried.

However, much like for my windows, it’s easy to trim the excess off.
I should probably caulk the seams too, but I’ll get around to that at some point. It’s now airtight around the unit, which is exactly what I wanted!
On the outside… well. I have a bit more trimming to do. It’s kind of a mess. I’ll finish that up later.

Bonus: Wall Construction Detail
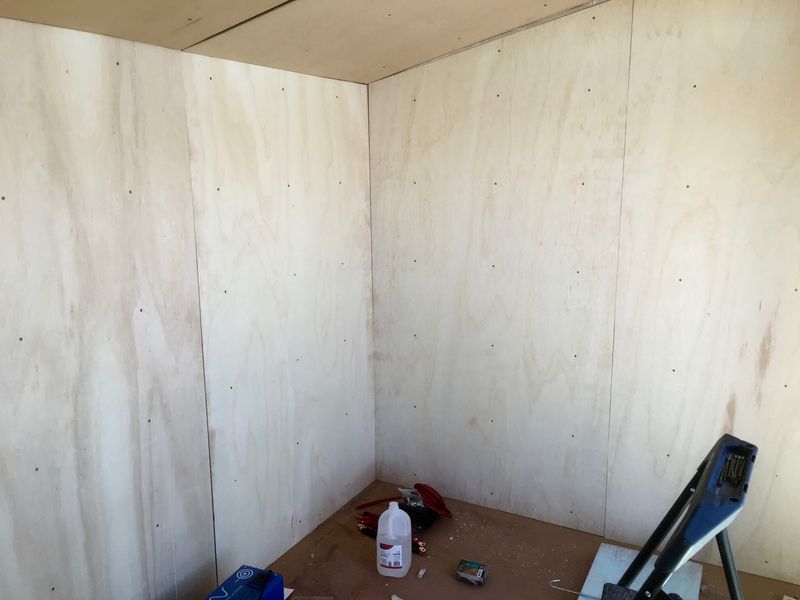
One really neat thing about cutting a hole in my wall is that I can see exactly how things worked with the wall assembly - and I’m very happy with it! Everything is tightly secured together with screws and glue, and it’s exactly what I hoped it would look like.


So, I have the ability to heat and cool my office now! Just no ability to power it for long.
Most excellent.
Join me next week as I get the solar bits and pieces wired up!
Comments
Comments are handled on my Discourse forum - you'll need to create an account there to post comments.If you've found this post useful, insightful, or informative, why not support me on Ko-fi? And if you'd like to be notified of new posts (I post every two weeks), you can follow my blog via email! Of course, if you like RSS, I support that too.


