
If you’re new here and wondering what this is all about, I’m documenting my build of a solar powered off grid office built from a Tuff-Shed - in many detailed steps. Last week, I insulated the walls. This week, I insulate the ceiling!
After a very successful 4 hours filling the walls with rock wool batts (and another few hours filling the window and door gaps with foam), I figured the ceiling would be quick and easy too! I couldn’t have been more wrong.
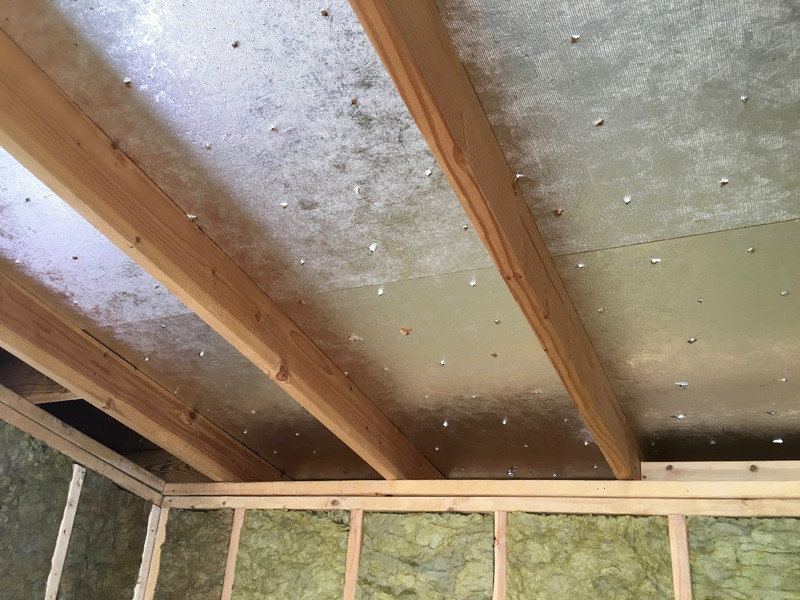
Here’s what I’m starting with overhead. It’s a shingled roof, built on 2x6 rafters, 24” on center. The sides are broken into smaller compartments, and there’s a radiant barrier on the inside (the silver layer). My plan is to stuff it full of insulation, just like I did the walls!

Would you like to know how not to insulate this, and, perhaps, some advice on how to go about insulating it? Read on, and learn from my mistakes.
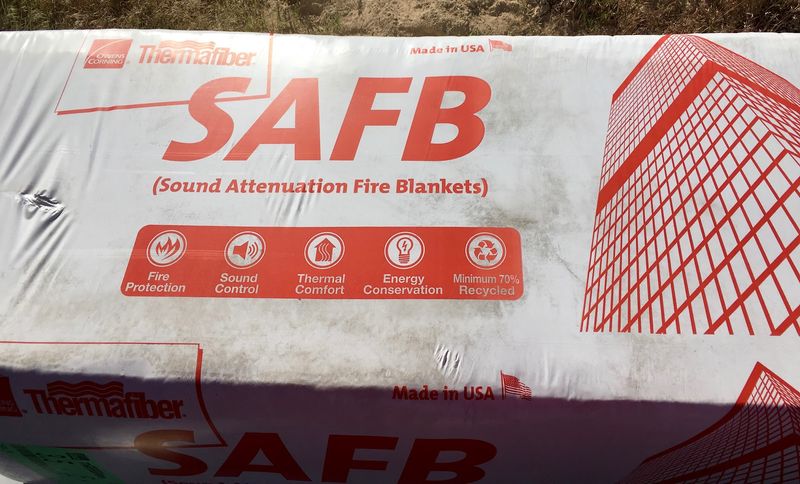
Rock Wool Batt Sizes
There exist sizes of rock wool for dealing with 2x6 framing, 24” on center. Ideally, one can (and, as I learned, should) use 5.5x24x48 batts of rock wool - but nobody had this locally. So, instead, I used 3.5x16x48 and 2x16x48, cut them in half, and stacked them on top of each other. I figured it was about the same. It’s not! The end insulation result is, perhaps - but the process was much more complicated and frustrating than it probably should have been
The silver lining on the inside of the roof is a radiant barrier. This is designed to help reflect heat out, and also to be bad at radiating heat into a space. However, since I’m covering it tightly with insulation, I believe I negate most, if not all, of the “don’t radiate heat” benefits, as it can just conduct the heat through via contact. I don’t know if it will still reflect heat out, but it’s not going to be worse than having nothing there. Basically, I wouldn’t have paid for it, but it came with my shed, and I got the shed for 40% off. I’m not going to complain. I seriously doubt it will be worse than nothing.

Cramming Cavities
This would be a good name for a band composed of dentists, by the way.
Cramming rock wool into the cavities on the end is easy. Just stack two sheets, line up, and shove in. They slide in fairly easily, though sometimes the top one hangs up on nails and takes a bit of work to get in
Most of the edge cavities are 24” wide, so cutting the sheets in half works perfectly to fit them. They fit in nice and tight. It’s a promising first step, so this should be easy, right?

Ah. Well. The problem comes when trying to cram the insulation into unsupported openings over the floor. There’s nothing to hold them up, and they have no interest in staying put.
I’m under the impression that getting the correct size makes this easier, but doing 3.5+2, sideways, doesn’t work very well at all. If the batts are too long, they want to “bridge” and pop out in the center, and that relieves tension so they fall out. If they’re even a hair too short, they fall out. And the top one can push the bottom one out. If you’re interested in doing this, order the proper size. Don’t do what I did.
The major problem is, “Nominal dimensions are not actual dimensions.” The 3.5x16x48 batts are 3.5” thick (as indicated), 48” or so long (as indicated), and 14.75” wide - so they fit tightly in the 14.5” space created by 16” on center 2x4s (which are, of course, 1.5” wide). Cutting a 48” batt in two creates a 24” batt, when I really need a 22.5” or 23” batt - so I have to trim them shorter than in half, and the precision isn’t the same as what comes from the factory.
However, I have what I have, and this situation qualifies as “something moving when it shouldn’t” - which means duct tape is the solution! And I have duct tape on hand.

With one row complete, duct tape seems to be working. I don’t have to tape every single panel, just some of them. Friction holds the rest in.

My workspace looks about like this. I cut a few panels at a time and have some stock to work with - the 3.5” panels are on the right, the 2” panels are on the left. The gallon of water gets consumed regularly while working out here. And, yes, the floor will be a mess from cutting rock wool.

Post-Lunch Drooping Duct Tape Disaster
Oh. Well, then. Duct tape isn’t the perfect solution. Everything is all saggy, and some of the strips have come off. Time to search for other options.

Insulation Supports - Sounds Legit!
There exists a thing called “Insulation Supports.” They come in a box, and based on the name, promise to hold up insulation. They should work to hold up insulation, right?

What are they? Nothing fancy - just some springy steel rods with pointed ends. They look exactly like this!

And they don’t work. Not even the slightest bit. Not for what I’m doing.
If you have deep 2x8s or 2x10s and want to shove “a bit of fiberglass” in between, I’m sure they work perfectly. But they have to arch up (as shown on the box), and there’s nowhere to arch with what I’m doing - the rock wool simply doesn’t compress like that. Probably fine for fiberglass insulation in your crawlspace, not OK for rock wool in the ceiling.
So, it’s time for Plan D. Plan A was “cram them in and they’ll probably hold.” Plan B was duct tape. Plan C was insulation supports. So, yes, I am onto Plan D. For “Don’t make the mistakes I did.” And I’m well into “figuring this out on the fly, because I assumed Plan A would work.”
Lath (as in “Plaster and”)
Searching for thin wood to serve as temporary insulation supports, I came across several bundles of lath in a corner of Home Depot. It’s 48” long, rather thin, and perfect for this!
The only problem is that the ends split a bit while screwing it in. This isn’t a big deal for me, as the center screws go in nicely, and I’ll be securing everything with foambord as well.
It just has to hold things in place for a few days, which it looks like it will do!

Putting in insulation with lath is a bit of a trick - cram both sides in, get them to hold briefly, and screw in the lath. It’s tricky, and involves trimming the insulation to just the right length, but it’s possible!

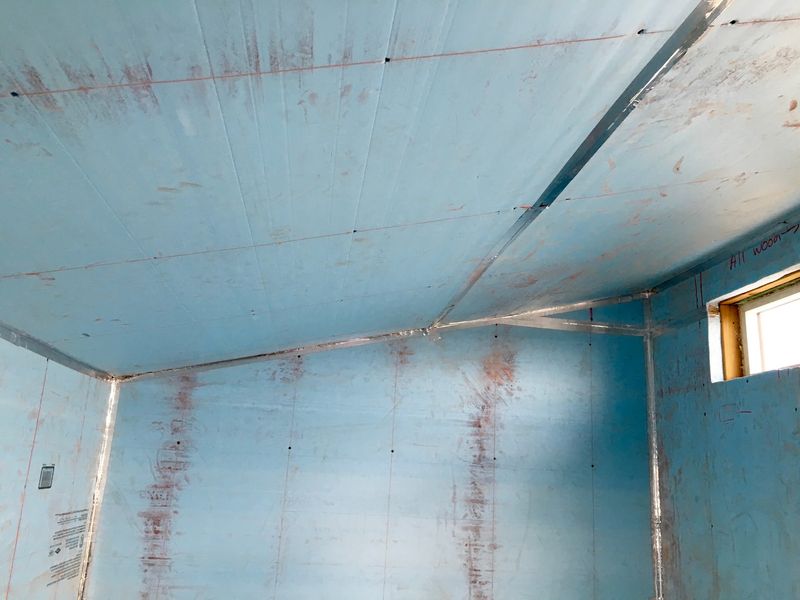
Do this, oh, a bunch more, and you end up with an insulated roof where the insulation stays in place. This took a lot longer than I’d expected - four hours for the walls, two days to get the ceiling sorted out. Using the right insulation size would almost certainly have made for a much quicker job, and likely better consistency of the insulation as well.

But, it’s finally done!
Final Thoughts
I’ve learned several things.
First, get the right stuff. I think most of my problems were due to my “DIY 5.5x24x48” - the proper stuff would have fit tightly, not been prone to bridging out (one thick piece) and been thick enough to stay up on its own. Or with minimal support. So, lessons learned there.
Second, apparently “twine and large headed screws” works great as support for overhead insulation - you can lace the twine back and forth and hold the insulation up. I learned this after I finished with the lath, of course.
Third, get a friend for this. Seriously, it’s hard to do solo. Even with a ladder. Just find someone to help out.
Next week, join me as I cover all my fancy green rock wool insulation with a layer of 2” thick blue foamboard!
Comments
Comments are handled on my Discourse forum - you'll need to create an account there to post comments.If you've found this post useful, insightful, or informative, why not support me on Ko-fi? And if you'd like to be notified of new posts (I post every two weeks), you can follow my blog via email! Of course, if you like RSS, I support that too.


