
It’s been a little while since I’ve had a shiny new tool battery to tear down! This one showed up in the mail for some analysis and evaluation - so analyze and evaluate it I shall!
As of the time of posting, you can get 2 for $150 (shipped) on eBay - which almost certainly beats your local hardware store by a lot. But, only if they’re good.

This is a notable pack in that it’s (supposedly) using 20700 format cells - the first non-18650 based tool pack I’ve had the opportunity to rip into.
What’s inside? Is it any good? Read on to find out!
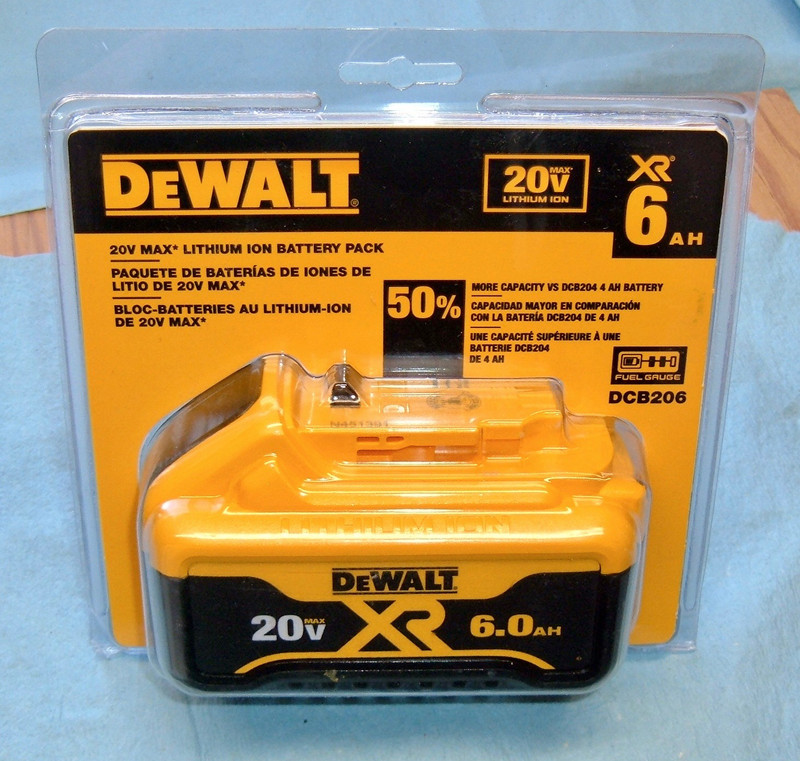
DeWalt 20V Max 6.0Ah Tool Pack
I’ve looked at the DeWalt 20V Max packs before. Back in 2016, I tore apart a 3.0Ah pack I had laying around - that particular one had a bad cell group (dead short in a cell - that must have been exciting when it failed), so it was quite unusable and I couldn’t really get much data on it.
This new pack is supposed to be twice the capacity at 6.0Ah - or, as the front cover helpfully explains, “50% More Capacity vs DCB204 4.0Ah Battery.” Math!
Since this is a brand new and working pack, I’m not going to completely destroy it - I do like my tool packs for my tools. But, I’m going to pull it apart enough to find out what makes it tick, compare it to the other pack I ripped apart, and do an awful lot of testing to find out if it’s any good!
Specifications & Size (vs 3.0Ah Tool Pack)
To give you an idea of how this pack compares to the more common 3.0Ah pack, I’ve compared the new pack to the 3Ah ones I have laying around and previously tore down.
Weight (3.0Ah): 22oz (624g)
Weight (6.0Ah): 30.1oz (854g) (37% heavier)
Dimensions (3.0Ah): 4.5” x 3” x 2.5”
Dimensions (6.0Ah): 5.25” x 3.25” x 3” (51% more volume)
It’s half a pound heavier and marginally larger in all dimensions for twice the capacity. You can consider this a case of “Battery technology advancing.”

The new pack sounds bigger than it is - it’s really only a small increase in size and weight over the old pack.

If you’re doing a lot of overhead work, the extra half pound might matter to you - but otherwise? This is a very nice improvement.
Warnings and Cautions
Oooh! The back of the packaging comes with a handy list of “Things I’m about to do with a battery pack” - though I may not do all of them immediately. At least not intentionally.
The top part of the warnings is not terribly fun to read. There’s a 3 year warranty (which is pretty solid for a tool pack, especially if you use it regularly), a warning that I should read this list of warnings that seems to be the instruction manual (which I have, and will proceed to ignore), and a label in the top right stating that this is a lithium ion battery and that if the package is damaged, you shouldn’t transport it. Obvious, but this is required labeling on lithium batteries.

The lower part of the warnings is the fun part - let’s see what “suggestions” I’m about to ignore.
I don’t plan to immerse the pack in water or other liquids, even if that does sound fun (I suppose I should find out if it floats).
I don’t intend to incinerate the pack, even if it is severely damaged or completely worn out (I’ll try not to severely damage the pack). You should recycle the packs, because vapers need “9000mAh UltraStarFireXTREEM” batteries from some source or another. I bet these will be recycled as “15000mAH” cells. Though I will say, they’re not kidding about toxic fumes - lithium battery fires are a good thing to be well upwind of.
If you’ve managed to get cylindrical lithium battery contents onto your skin, or liquid into your eye, you’re having a really, really bad day. Or, perhaps, you’re trying to build a DIY Powerwall in the normal, incredibly hazardous, likely-to-cause fires method. I do try to keep the contents of my lithium cells inside the cell at all costs. I usually even succeed!
Seriously? ”Contents of opened battery cells may cause respiratory irritation”? Yeah! That stuff is not for human consumption. McGruff the Crime Dog says, “Don’t sniff lithium batteries.”
Now that I’ve gone through the “Do not destroy this battery and stand around staring it it while it squirts in your face, which you may find irritating” part of the warnings, I come to the parts I fully intend to ignore.
“Charge the battery packs only in DEWALT chargers.” Well, probably. You could charge it with any other balancing charger that handles a 5S pack, but the DeWalt one is convenient.
“Do not probe pack with conductive objects.” Like the probes of a voltmeter? Well, um… Oh! How about alternative contacts for discharge testing?
“Never attempt to open the battery pack for any reason.” Definitely doing that.
“Do not store or carry battery so that metal object can contact exposed battery terminals.” This battery, very reasonably, has no exposed battery terminals. But, the terminals are live at all times - so I wouldn’t want to carry this pack in a box full of paperclips, metallic tinsel, or other metal objects that could make contact with the terminals.

Exterior Overview
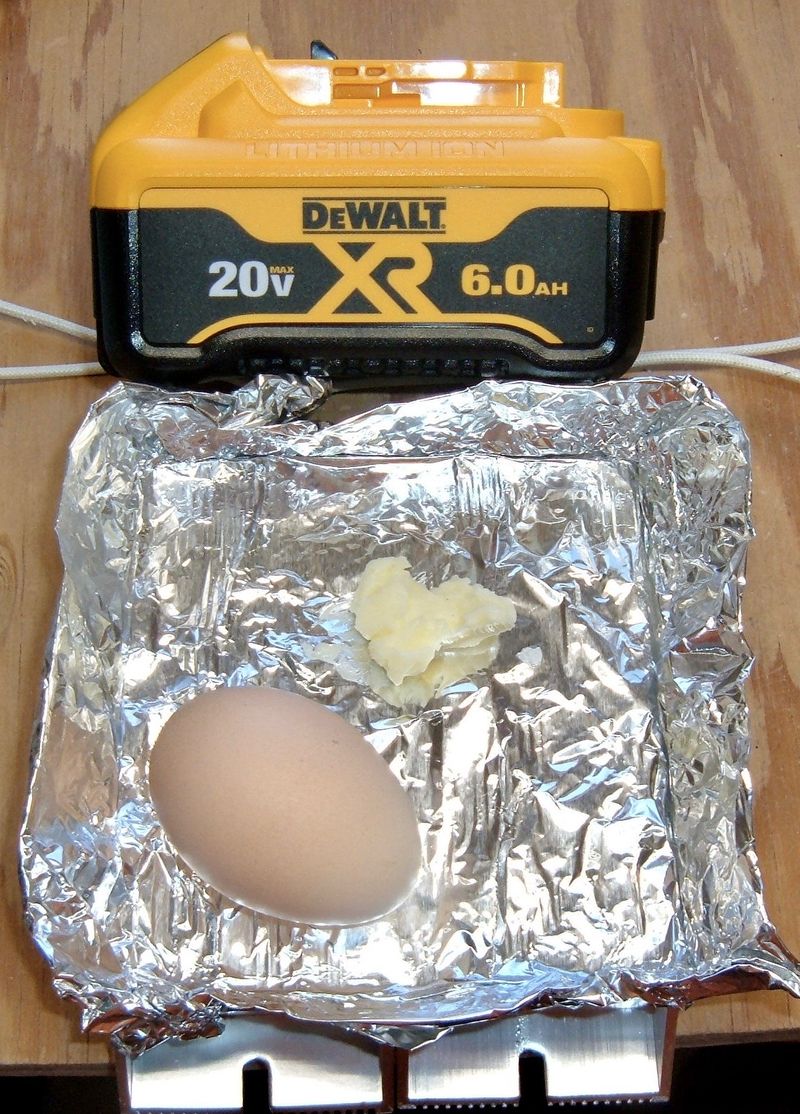
What we have here is 854g of brand new DeWalt Tool Battery, built in late 2016, if the date code is encoded reasonably.
It has the same terminals and latching mechanism as all the 20V Max packs - which does make sense, given that they all need to fit in the same tools.

The underside comes with the usual warnings and information.

Zooming in on the actual data label in English, it’s a 20V (Max) battery pack, 6.0Ah, “Type 2” (whatever that means), and claims 120Wh nameplate capacity. Well, not quite, but that math works with their admittedly creative naming for this series of packs (personally, I’d call it an 18.5V pack, but that’s not a substantial improvement over the old 18V NiCd or NiMH packs - you can buy straight through adapters).
Interestingly, 120Wh exceeds (by 20%) the 100Wh absolute capacity limit on the mailing method in which this pack arrived at my office. Bad seller! I’m not surprised, but as one who deals with the proper dangerous goods/hazmat shipping for battery packs on a regular basis, I really don’t like to see batteries shipped around in violation of shipping laws. That leads to more shipping laws, which just annoys me even more.

Terminals
This is a DeWalt 20V Max pack - the terminals are the exact same as on the previous pack I pulled apart.
These packs are pretty simple. There are 8 terminals - B+, TH, ID, C1, C2, C3, C4, and B-.
B+ and B- should be obvious - these are the main charge and discharge terminals. They’re on the ends, are double height (both the upper and lower row are the B+/B- terminals), and are of a different material than the center terminals (copper versus brass, I’d guess). Probe these, you see the full pack voltage at all times - helpful, if you wish to use these packs for other purposes! You’ll see how things are wired up internally below, but it’s up to the equipment to perform a low voltage cutoff. This pack can’t do it.
TH is for thermal monitoring. On the DeWalt 20V Max packs, at least, this is a 10kΩ/25C NTC thermistor wired between B+ and TH. Note that it’s going to the positive terminal! If you measure the voltage between TH and B-, you’ll see something somewhat less than pack voltage, because your voltmeter and the thermistor have made a voltage divider.
ID is for pack identification. On this pack, it’s almost exactly 800Ω to B- (ground). I assume this is a resistive based pack identification method. My 3.0Ah packs read exactly the same.
C1, C2, C3, and C4 are direct access to the voltage of each cell group - so, as shipped, 3.5V per cell. The charger uses these terminals for balance charging, and if you happened to want to charge one of these without a DeWalt charger, you could simply configure your charger for a 5S balance charge, hook up the proper terminals, and have fun. If you do this, be aware that C1 is the first cell group up from B- - the terminal ordering feels a bit backwards.

Shipping Voltage
As delivered, the pack has 1 of three charge LEDs lit, 17.5V across the pack, and almost exactly 3.5V per cell charge.
This is a bit lower than what I’m used to (normally 3.6V per cell), but based on the datasheet, this corresponds roughly to a 30% state of charge (required for some newer shipping regulations). By my reading of the datasheet, this is closer to a 35-40% state of charge, but… hey. Close counts, right? If the shipping companies won’t specify exactly how they intend you to define 30% SoC, you can define your own method. It’s not like they’re out there with a voltmeter.
If you can’t tell, I’m depressingly familiar with lithium battery shipping regulations. At least all the local UPS guys know me as “the battery guy” now and don’t have to call the depot about the fact that “This guy is shipping hazmat… is that OK?”
The ideal place to store lithium cells for shipping is about 60% - this is well below the “stressed at full charge” state of charge, but leaves plenty of capacity for in-transit self discharge or a small battery management system draw.
It’s fine, but you’ll need to charge the pack before use.

What’s Inside?
Well, here’s another one of the suggestions I’m completely ignoring.
Current generation DeWalt packs are held together by Torx T10 Security Screws - they have a pin in the center to prevent you from using a normal Torx bit. Of course, being a well equipped techno-weenie in a solar powered office, I have an entire kit of security bits, because I don’t believe in keeping me out of things.

With the “Please don’t remove me” screws removed, the pack comes apart easily enough. There’s no glue or anything else involved - the pieces just slide free.
And inside is just a scaled up version of the 18650 based pack I tore down previously!

Comparing them side by side, you can see this - the older 18650 based pack and this 20700 based pack are pretty much identical except for size (and the fact that I dismantled the older pack a good bit further).

Just like the previous pack, the cells are spot welded on the ends with some nickel strip (presumably 0.30 mm - it’s hard to measure without ripping things apart, but that’s what the previous pack had, and this feels the same to me).
The H interconnects are placed a bit more precisely than the interconnects on the older pack I tore apart. If I had to guess, I’d wager that this pack was machine assembled. The spot welding points are marked by small divots in the strip, and the slits are pretty standard on thicker nickel interconnects. By having the slit in the center, the spot welding current is forced to go into the battery terminal (not through the whole battery - just across the terminal), and this makes for easier and more consistent welds with the thicker strips.

The Cells: Panasonic/Sanyo NCR20700A
Measurement of the cells indicates that they are, indeed, 20mm in diameter (you can’t see the entire diameter on the ends as the ends are a bit curved).

They are also almost exactly 70mm in length (the case is slightly less, and the cells stick out perhaps 1mm on each end).

Unfortunately for identification purposes, the markings on the cells are hidden under the case - and, for this pack, I don’t really feel like ripping the whole case apart. But it doesn’t matter, because there’s only one cell that fits this description!

The Panasonic/Sanyo NCR20700A!
This is a 20700 format cell, with a red wrapper, rated at 3100mAh, and rated for a whopping 30A. Impressive!
The previous pack I pulled apart had a pair of 15A rated cells, for a total pack rating of 30A. This has a pair of 30A rated cells, for a total pack rating of 60A, but the interconnect strips and wires are the same as in the smaller pack, so I can’t say I’d consider this more than about a 30A pack. Though I might try and see what happens.
Looking at the discharge curves for the cell (from the previously linked PDF), Panasonic considers the cell fully drained at 2.5V - which is absurdly low for a lithium cell (and works out to 12.5V across this pack). You really, really don’t want to do that to your cells or the cycle life goes to “suck” in a hurry.

The cycle life on these cells, if cycled repeatedly from 4.2V to 2.5V, is (by modern standards) quite poor - under 200 cycles to 80% (2400mAh) according to charts in the datasheet.

In reality, they should last a good bit longer for most users. The DeWalt charger (at least the one I have) doesn’t charge past 20.5V for the full pack - this works out to 4.10V per cell instead of 4.20V. And, if you’re not being an idiot, you won’t run your packs down to low voltage cutoff regularly (I would consider 15V, which is still one LED lit, as a sane cutoff point for these cells). You should feel the reduction in power by then anyway - just swap them out when they’re down to 1 LED and you’ll be perfectly fine. All you do by draining the pack deeply is hurt cycle life.
Lithium batteries are most stressed when totally full (4.2V per cell, though higher for some newer chemistries), or fully empty (2.5V per cell or below). Running the cells from end to end like the cycle life test will kill them fairly quickly. Not fully charging them, and not running them totally empty (as is the case with the DeWalt charger and, ideally, users) is a lot easier on the cells and should keep them alive a lot longer. DeWalt offers a 3 year warranty on these packs, and I’d expect them to easily last 3 years. Even if the capacity drops with time, the packs will still be totally usable.
For longer term storage, somewhere in the “2 LED” range would be ideal. Letting them sit fully charged is better than letting them sit empty, but still worse than using them a bit before letting them sit.
I couldn’t find any internal resistance numbers for these cells, so I measured them myself. I built a custom harness for my ZB206+ battery tester (this is my go-to tester for single cell testing, but the cells are too long for my normal test fixture), and measured pairs of cells (because I’m not ripping the pack apart that far).

Each bank of 2 cells had a DC internal resistance (on my tester) of 9mΩ, which works out (via math) to a per cell DCIR of 18mΩ. That’s impressively low, but is well within what I’d expect for a “power cell” (as opposed to a higher capacity “energy cell” like the NCR20700B). You saw it here first!
Internals and Interface Board
These packs contain an interface board that serves to connect the cells to the outside world. The board has the ID resistor and thermistor as well, but it is by no means a battery management system - it doesn’t appear to do any balancing, and is quite simple. There’s also no low voltage cutoff or overcurrent cutoff - the tool is required to handle all that.
This means that if you want to use these packs in another project, it’s really easy! Just shove some terminals in and don’t be stupid about your low voltage cutoff (15V is a good idea).
With the cover off, it’s easy to see how the pack is wired up. The positive terminal from the cells (lower right) is wired directly to the B+ terminal, which is a double height terminal. The same goes for B-. There’s no way for this controller board to cut current even if it wanted to.
The exposed balance wires (coming from the center of each “H” interconnect) go into the board and are routed to the C1-C4 terminals in the center (since these don’t handle nearly as much current, they don’t have to be double height).
Finally, the circuit board handles the ID and TH pins as described above.
It’s worth noting that the thermistor is showing the board temperature, not the cell temperatures. I don’t know what the high temperature cutoff is, but if you are using this pack for your own projects, be aware that the cells will be a good bit hotter than the thermistor indicates.

The other side is just more of the same.
On the left, the “state of charge board” has three LEDs and some basic voltage sensing logic on it to light the proper number of LEDs. Nothing fancy, but it gets the job done.

Unlike the 3.0Ah pack I tore apart, the cell group wires are soldered to the PCB - they’re not arranged as a plug. This means I can’t pull the PCB off to observe the underside without starting to dismantle the pack with a soldering iron - which I don’t care to do. But there’s not much under there.
Capacity Testing
An obvious question to ask about any battery cell or pack might be, “Does it meet the rated capacity numbers?” There are so many lies out of China with “9000mAh StarFireXTREEM 18650” cells that are maybe 800-1100mAh that it’s worth testing.
I do have high hopes for this pack. DeWalt puts proper OEM cells in, as do all the reputable tool pack makers, so I expect it to get within a reasonable distance of the rated capacity.
I’m reasonably certain that “this” is also one of those things the manual told me not to do - I’ve jammed some conductive spade terminals directly into the pack and am discharging it through my FDY10-H battery tester (which I will review at some point - I love this little gizmo for bulk testing).

2.0A Draw
With the pack fully charged to 20.5V (4.1V/cell), I set the tester up for a 2.0A draw and ran the pack down to 15V. At the buzzer, the tester read 5.49Ah and the pack had one LED left. I then ran it down to 13.5V, and found myself with 0 LEDs, and 5.79Ah out the terminals. I have no doubt that if I’d run it down to the 12.5V mark, that extra 0.2Ah would have popped out - so this is absolutely a 6Ah pack! You won’t see a true 6Ah in operation, but that’s true of pretty much every battery out there - they’re rated in ideal, low draw conditions.
10A Draw
This is a tool pack, though. They get beat on. Repeating the test at 10A (the max this tester will handle), I extracted 5.65Ah when running to a 15V cutoff. That this is higher than above is actually reasonable - the cells were warmer during this discharge, so will put out a bit more voltage. And, again, if I’d run it lower (which I don’t like to do), I’m sure I could have pulled a full 6Ah out.
I’m absolutely comfortable calling this a 6Ah pack - it meets specifications just fine. The cells are rated a bit more if you fully charge them to 4.2V/cell, but at 4.1V/cell, it looks like this is pretty much exactly a 6Ah pack.
Final Thoughts & Conclusions
I have nothing but good things to say about this battery. DeWalt has put out yet another solid tool battery based around some impressive cells. It’s not that much heavier or larger than the older 3.0Ah pack - but it has twice the capacity!
And, like with other tool batteries, if you want some fancy new Sanyo NCR20700A cells, the best way to get them is to rip apart tool packs. I literally can’t buy the 10 standalone cells for what I can buy this pack for. The best price I’m finding (at the time of posting) is two full packs for $150 - so $7.50/cell - with some nice bonus plastic too. The individual cells are around $10/ea.
As such, I won’t rebuild these. You can buy a replacement cheaper than I can buy the cells.
If you’re looking to use a tool pack for other purposes, this would be a good one. Keep it under 30A or so, set your (external) low voltage cutoff to 15V, and have fun!
What’s Left to Test?
I’ve covered pretty much everything I can think of in this review - but there is one question that remains unanswered. This is a question that, I’m sure, is on absolutely everyone’s mind when they think about tool battery packs.
Comments
Comments are handled on my Discourse forum - you'll need to create an account there to post comments.If you've found this post useful, insightful, or informative, why not support me on Ko-fi? And if you'd like to be notified of new posts (I post every two weeks), you can follow my blog via email! Of course, if you like RSS, I support that too.


