
This week: A random grab bag of stuff I’ve been doing around the property this summer - stuff I’ve dragged, lifting tines I’ve bent, sheds I’ve improved, and sunflowers that have shown up!

This is the second in an ongoing set of posts about things I’m doing around my few acres of basalt hillside. Don’t expect any sort of regular publishing schedule on these, as they happen when they happen (and when I have enough grab bag stuff to write one).
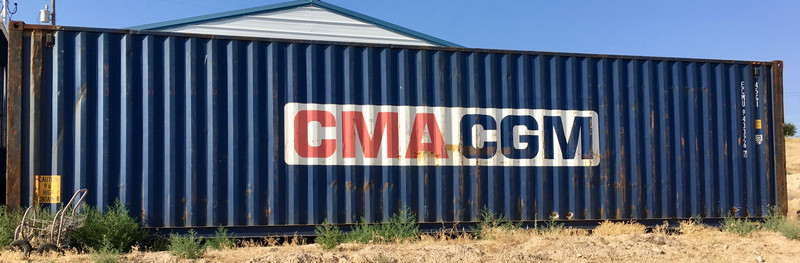
But, first - my shipping container is now legal!
Shipping Container Floor Plans
Those who have kept up with various posts may have caught references to my shipping container having been… say, lacking proper building permits and the like. Some of you may think this comically absurd. I happen to agree. But, since the last update, I’ve fixed it!
I have a signed off building inspection for my 40’ shipping container. Applying for the building permit required a floorplan, and it seems “A 40’ shipping container” is not enough of a description for some people to envision the floorplan (perhaps the people up at the Planning & Zoning board don’t hang out with people who think shipping containers are cool?). So, I have this not-to-scale and not-quite-done-with-a-ruler floorplan on file with the local building permit people. The interior opening door is entirely wrong and was added by someone there after I handed it over so people could figure out which side the doors were on. Not that there’s any indication of property orientation here. Because… somehow… anyway. It’s done. It’s legal.

The inspector and I had a brief discussion about tiedowns for the container. I pointed out that it was an 8600lb block with the aerodynamic qualities of a box (literally), and that it would be quite a few thousand pounds heavier with all the stuff I keep in it. Plus, it’s up near the house and tucked in with plenty of other things. If this container is being blown off it’s blocks, I have far, far larger problems than the container.
Next steps for the container are to get some suspended shelves hanging from the tiedown hooks up high, and to put more shelves in the far end (similar to my shed shelves). I’m loving it as a workspace, and I might even consider mounting some solar panels to it at one point or another!
Moving Trailer Tongues
One interesting thing about having a manufactured home delivered is that they don’t really take away many of the pieces. I still have to dodge axles in my crawlspace (though they did take the wheels and tires - those are apparently the factory’s property), and the trailer tongues just get left… somewhere. They’re not terribly heavy, but they are a lot heavier than is easy to drag by hand (which is to say, they’re made of fairly large I-beams). I can lift the end, and it’s got a crank on it, but getting this beast high enough to attach to my truck was going to be quite the challenge, so I hadn’t done anything about them.

They’re close enough to the house (and my compost pits) that I was getting sick of them, and since I’m trying to clean up the property this summer (a cheap way to spend my time as I’m saving my pennies for some projects next year), I wanted them moved.

How do you move something like this? Why, with an old tractor! I’ve done quite a bit of work on my 1939 Ford 9N, and, wow, what a difference. It starts reliably, runs well, and generally does what I ask with a minimum of drama. It works a bit too well, in fact, but we’ll get to that later.
This gizmo attached to the three point harness (well, attached to two of the three points and shackled to the bar for stability) is a drawbar with a bunch of trailer balls in it. The advantage of having it on the three point is that I can lift and lower it easily - and the three point will get low on this tractor. Full on Hermes limbo low!

I could literally back up to the tongues, drop the three point all the way down, stick the ball under the tongue hitch, lift it up, select 1st, and drag them across the property. Super easy, and avoids having to mess with any sort of jacking the tongue up to connect it to my truck.
Another use for this drawbar is to move my trash trailer in and out of it’s spot. I can get it there with my truck, but it’s not particularly easy, and I’m not as precise at putting it back as I’d like. With this setup, I can just drag the trash trailer out to the driveway and hook up there. Easier, and almost certainly faster. This is a seriously cool little hack if you have a tractor and trailers (I suspect this applies to very few of my readers).

A bit of dragging and the tongues are out of the way, down by the fenceline, and outside the firebreak. They’re not going to care if a cheatgrass fire comes through, but I might want the scrap metal at some point.

Wood Piles and Bent Tines
Another battle I’m fighting while trying to clean things up are the wood piles. A bunch of (dead) trees came down when the house went in, and I’m slowly turning them into firewood, roasted marshmallows, and assorted other things (possibly some hugels) over time. I didn’t realize until this recent drone survey of the property that I did, though, just how much room one of them was taking up. It’s taking space I’d like to either put garden or rainwater tanks, but definitely not a never ending pile of wood. I’ve removed most of the good wood from this pile, but there are still plenty of stumps I can’t cut apart (chainsaw chains don’t deal well with dirt/rock/grit, and a stump is a device for holding all of those things).

This particular pile (there are two, with the other being by my office) is just spread out. For size reference, the scraped part on the left is about 8’ wide, and that’s a half wine barrel of strawberries in the top left corner. This wood pile is just spread out, and in the way.

So, using another attachment for the tractor I found laying around, I started hauling the stumps out! This worked really well for the first few stumps - drop the tines down to the ground, shove them under the stump, use a ratchet strap to hold the stump on, lift it, take it across the property and dump it out on the hill by other tree cuttings (eventually, I’ll turn those into firewood after they age, but the stumps will probably just sit there indefinitely or until we need the space).

Unfortunately, 75 year old tractor hydraulics are a good bit stronger than the box iron used to build this particular setup. And one stump was either really heavy, mostly stuck in the ground, or both. I did successfully rip it out, but in the process I snapped a ratchet strap and bent up one of the tines pretty badly. Whoops… The tractor was happy to do it, and I had no idea I was bending things while lifting.
I’ll get it straightened out here soon and be a bit more careful with the lifting. And/or get some more material welded in to strengthen it. It’s not quite as strong as I’d thought!

The “Ultimate” Compost Bin
Not that long ago, I discussed my compost bin setup. The plans indicated that this was the “Ultimate Compost Bin.”
You know, I think they just might have been full of baloney when they claimed that!
It may be an OK bin for very, very wet climates. Maybe. It’s not an OK bin for dry climates, and based on some feedback online, it’s not even a very good bin for moderate climates. It just dries out the material in a hurry, and, since I’m in a high desert, the material I fed in was drying out so quickly it couldn’t do anything except dry out. Even the core would be dry in a few days! Airflow? Excellent. Moisture retention? Awful.
So, with that worked out, I set about trying to fix the problem - cheaply, as I’d rather not build an entire new bin. Enter black plastic and a staple gun! I stapled a few layers of black outdoor plastic around the outside to help keep the moisture in.

Then, I stuffed the gaps in the interior panels with cardboard to help keep airflow between bins from drying things out. It’s a good place to stuff cardboard, and it’s one of the many “random uses of cardboard” I’ve found that justifies keeping some shelf space in the shed devoted to large hunks of cardboard. You don’t realize just how much of the stuff shows up until you start saving most of it!

And, finally, to help keep the pile wet, a black tarp over the top of the material, held down by a few rocks.

Does it work? Yes, far better than before! The compost doesn’t dry out nearly as badly as it was.
Am I making good, hot compost out of my weed-seed filled feedstock? No. I am not. I think this whole batch is going to be scrap because it hasn’t gotten hot enough to burn out the weed seeds, far as I can tell, and I’d rather not give cheatgrass and tumbleweed a way to spread into my gardens. It’ll be an experimental load. I didn’t put enough in (you can see how far it’s shrunk down), and the green/brown mix was way off. However, I still have a ton of weeds laying around I can use, so I’m going to fill another bin here at some point (all the way to the top!) with a much more greens-heavy mix and see what happens. I really don’t care if it stinks of ammonia that much - I just want it to get hot and kill the weed seeds!
Shed Door Closers
My garden shed has been quite useful, but the shed doors are a perpetual pain. They don’t stay open in the slightest breeze, and they like to slam shut - hard. Not fun if you’re near them.
So, I picked up some heavy duty screen door closers, figuring they’d work. Which… they sort of do, but not amazingly, and I may come up with a better solution at some point. For $30 in parts, it’s an awful lot better than it was!
The trick here, and the reason this is more complicated than “Bolt them on and be done,” is because the shed doors are thick. If you look at this cross sectional view of everything, there are the shed studs, the hinges, the outer layer of the door, a metal frame (these doors shouldn’t ever sag - one of the reasons Tuff-Sheds are awesome), and then an interior layer of wood. It’s not a simple screen door, and the thickness of the door means that the geometry on opening is really quite weird.

Envision the path of the interior wood as the door opens (it’s about 2” off the outer panel), and you can see part of the problem. A normal door closer just won’t bolt up to this without some additional woodwork.

Which, after some experimenting, I came up with! This is a scrap hunk of 1x6 from my compost bin, and it extends the “area I can screw the closer to” enough that it looks like things will work once I put the closer in place. The big door sheeting closes on the outside of the shed, and the gap to the internal structure of the door is large enough that this bit of wood clears.

Excitedly, I put the other end on, pinned everything together, opened the door, and… ah. It doesn’t quite open all the way. I was hoping for 90 degrees, I got maybe 75 degrees. At best.
It’s not ideal, but, on the other hand, the door will self close (more or less - it doesn’t latch, but I didn’t expect it to), and I can keep it open with the rod-catch gizmo. It’s far, far better than having the doors randomly slam on me, and it’s easy enough to pull one of the end pins if I need the door open wider. So, this will stay until it bugs me enough to (over) engineer some other solution to the problem. If you’re tempted to put a screen door closer on a Tuff-Shed, beware. It’s not as awesome as it sounds. If you’ve found a good solution, I’d love to hear it!

Office Decorations
What on earth does one do with random metal signs one collects/wins/finds cheap? Until recently, I’ve been just putting them randomly around rooms, or storing them in my office for no good reason. But, I decided I can do better - and so I have! The north side of my office shall now be a repository for goofy signs and other random decorations! I don’t get much sun here, so they shouldn’t fade too badly, but it’s more interesting to look at in the morning than a bare wall.
No, I did not steal a bus stop sign. I worked as a bus driver for several years in college, and the old signs were available for very, very little money to bus drivers (if I recall properly, I paid a quarter). I understand they make acceptable skid plates for Jeeps as well!
If you have a collection of random signs of this nature you’re looking to get rid of, the contact form is over in the right column - I’ll happily put them to no good use whatsoever on my office!

Sunflowers and Owls
Finally, just because I like how they’ve turned out, some random sunflower and burrowing owl pictures.
The sunflowers are volunteers on our property. We don’t have a good idea where they came from, we have absolutely no clue where they’ll pop up any year (though I may try to collect some seeds this year), and they’re massive, quite pretty, and we really like them! Even if they are in the middle of our very sad garden.

And, because they’re awesome and they eat mice and they are wonderfully entertaining to watch in the evenings, one of our burrowing owls! I’m fairly certain these are both of the same owl, just with radically different white balances. These owls camp existing burrows, which we have plenty of (from our rock chucks and gophers - they probably can’t fit in the vole burrows). We thought we had one. Then we thought we had two. Then we counted seven. And recently, we’ve counted a dozen perched and running around. They’re having a great year (likely related to the great year for mice), and we wish them the best in eating all the mice they can find, because we’re tired of finding mice in everything. Including our car. Again. I really need to build a better mousetrap…


Final Thoughts
A few acres on a hill of basalt has quite a few projects on it! I’m slowly making progress on the property, though it’s going slower than I’d expected. Lots of other things call for time, and it’s been quite hot lately, which slows the rate of work somewhat.
Does old tractors, shipping containers, sheds, and owls beat Seattle? I cannot begin to count the ways!
Comments
Comments are handled on my Discourse forum - you'll need to create an account there to post comments.If you've found this post useful, insightful, or informative, why not support me on Ko-fi? And if you'd like to be notified of new posts (I post every two weeks), you can follow my blog via email! Of course, if you like RSS, I support that too.


