
Now that I’m stable in my new location, I’ve been considering what I’m paying for - and how I can optimize costs for the next 60 years or so I intend to live here. One of those things (admittedly small in the face of my current expenses, but a moderate long term expense) is trash service. I can haul trash to the local dump for $14.50/ton (with a base fee of $5 for up to 620lb). Toss in the diesel to get there and back, I’m looking at about $10 per quarter (or less) for trash. My current trash service is $222/yr. And, honestly, I don’t like hauling the trash can 1/8 mile uphill to the street for pickup. Plus, I’m lazy about splitting out recyclables, cardboard, and food waste. So I decided to build myself a trash trailer!

I built mine out of an old pickup bed trailer laying around at my inlaws place. We live quite close to them, we get along very well, and there’s an awful lot of stuff laying around for the asking if I can make use of it somehow or other.
So, of course, I did just that! Interested in the process of turning a half century old pickup bed trailer into my trash hauler? Read on!
The Trailer
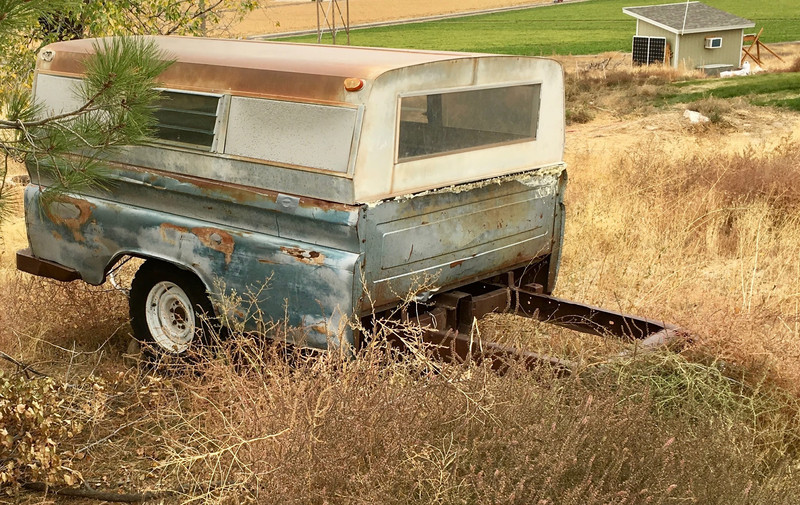
My base is a 1964 Chevy pickup bed trailer, left over from a relative who died a few years ago (it was his truck, long ago turned into a trailer). Filled with firewood. Slightly burned after a grass fire (remind me to tell you that story sometime). The tires are totally shot, and it’s sitting in an awful lot of what my daughter calls “mean weeds” (tumbleweed and other various spiked plants). In case people wonder, this is why I live in boots and jeans - I can go running through an awful lot of cheatgrass, tumbleweed, and other nasty stuff, and be just fine. This is incredibly useful if you discover your property is suddenly on fire. Some friends who showed up to help observed that roaming around my property in shorts was a reasonably bad idea. I really, really hate cheatgrass, and intend to convert most of it to either “not-cheatgrass” or “eggs.” Either way. Don’t care.
If you haven’t spent any time in a rural area, you might not be familiar with the concept of a “pickup bed trailer.” This is an old pickup truck, converted into a trailer! In general, you remove the cab, engine, and pretty much everything that isn’t “frame,” “bed,” or “rear axle.” The driveshaft comes out so the differential spins freely, you weld a hitch onto the front (either to a crossmember, or just notch and bend the frame rails), and you’ve got a trailer. They don’t tow amazingly, but they turn a scrap pickup truck into something fairly useful for remarkably little money - and they’re easy to find laying around. I happen to think they’re pretty nifty, because you’ll see 50-70 year old truck beds in use as a trailer. The running gear is long ago worn out, but the bed still lives on in a useful gizmo. If I had to guess, I’d say this particular trailer will long outlast the majority of brand new Teslas coming off the line this year.

I wasn’t kidding when I said this trailer had been through a fire. Literally. ”Stuff in the bed was actively on fire.” It’s pretty charred. Oh well. The metal is solid, and that’s all I care about. The firewood goes to my inlaws for winter heat, the remainder goes into the trash (or metal recycling pile), and I get the trailer for the hauling. Woo!

New Tires
The tires on the trailer were toast. They didn’t hold air. Not even close. Both sides were utterly destroyed (they’d been sitting, flat, for decades), and that wouldn’t do. However, the wheels were also rusted firmly to the now useless brake drums. I used a pretty standard trick for freeing this up - loosen the lug nuts on both sides, then drag the trailer around for a few hundred feet. Long-flat tires, flapping around with loose lug nuts, do a great job of breaking the rusted wheel from the drum! With the wheels loose, I removed them with a handyman jack on the rear of the trailer. But, I wanted to leave the trailer supported on something other than dirt while I got new tires, and I’m no stereotypical redneck. So, instead of cinder blocks (of which I have plenty), I used some logs. Not as classy as jack stands, but involved an awful lot less walking to retrieve.

$94 and a few cents later, I had a pair of tires that held air. They’re not new. They’re from one of the shadier used tire shops in the area, but they seem to be intact enough to work for my few miles a year (I expect this trailer to roll under 100 miles/yr, which means I need tire covers to prevent the sun from dry rotting the tires). They body isn’t in great shape, but it’s survived over half a century so far, should last a while longer…

The Bed
Originally, the bed contained some old, half rotted plywood sheets over the original wood. These went in the trash. So did the dirt - I sucked most of a large Shop-Vac out of the bed. Then hosed it out and got rid of an awful lot more dirt, dust, grit, and generally decades of accumulated junk. I don’t know when this trailer was parked, but it’s been a while.
If you’re not familiar with old pickup beds, they don’t look like modern pickup beds (where the war is over steel versus aluminum). Old pickup beds are wood. They’ve got wooden slats making up the bed, held in place by hold down strips. These iron strips are bolted to the frame.

Unfortunately, on this trailer, between the rotting of wood with age, and the fire it went through, the wood base isn’t exactly intact. There are giant gaps that would be ideal for letting garbage through onto the road - not quite the point of a trash trailer. I also suspect a steady stream of trash on the road behind me would count as an “untarped load,” which means some large fines…
This photo makes the construction of the bed clear - there’s frame elements underneath, then a layer of wood, then the metal straps on top. I obviously need to something about the condition of the bed, and the easiest method seems to be a new bed of plywood.
I considered removing the metal straps and all the wood so I could put the plywood in place of the existing wood, but that would be an awful lot of extra work for what, realistically, just needs to hold trash. Putting the plywood on top of the existing wood/metal framework seems an easier option.

After hosing it out and removing some of the broken up wood, I found myself left with this - not exactly trashworthy. But it’s a solid enough base to work with for something else - and that something else is plywood!

Fitting the Plywood Flooring
With the basic plan in place, the next step is cutting out plywood to make the floor - which means measuring the bed. I am a huge fan of little pocket notebooks for work like this - there are plenty of things digital is bad at, and this type of work is one of those things. A few minutes with a tape measure, some sketching, and I’ve got a cutting plan!

Which, with a 4’ measuring stick (so much more useful than the normal 3’ version for working with plywood) and circular saw, is turned into reality. Since the bed is 6’ wide, I debated between putting the split down the middle (a pair of 3’ wide boards) and putting it over to one side (a 4’ and 2’ pair) - and decided to go with the 4’/2’ pairing, mostly because a 2’ wide hunk of plywood is more useful to me than a pair of 1’ sheets. I’m working on building up a “lumber yard” in my shipping container, and at least for now, I have the space to store plywood flat!
If you haven’t spent that much time with circular saws, cutting a rectangle out like this may seem confusing. It’s not - I cut from the edges in, then did a “plunge cut” for the long back cut. This involves moving the blade guard out of the way (it has a lever for a reason), and dropping the spinning blade along the cut line. I worked both ways - insert it in the center, cut to one end, then reverse and go to the other end, though I suspect someone better than I at plunge cuts could do it in one pass. But, that’s how you do it!

With both sheets cut, a quick test fit confirms that they do, indeed, fit in the bed! Excellent! Time to do something to protect it so it’s not just bare plywood being assaulted by whatever happens to be in there.

Protecting the Plywood Flooring
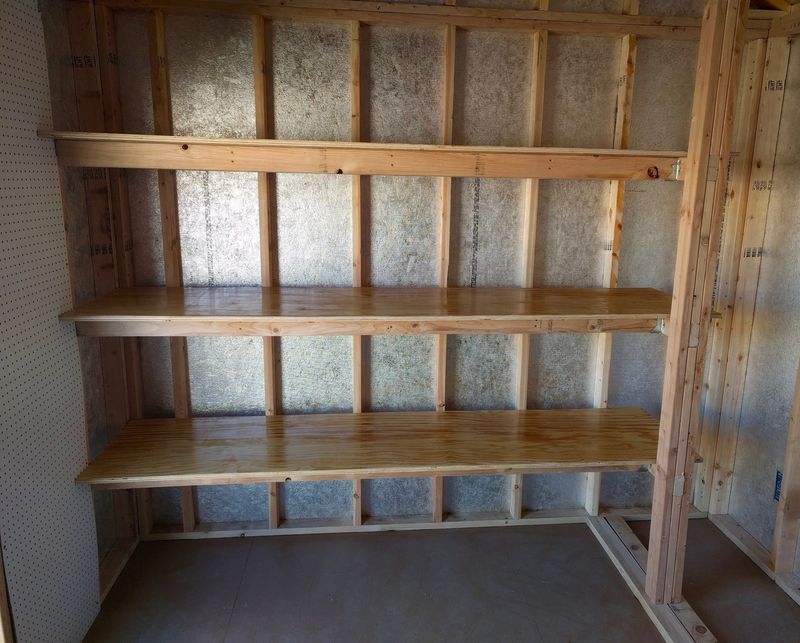
Before putting bare plywood in a trash trailer, it’s worth considering how to protect it - at least a bit. One option is to simply not worry about it and accept that the plywood will need to be replaced after it gets soaked with (whatever), but I’m not a fan of that option. I prefer a bit of protection on the plywood before installing. And, my current favorite plywood protectant is Helmsman Spar Urethane. This is an oil and plastic blend that goes on, leaves a hard coating, and is waterproof. It also looks good, which doesn’t matter for a trash trailer, but I still like the look. I recently used this for protecting my shed shelves (garden shed, not office shed), and I like how it turned out. Those shelves had two coats - but for a more rugged environment, I’m going with four coats on the top and two on the bottom.

This stuff is awesome. I love working with it, and it leads to an awesome looking finish on plywood - even if you’re just going for protection. There are people who document how to turn it into an insane glass finish, and I’m not one of them. Trash trailer. So, on it goes!
My makeshift paint booth is my shipping container, which is currently illegal as I didn’t get a building permit for it. Did you know you need a building permit for a 40’ shipping container sitting on wood blocks? Neither did I. One is in the works, annoyingly… it was tied in with my carport permit, so I didn’t have to pay extra. Anyway.

My process for protecting plywood is pretty simple. Sand the plywood with 220 grit sandpaper (recommended on the tin). Wipe the wood with a wet rag. Apply urethane (the wood will be super thirsty on the first coat, so get it on good). Wait for it to dry. Repeat until the desired number of coats is accomplished (in this case, 4 on the top, 2 on the bottom).

Working with a bright light source (perhaps a remote fusion photon emitter?) makes it really easy to see what has and hasn’t been covered on a particular pass. You don’t want dry spots, though the brush makes a particular sound going over them, so it’s easy enough to tell if a spot is sufficiently wet while going over it. The later coats are easier to apply than the first.

For fun, once the coats of urethane all cured, I added some TiteBond III around the edges for waterproofing. I don’t know how much of a difference it will make, but it came highly recommended, so worth trying. A chunk of cloth makes a great way to apply it - lead with the bottle, follow with the cloth, and load it up. I probably should have done this before applying the urethane - it doesn’t stick to urethane. Things to keep in mind for future projects…

Installing the Flooring
My genius plan for installing the flooring: Bolt it down. To what? Well, to a bunch of 2x4s run under the wood/strips (depending on the area). A few carriage bolts (they have rounded heads which don’t catch on stuff easily), some time drilling, and I should have the plywood firmly held in place.
A key step included “A lot of measuring” to make sure I wasn’t going to be drilling into any of these iron straps. With that worked out, I figured out where I could stick the 2x4s. To fit them, I cut them in half - so each one is about 32” long (slightly less than the 3’ half width). They just sit down under, get a hole with a drill, and are secured in place.

While removing the plywood from the shipping container, I scraped up the finish. Whoops. Lessons learned: Protect the underside first, so if you scrape it up removing it from cinder blocks, you scrape the bottom. Or don’t use cinder blocks. Or, treat it as the “first scratch” on a car - glad to get it out of the way so you can stop worrying about it. It’s easy enough to touch up scratches with the spray can version, though.

Urethane coated plywood looks good. Almost too good for a trash hauler… seriously, I love how this particular method of protecting plywood looks. I almost wish I’d known about it for my office, but I really don’t want gloss walls in my office.

Installation procedure: Borrow toddler and wife, drill holes, run bolts through, have toddler stand on bolt heads so you can get the nut on the bottom, tighten down. A great evening activity for all families! That’s really all I did here. The nuts and bolts tighten against the 2x4s, and hold the plywood in place.

Sealing the Front: First Attempt
The bed is slightly longer than 8’, and there’s a gap in the wood in the front where it rotted out. Again, holes are no good for a trash hauler.

My first attempt involved screwing some 2x4s into what remained of the existing wood to block this off. It didn’t work - the wood wasn’t solid enough to hold a screw. I’ll discuss the second attempt later!

Mounting the Topper
An open trailer is a useful thing to have, but isn’t a particularly useful trash hauler. The critters can get in and make a mess, the rain gets in and makes a mess, and the wind can remove the contents (and make a mess - there’s a theme here). Fortunately, pickup bed toppers are pretty common, and the source of the trailer also had an older pickup bed topper laying around that (mostly) fits!
The first problem I had to address was the side rails on one side of the trailer being quite bent - not nearly flat enough to proper mount and seal against a topper. Part of the rail was bent up, part was bent down, and it simply wasn’t remotely flat.
After some conversations with an expert in this sort of metal adjustment (my father-in-law is really, really awesome), I settled on using a few lengths of 2x4 and a pipe wrench to bend things back. A 36” pipe wrench was about the right size and offered enough leverage to straighten things out nicely. It’s worth noting that a 36” pipe wrench is not the largest pipe wrench I have easy access to, by a long shot. There are some that are pretty much designed to be used with a winch.

Nobody is going to claim this is perfect, but it’s an awful lot better than it started! The process is simple: Sandwich the bed rail with 2x4, clamp the wrench down, and push or pull until the desired angle is reached. Brute force, working properly.

The topper is a 1973 Gem Top (that’s also been through a bit of a fire - you may sense a theme in this post, and you wouldn’t be wrong - seriously, I hate cheatgrass). This was made over in Oregon most of a decade before I was born, and about a decade after the truck bed. My stuff is getting older much faster than a year a year. Though, to be fair, the 75 year old tractor pushes the average up a good bit - I’ll cover that in another series of posts.

This particular topper is a metal top with plexiglass windows in the side. Some of them are just a bit more heavily tinted than from the factory, and others are rather bubbled and opaque. Oh well! Two of us simply hefted the topper from the old pickup bed over to the new trailer. It was on the old truck backwards for some reason, so I just backed up close and things slid over.

A pair of C clamps later, and I had it well enough secured to get back to my place. You’ll note the windows on this side are not clear - they’re bubbled up on the surface. It’s an interesting (fire induced) failure for plexiglass, and I’ll see how long they last before needing replacement.

Securing the Topper
A pair of C clamps isn’t nearly strong enough for long term use, so I went to my local farm supply store and picked up the trailer canopy clamps they had - a nice set of 4 aluminum clamps. These ran me around $30, and while I could have saved a bit on eBay, the savings aren’t as much as one might hope.

They also didn’t fit properly. The shell has a wide frame rail along the bottom, and the clamps weren’t long enough. This isn’t the exact shell for this truck bed (close, but a few inches off in width), so I solved this problem with a reciprocating saw and a metal cutting blade. If you clamp the side rail right near where you’re cutting, it solves the “rail bouncing up and down and not actually cutting” problem nicely!

Sealing the Remaining Gaps
With the sides clamped down, all I had left to worry about was the front - which, looking from the outside in, isn’t exactly well sealed. Again, I want things pretty well sealed up to keep critters out and any possible smell in (we cloth diaper for the most part, but still occasionally have a dirty disposable to deal with). This gap is no good, but I know just the thing for large, free form gaps - and it starts with duct tape!

I coated the outside of the gap with duct tape, but, as it turns out, not enough duct tape. If you’re doing something like this, go for an extra row or two - it keeps things a lot tidier than blowing out your duct tape seal.

Ah! Those of you who knew me in college may think, “Ah, yes, he’s just going to leave it covered in duct tape.” But you’d be wrong! I’m going to use the duct tape to hold the expanding foam in!
I used foam to help with insulating my solar office, and I love the stuff. It fills cracks, it expands into a pretty hard seal, and with a bit of practice, you can spray it into some fairly large gaps and have it stick and expand properly. So I did. I used it to foam the gap between the topper and the bed, I used it to foam up the gap in front where the 2x4 didn’t stay put (stick it to one side, then the other side, then fill in the center), and I used it to seal some small gaps in front of the wheel wells.
After it sets up, you’ve got a hard surface that will take a good bit of abuse, but can still be removed if needed.

Unfortunately, my duct tape wasn’t quite good enough along the front, and I had to clean up some blown out foam. Seriously, use more duct tape (or better duct tape - I have better stuff, I just didn’t think I’d need it).

At some point I may wander around with a knife and clean up the foam on the inside, but I just don’t care that much, and it helps add a bit of cushioning for things sliding forward in the trailer. Plus, having the solid exterior surface is likely more waterproof than a trimmed surface - the outside builds up a bit of a crust over the cell structure.

Safety Chains and Lights
Since the trailer doesn’t come with chain hookups, I worked something out - that something being a safety chain from the local farm supply store and a bolt with a few washers. For a trailer that hopefully does under 100 miles a year on back roads, I’m not particularly worried about this.

Lighting is a pair of magnetic trailer lights from my local farm supply store (a lot of this trailer comes from there). Nothing fancy, but I’ll just stick them on the bumper when I’m towing.

Refilling the Differential
A quick visual inspection of the differential indicates that it’s been leaking slowly for a while, and is therefore probably short on fluid. The differential isn’t carrying any power (the wheels spin it and the pinion shaft is disconnected), but the bearings do need some lubrication, and I have no idea how long this has been sitting without much lubrication.
That fill plug is the way to fill it up - and I prepared for a fight. I was certain it was going to be properly stuck in place, so I went under there with a wrench, a cheater bar, a racing jack… the works. I set the wrench on, and…
Tapped it. It came loose. Not going to complain there! It is, by far, the least-awful differential plug I’ve ever dealt with. The differential took about 1.5 quarts of gear oil to fill it, though, so it was definitely low!

Holding a Camper Shell Door Up Without Pneumatic Struts
This isn’t at all related to the functions as a trash trailer, but is worth sharing as an interesting older solution to a problem that we solve very differently today.
How do you hold the upper door of the shell open? Well, a modern one uses the precharged pneumatic struts - and if you’ve owned old cars, those go bad after 15-20 years. They’re not a big deal to replace, but you have to replace them. This camper shell, on the other hand, is 44 years old - and the door holder works just as well as when it was new!
This is the inside mechanism - it’s a spring loaded toggle that springs to the position shown - which pulls on the steel cable that goes through the hole in the door.

This steel cable is then run up to a hook on the top of the outside. If you open the door, the spring loaded toggle tries to flip out, and if you lift the door high enough, it succeeds and holds the door open. To close the door, just toggle it back, and let the door down. It’s simple, it works, and it’s not likely to fail any time soon! This is the sort of simple solution I enjoy seeing - it’s not as elegant as the modern options, but it’s fixable with hand tools and should last just about forever.

Finding a Spot
The last part of the project took a bit of work as well - finding a spot that was close enough to the house to be useful, but not “Hey, wow, there’s an old trailer in your driveway!” I also wanted somewhere easy enough to get my truck in and out of - requiring a 47 point sequence to get the trailer in or out didn’t seem like a useful thing to me. I eventually found a spot not too far from the house, and somewhat shielded by a tree and some bushes. It’s accessible from the driveway to tow it out, but it’s not blindingly obvious as you come down the driveway. That’s my office in the background. I’ll see how this all works!
Trash Diversion Plans
I’ve had more than a few people tell me I’m crazy when I mention this project - they assume it will stink of a garbage pile. Which it might, except I have some plans to divert most of the stinky stuff out to where it’s useful. And, this will hold an awful lot of trash cans full of material, but it should hold even more with the diversion plans.
I’ve realized that the bulk of my waste (by volume) is actually cardboard - boxes from stuff that shows up, boxes we use for storage that have gotten beat up, boxes my daughter plays in, and the occasional snowblower box. Now that I have a storage shed and shipping container, I have enough space that this cardboard is no longer waste, but a useful resource to keep around. Toss it in the ground with some dirt on it, and you have the makings of sheet mulch - a great way to turn cheatgrass into something that’s not cheatgrass. Even without that much compost or other material on top, simply putting the cardboard down and covering it with some loose dirt will help keep the cheatgrass contained - and you can cut holes in it to plant other stuff. Ideally, it deters weeds and helps hold moisture in the soil (useful when you don’t get much rain in the summer).
Another common component of a waste stream is food waste, but I’m running that into a compost tumbler (which, I admit, isn’t working great - I need to try some different approaches there). With that and cardboard out of the way, we just don’t generate that much waste. My goal is to haul the trailer once a year or so, preferably in colder weather. That reduces my annual trash costs from $222 down to about $30 (plus probably $5-10/yr in trailer maintenance, averaged out). That’s ongoing savings, and ongoing incentive to creatively reuse waste on the property! I’ll see how it all works out!
Oh, and I plan to build a trash puller of some variety to help pull trash out of the trailer at the dump. I have no interest in climbing in there to push stuff out!
Final Thoughts
This was a fun project. I’ve got about $250 of materials into making the trailer and topper usable (about $60 in plywood, $35 in urethane, $95 in tires, $30 in clamps, $10 in chains, $20 in trailer lights that I can use on other trailers as well). Plus a few bolts and other random bits and pieces. So, a year’s worth of garbage service pays for this project. Since I plan to live here the rest of my life, it should hopefully save me over $10k in the long run (more if I can divert more trash). It was enjoyable to work with some older equipment, and figure out how to solve the problems of creating a good floor for a junk trailer.
Comments
Comments are handled on my Discourse forum - you'll need to create an account there to post comments.If you've found this post useful, insightful, or informative, why not support me on Ko-fi? And if you'd like to be notified of new posts (I post every two weeks), you can follow my blog via email! Of course, if you like RSS, I support that too.


