
Another new pack to tear down! There are so many fun variants of the BionX packs over the years!
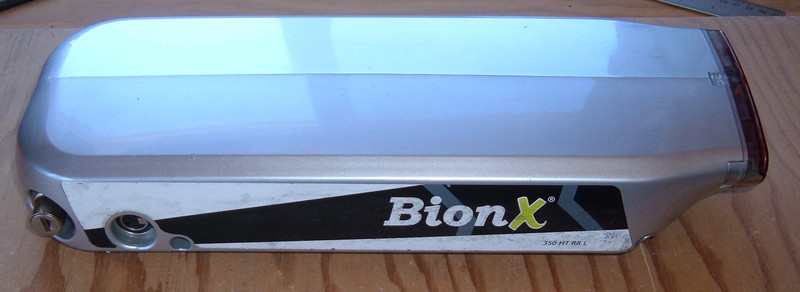
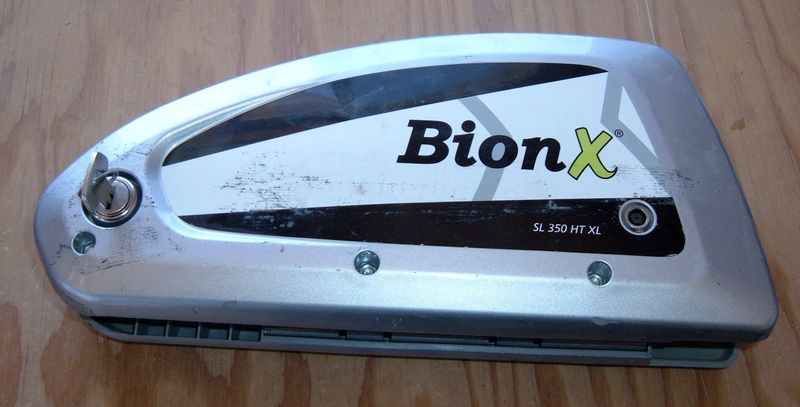
Today, I’ve got a “BionX 350 HT RR L” pack. Quite the name, and I’m sure the name means something to someone who has decoded all the BionX naming conventions.
But, to me, it means a new battery layout to investigate and, perhaps, rebuild - and that’s very exciting!
Last week, I pulled apart a newer BionX 48V pack, discovered that the design is incredibly modular, easy to repair, and noted that such features are useless when BionX won’t sell you parts.
This is the new pack for this week. It’s a rear rack mounted pack, and it’s quite massive compared to the Trek Valencia Ride+ pack, which is the other rear rack pack I’ve worked with (Teardown 1/2, Teardown 2/2, Rebuild).
This pack comes rated as a 37V, 9.6Ah pack - so inside is almost certainly a 60 cell layout, but the standard downtube layout won’t fit in this pack.

What’s in it? I assure you, it’s 60 cells - so read on to dive in with me!
External Features
The charge port is the same 4 pin XLR connector that most of the older BionX batteries use. Poking around with a voltmeter indicates that the pack voltage is on pins 2 and 4, as is normal for the 37V batteries, and that the pack has charge - which is useful, as I can test it and confirm things work before diving in (they don’t always). BionX, wisely, uses different pins on the connectors for different voltages so you can’t charge the battery with the wrong charger - it simply doesn’t work.

The underside has the usual mounting brackets, the now-boring warning about not throwing it away, and a label telling me not to do what I’m about to do. Which I’ll ignore, as always.

The back of this pack is a good sized reflector and LED tail light. The thing that looks like a plastic screw head low and center is actually the LED - so, you know, don’t try to unscrew it.

Diving In
Time to dive in!
The rear light just pulls off - there are no screws to remove. I’m not sure I like a light that clips in place without anything else securing it, but I suppose as long as it stays there, it’s good enough… I’d really rather see some screws, though. Rear racks get backed into things often enough that relying on the plastic isn’t a good idea.

Unlike the older BionX packs, this only uses two bolts to hold the sides together. Someone probably claimed, “Responsible for a 50% reduction in bolt use” during performance review (the old packs use four).
The pack comes apart reasonably easily. Like most later model BionX packs, there’s some silicone goop used to help keep things from moving around. Unlike several of the Trek packs, there’s no hellish black foam that does not release.
With the pack split, the BMS is visible at the rear of the pack. It’s an older BionX BMS, with a large beeper on it, and a nice 30A fuse. Nothing special here - just getting the job done.

I’m not sure when or why BionX started using the silicone sealant, but it certainly doesn’t hurt anything. I’ve never seen anything that looks like vibration or movement damage on the old packs that don’t use it, but I assume there’s a reason they started using it.
The white stuff is nice enough to work with. The packs still come apart easily when pulled, but the batteries won’t shift at all when assembled.

The older packs generally have a fairly large area around the BMS board for the tangle of wires, and this pack is no exception. It feels like there should be a better way to do this, but it’s how the older packs are.
Like all the not-ancient packs, the board has a great conformal coating on it - this helps keep water and dust away from the components, and is just a great idea for any board subject to the elements.

Like some of their other packs, there’s a foam block. It’s not really doing much here. The battery is held in place by plastic fins in the case, and it’s quite tight between the fins, but I suppose backup in case those fail is useful.
You can see the routing of the LED tail light cable here as well. It just runs along the battery and out the gap. This is simpler than the Valencia Ride+ pack routing, where it loops around the handhold instead of just going straight across.

The Battery Pack
With the case split, I can get the battery pack out. This has the usual BionX label, reporting that it’s a 10S6P battery pack, rated at 37V and 9.6Ah. I’m familiar enough with this voltage and capacity - it’s the standard 60 cell pack capacity for packs using the Sony LiMn cells, just in a different form. What form, exactly? You’ll see soon enough!
The metal thing on top is the standard “interrupt charging at high temperature” fuse (it will reset as things cool down). It’s on all the packs. The metal bits are very much connected to the wire, so be careful pulling a pack apart.

Actually, you know what’s even better than just being careful? Insulating the whole thing. I wrap the thermal fuse in tape before I do anything else. You should too. It’s on thick wires, swings around, and has the potential to make sparks fly, with a lot of current going through unintended paths. I’m not sure how many amps a BionX pack will source through a dead short, and I can’t say I care to find out by accident. It’s more than enough to spot weld metal, and if you’ve spot welded a dead short across a live battery pack, you’re well on your way to having a really bad day.

There are three wires heading into the shrink wrap - red, black, and green. Red and black will be the main pack positive and negative, and green (sometimes yellow) is for a temperature sensor. BionX uses a regular 10k/25C thermistor, and this signal is passed out to the charger as well. I have no idea if the BionX charger uses it, but you can get sane values for pack internal temperature if you have a Cycle Satiator for charging the pack (and an appropriately wired adapter). I use one for all my rebuilds, as I can change the output voltage easily. That lets me set a lower state of charge for shipping, and also means that nobody has to ship me a charger (saving us both money). The pack has to be charged enough not to beep, but I don’t like to ship a fully charged pack - even though I’m under no requirement to ship it partially charged, it’s just a good idea to reduce the consequences of something going wrong.

Unwrapping the Battery
I’ve got the pack out - time to unwrap it and see what’s inside that nice wrapper!
Whatever you’re doing, do it with plastic tools. No metal knives for the wrapper. Again. Shorts. Excitement. Fireballs. Just say no.
I see green cells, and they look like the usual Sony cells.

A bit of further inspection and rotation reveals that, yes, they are the same Sony US18650V cells that BionX uses in all their old packs! They’re old, boring, 1600mAh cells that show a rather nice self balancing behavior. And BionX uses them in all their old packs (so, anything that’s not 48V).

Fully unwrapped, this is what the pack looks like. It’s 7 cells across on the top and bottom, with 6 sandwiched in the middle. The white interconnect wire on the bottom means that this is a “folded” pack - which will be made clear shortly, if that term doesn’t mean anything to you.

The other side shows another interconnect, the positive lead wrapping around, and (beneath the leftmost tape) the negative terminal.

The positive lead reaches around the far end to the other side.

Remove a bit of heat shrink, crank up a soldering iron, and the positive terminal is free. My life became radically easier once I discovered that a 150W butane iron makes short work of these heavy gauge connections.

The negative terminal soon follows. The small black wires are for the thermistor that senses the pack temperature.

Understanding the Battery Layout
With the pack free, it’s time to set about understanding the cell layout so I can rebuild this pack.
The basic structure is simple enough. Each row has 7 cells on the top and bottom, with 6 cells offset in between - so 20 cells per row, three rows, 60 cells total. As expected. I also know that it’s a 10S6P setup - 10 cell groups in series, 6 cells in parallel for each group. The folded packs are always parallel groups in series, so I expect there will be 6 cells in parallel, with 10 of those groups in series, wrapped around to fit this arrangement.

Pulling an end plastic free shows the structure under. Metal plates, slits for the weld points (this helps make a more solid weld by driving the welding current into the battery terminal), hand spot welded and inspected. The pack uses some fiber protective discs on the positive side as well - these aren’t common for BionX packs.

Remember earlier, talking about a “folded” pack? This is what I mean. The pack is literally folded together, with jumper wires (the white wire) carrying current where the metal strip isn’t. Imagine the pack is folded all the way open - the points that are connected would just be connected by metal strip.

The whole pack unfolds like this. Logically, you can think of it as a single long pack, broken and reconnected after being folded.

For the fold points, both the top and bottom cells are connected with a single strip of metal. This is what one would normally see with cell interconnects, so it’s quite fine. The wire is 10 gauge, which seems overkill, but will certainly handle the current.

And… it just keeps going like this! Groups of six cells in parallel, connected with metal plate. All the way down!

Final Thoughts
I enjoy seeing the evolution of the BionX packs over time. The early packs were entirely hand assembled with hot glue and cut nickel strip, and they’ve gotten progressively better. All the newer stuff has conformal coatings on the board, the pre-cut plates are getting more common, but there are still aspects that haven’t changed. The thermal fuse? Always there. I think it’s exactly the same part, as far as I can tell. The packs are still hand assembled, though there’s now inspections after assembly (not obvious on the older packs).
They still rely on the self balancing behavior of the cells, and they’re using the exact same cells they’ve been using since their early lithium days. It’s pretty neat to watch the slow evolution of design.
All that said: Is this something I can rebuild? Absolutely! And if you want to see what that process looks like, you’ll want to check in next Saturday!
Do you have one of these you need rebuilt? The contact form is over there on the right.
Comments
Comments are handled on my Discourse forum - you'll need to create an account there to post comments.If you've found this post useful, insightful, or informative, why not support me on Ko-fi? And if you'd like to be notified of new posts (I post every two weeks), you can follow my blog via email! Of course, if you like RSS, I support that too.


